


6 Unique Diaper DIY Displays That Aren't Cakes
11 Materials
$30
2 Hours
Easy
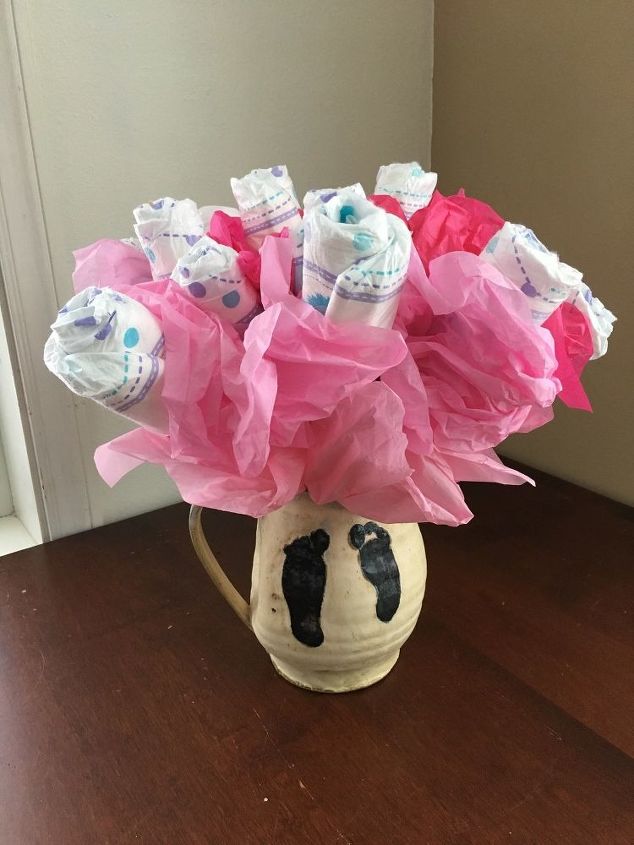
I put together multiple diaper DIY displays to show you inventive ways to decorate for a baby shower! The first one is the simplest: a bouquet of diapers!
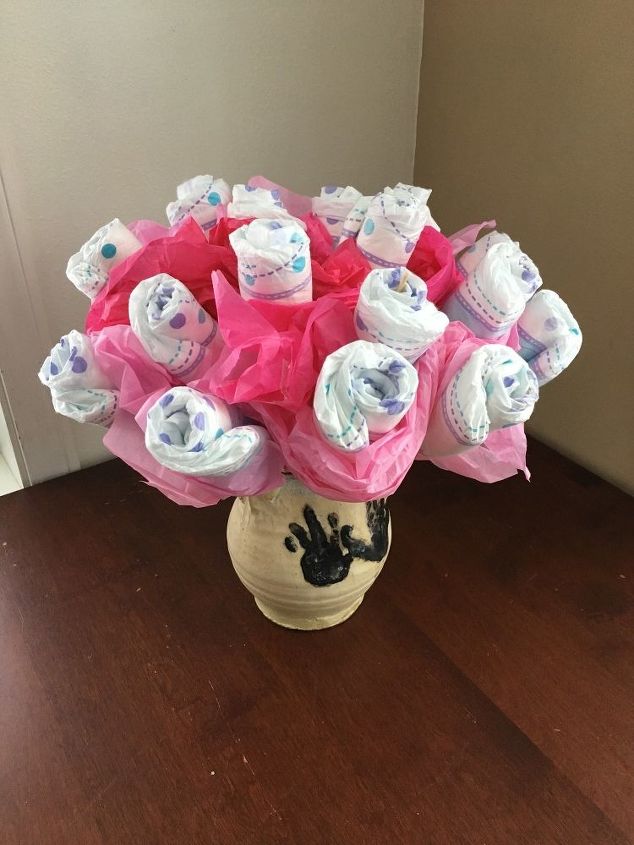
Simple roll your diapers and stick them onto wood shish kabob skewers. Then use a 4" styrofoam ball or foam block in the vase to stick the skewers into. I put them in a pitcher with baby handprints and footprints, but you could use a clear vase and fill it with baby items to gift. Then embellish with tissue paper the color of your choice!
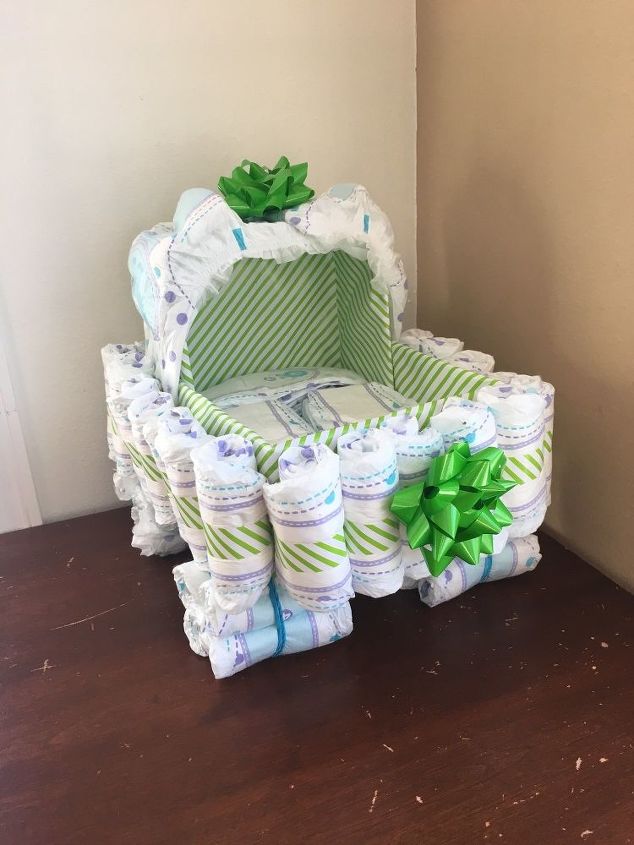
The next diaper DIY display is a bassinet or stroller style. Use two shoe boxes (one cut shorter to be proportional for the top) and cover them with fun colored wrapping paper. Then roll diapers and secure around them with the same color wrapping paper. Hot glue the rolled diapers onto the outside of the shoe box by dabbing the hot glue on the wrapping paper only.
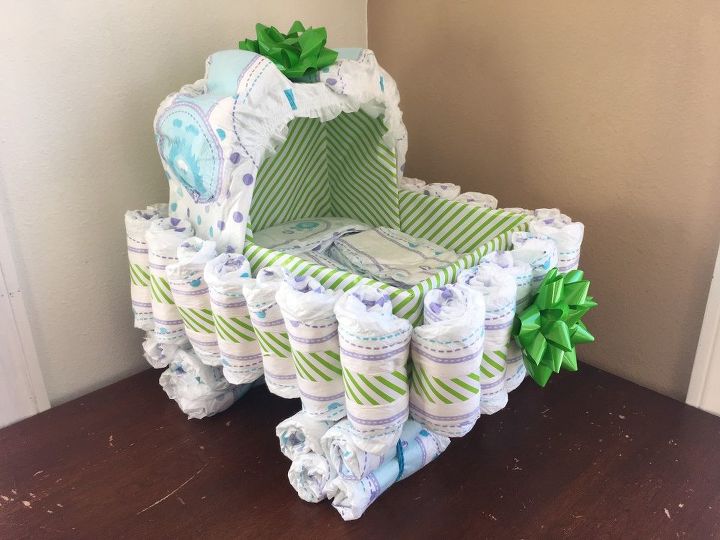
Open up two diapers and spread them across the top to form the hood of the bassinet. Roll four diapers and secure around them with a rubber band or more wrapping paper to make the wheels. Then embellish as you desire and fill the box with more diapers (or gifts for the mom to be!)
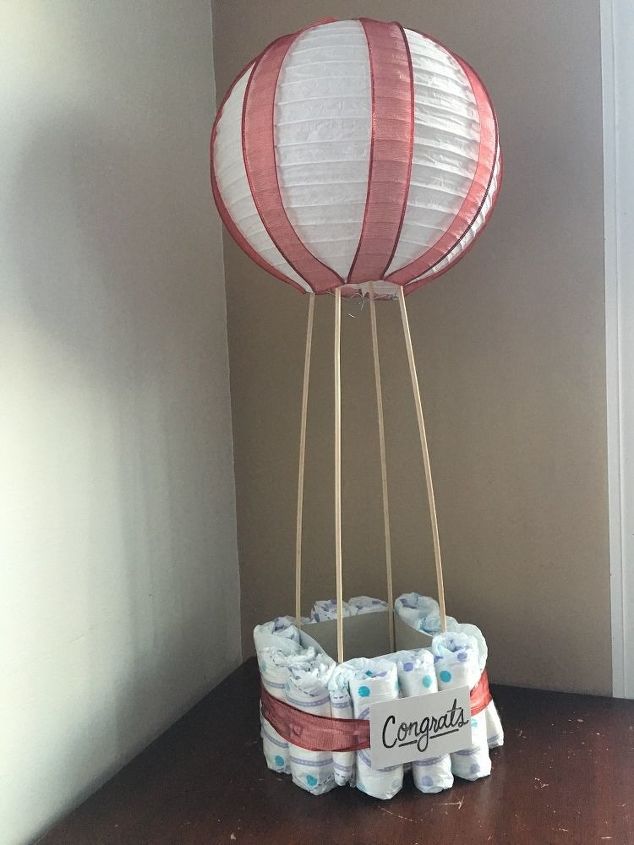
The next diaper display is so cute! Make a hot air balloon using a large paper lantern (at least 12" wide). Cut dowels to about 30" in length and hot glue them to the corners of a 6" square sized box. Then fill the bottom of the box with diapers or gifts.
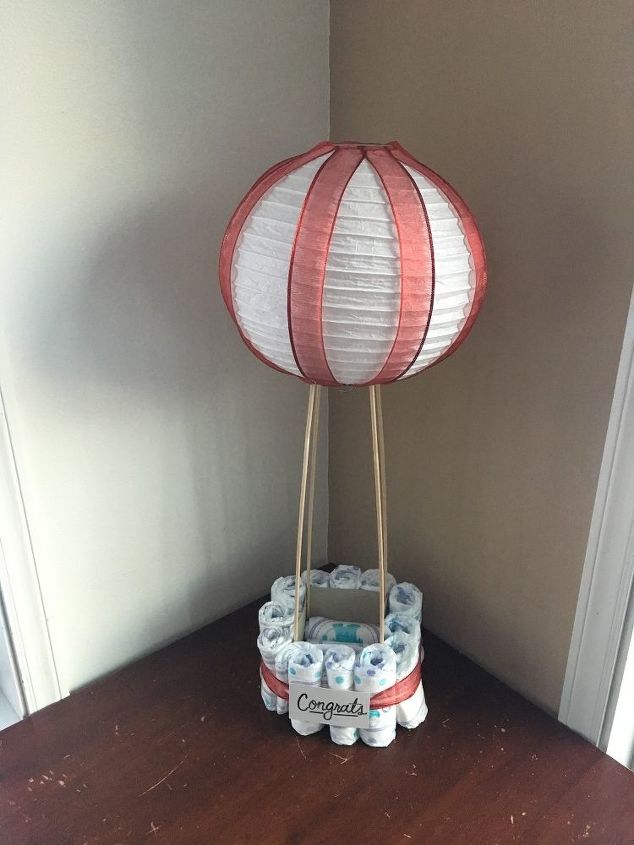
Roll diapers and secure them around the 6" square box. Then embellish the paper lantern by wrapping wired ribbon in strips around the paper lantern. Squeeze the dowels together and fit the paper lantern over it. Decorate with ribbon and maybe a sign!
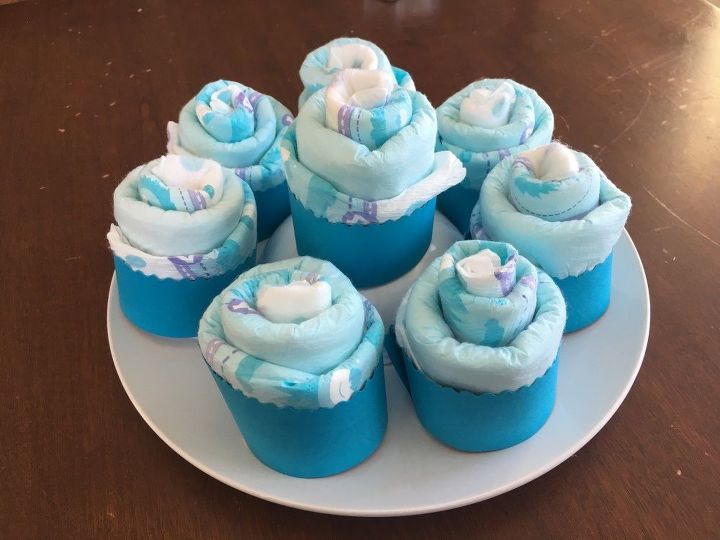
Now let's make another really easy one! Instead of a diaper cake, do diaper cupcakes! Open the diapers and fold them in half width wise. Roll them this direction and secure the bottom with a rubber band. Then pull the middle up slightly so it looks like a swirl of frosting.
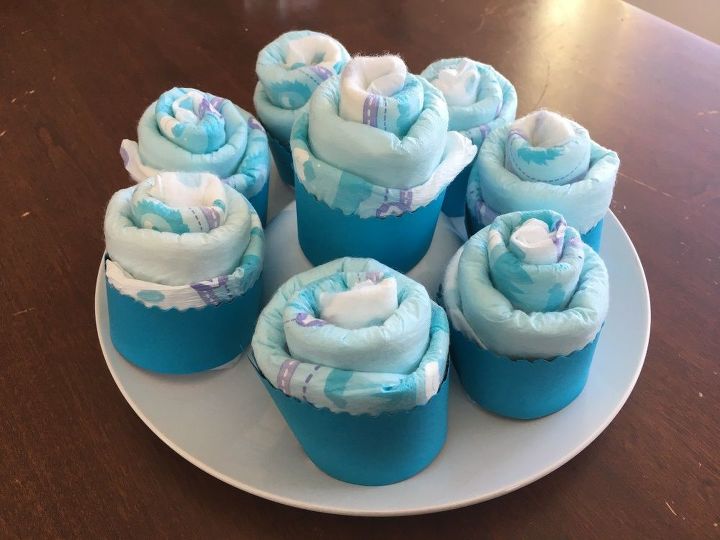
Cut strips of colored scrapbook paper and staple them into a circle to create the cupcake paper cups. Put the rolled diaper in each, hiding the rubber band at the bottom, and embellish however you want!
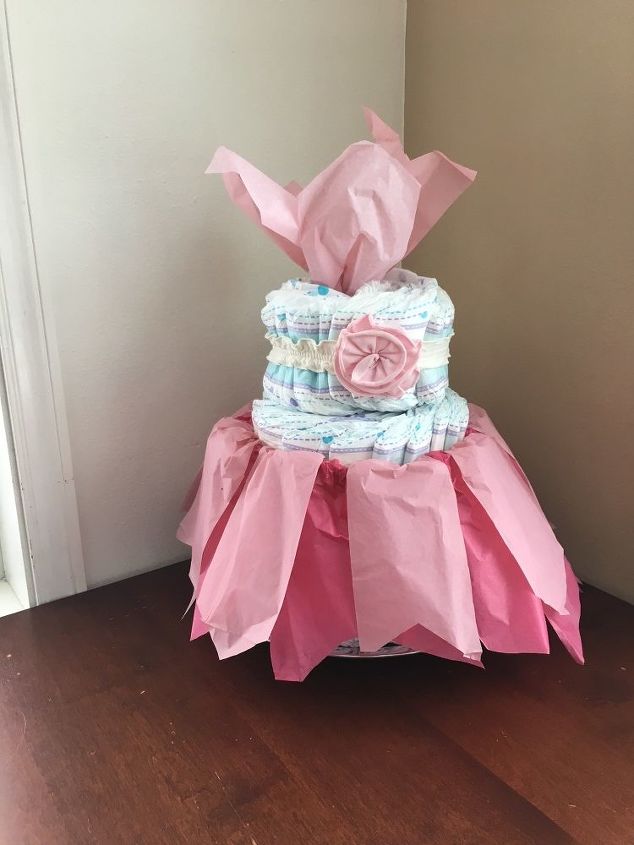
If mom is expecting a girl, make this darling diaper dress! Construction starts similar to making a cake, roll the diapers into a circle using a frying pan and toilet paper roll in the middle. Secure the large rolls with rubber bands. Make your rolls larger by stuffing diapers in the middle to expand the circle. Make your rolls smaller by tying the rubber band tighter.
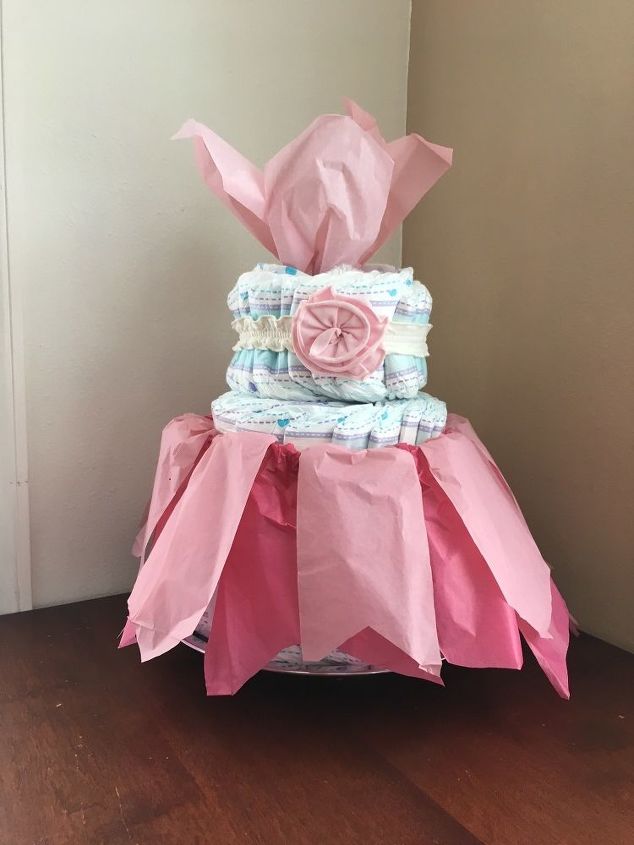
Next, stack the diaper rolls of various sized on top of each other with a paper towel roll stick securing the center of the stack. Use rubber bands, ribbon, or some stretchy material to go around the tiered diaper rolls to decorate (I used baby girl headbands so they can be kept as a gift when the diaper are deconstructed.) On the middle roll, tuck strips of tissue paper or tulle into the stretchy band to create a dress. Embellish with tissue paper sticking out the top and girly accents!
Last, but not least is a diaper wreath! This makes a beautiful decoration for the baby shower. Cut a piece of cardboard with about an 8" open center and 13" circumference. Be sure the cardboard is white or cover it with printer paper. Next, roll multiple diapers and secure around them with ribbon.
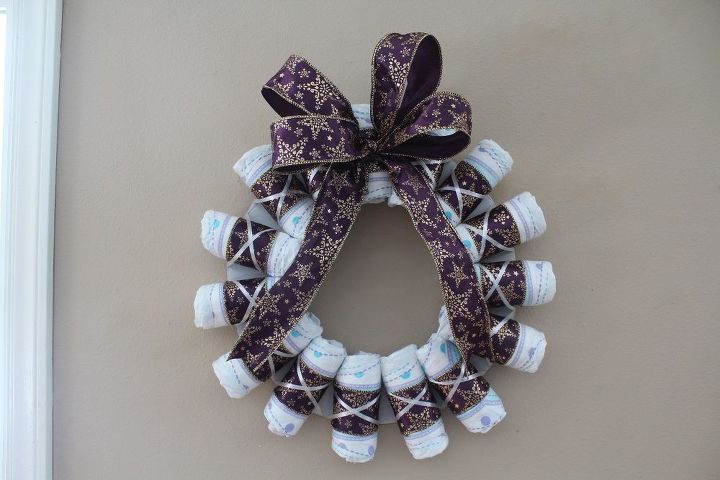
Hot glue the diaper rolls onto the cardboard circle, aligning the top of the ribbon with the outer edge of the cardboard and applying hot glue to the ribbon only (don't get it on the diapers!) Next, wrap more ribbon around the diapers and cardboard in a criss-cross pattern to secure everything together.
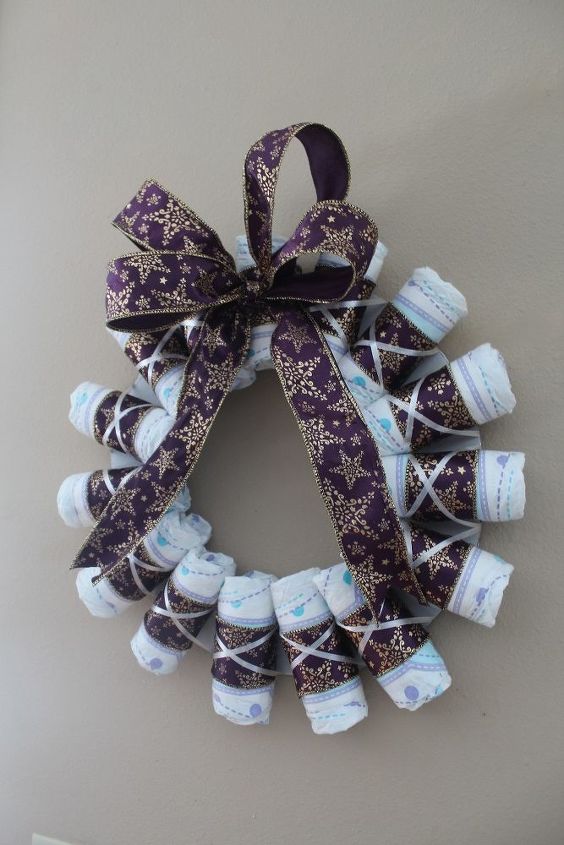
Embellish with a ribbon bow and you can even tuck presents in the middle!
These diaper DIY displays are sure to inspire so don't forget to pin and share! Come to my blog for other handmade baby shower gift ideas. I shared a tissue paper kite and a footprints wood sign for decor!
Resources for this project:
See all materials


Any price and availability information displayed on [relevant Amazon Site(s), as applicable] at the time of purchase will apply to the purchase of this product.
Hometalk may collect a small share of sales from the links on this page.More info

Want more details about this and other DIY projects? Check out my blog post!
Comments
Join the conversation
1 comment
-
The cupcakes and the wreath are my fav's!! Very clever!!


Frequently asked questions
Have a question about this project?