


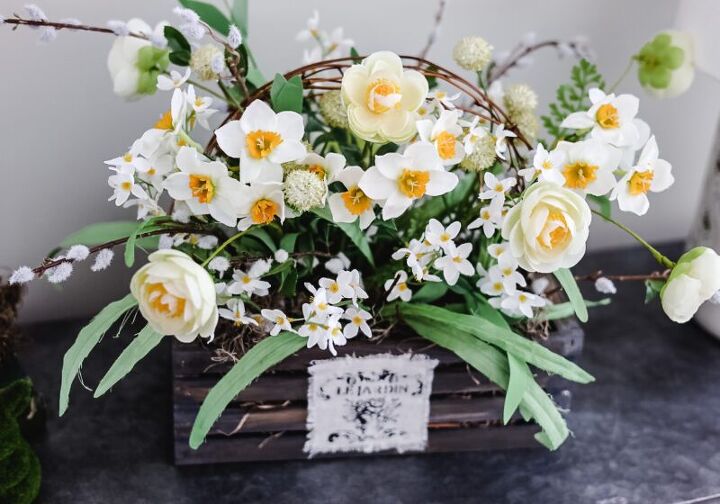
Spring Flowers in a Wood Crate DIY
Are you ready for some pretty Spring crafts?? Today I’m going to show you how to make a pretty arrangement with my new Spring flowers in a wood crate DIY project that I just finished.
How to make a wood crate for Spring flowers
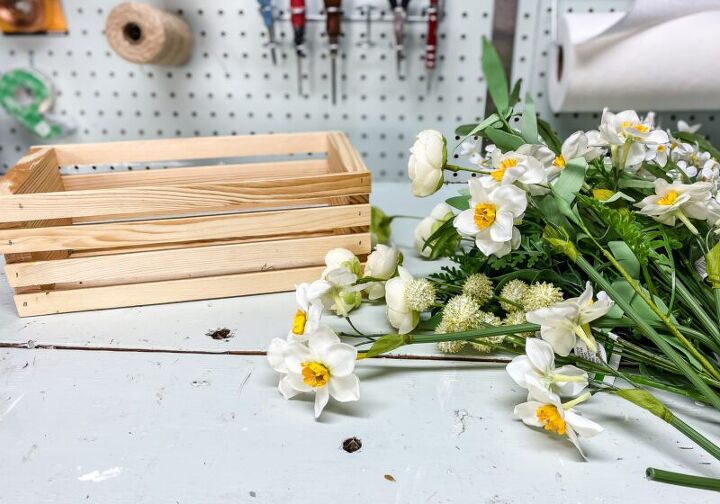
Wood Crate
For this project, I’m using a wood crate that measures 12 in x 8 in. I found it in the craft section of Walmart. You can find similar ones at the other craft stores too.
SUPPLIES:
- Wood Crate
- Chalk paint (Gray & Tan)
- Waverly antique wax
paint the crate dark gray
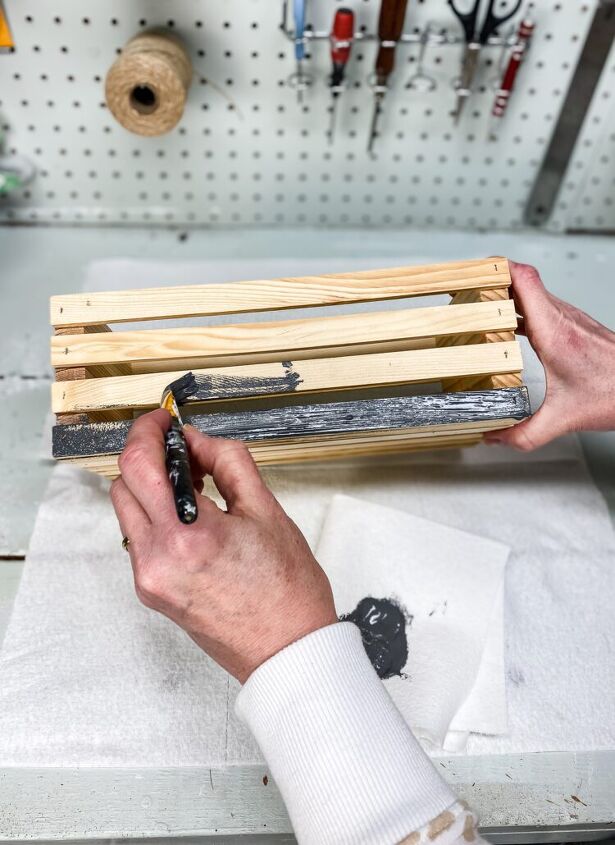
First I gave the crate a coat of dark gray chalk paint, you could definitely use dark gray acrylic craft paint…use what you have one hand.
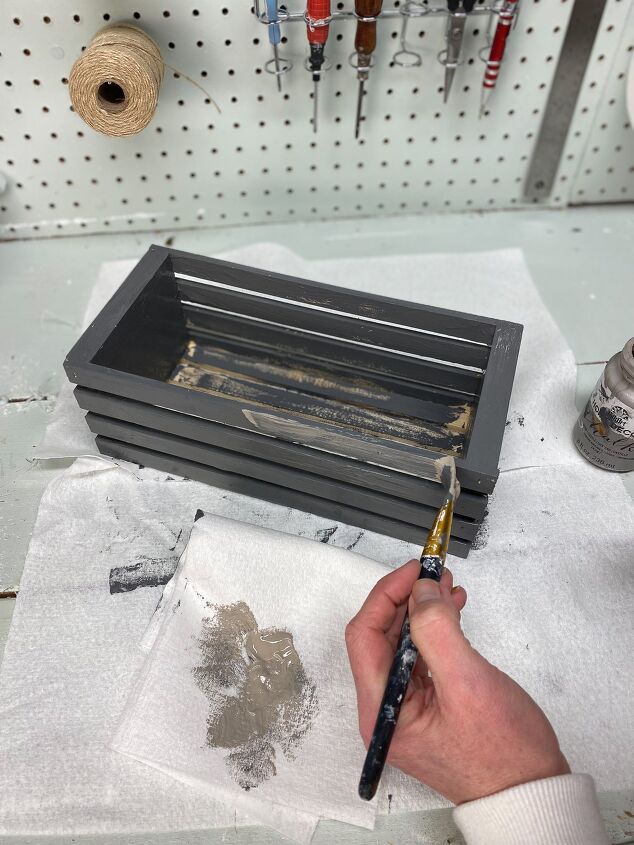
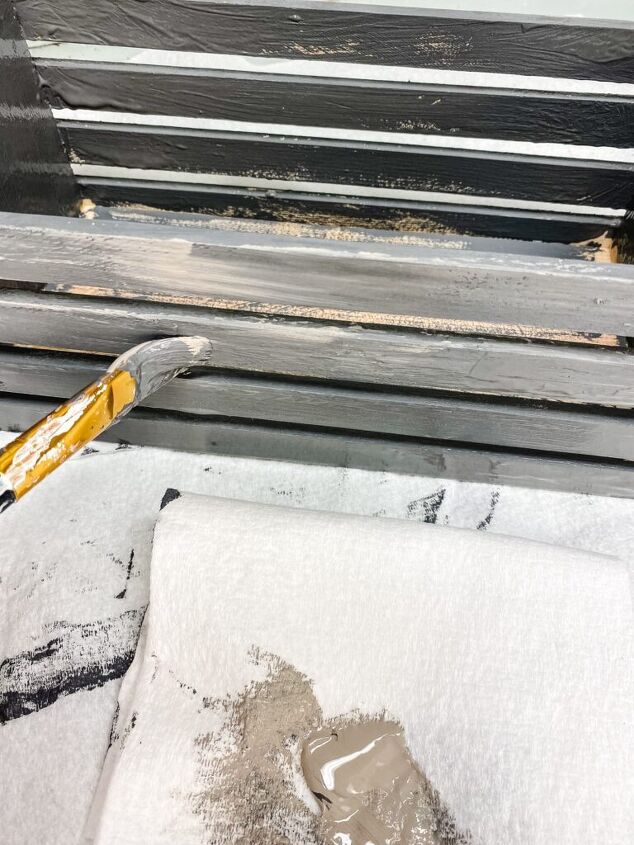
While the gray paint was still wet, I went over the entire crate lightly with oatmeal-colored chalk paint. This will give the crate an older look.
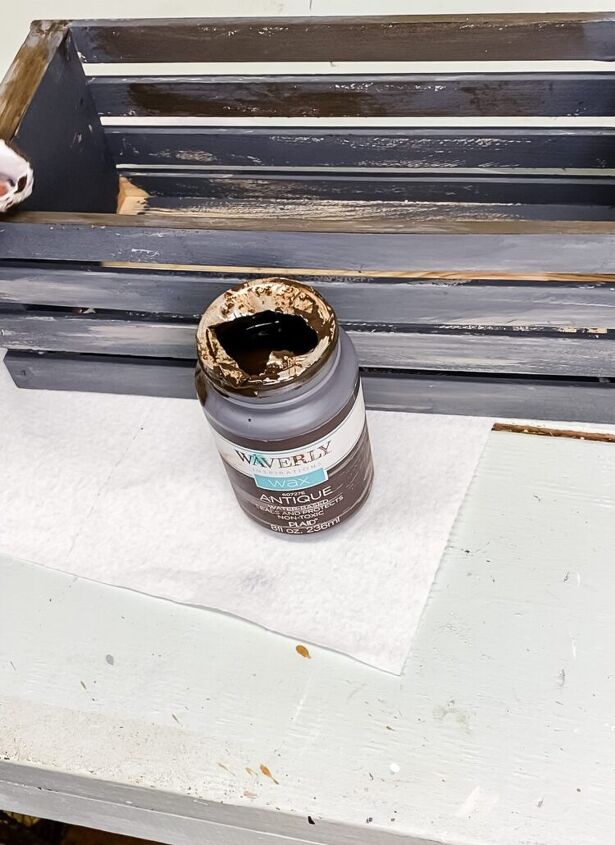
Once the paint had dried, I grabbed my Waverly Antique Wax. Then I dipped the corner of a paper towel into it and wiped it over the entire crate. I love using this wax for craft projects because it has a paint-like consistency and is so easy to work with…and the prices are so reasonable (you will find the line over in the Walmart craft paint aisle
This step will give the crate an aged look; this is optional…don’t feel like you have to run out and buy wax…the crate will look great just painted too!
Adding The Spring Flowers
For this arrangement, I went with a white and yellow theme. This flower crate would look so pretty with pink Spring flowers too! Because I have a ridiculous wall of faux flowers I went with what I already had in my stash.
FLORAL SUPPLIES:
- 3 Daffodil Stems (Amazon)
- Yellow Ranunculus
- White Wild Blossom Bush
- Cream Billy Balls
- Pussy Willow Stem
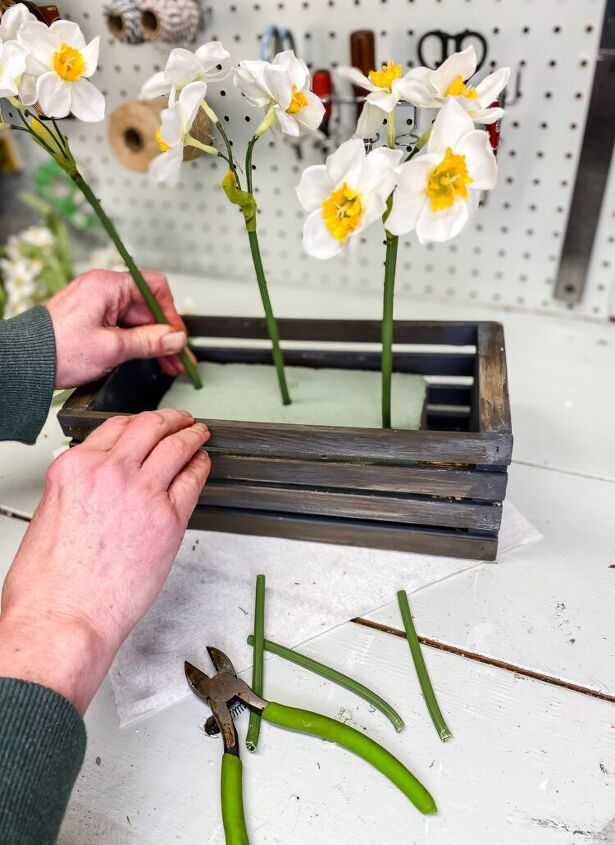
After adding a floral foam block to the bottom of the crate (you can hot glue it in place if you want but I did not) I added 3 of the daffodil stems. Each stem of the daffodils that I am using had 4 small flowers on it.
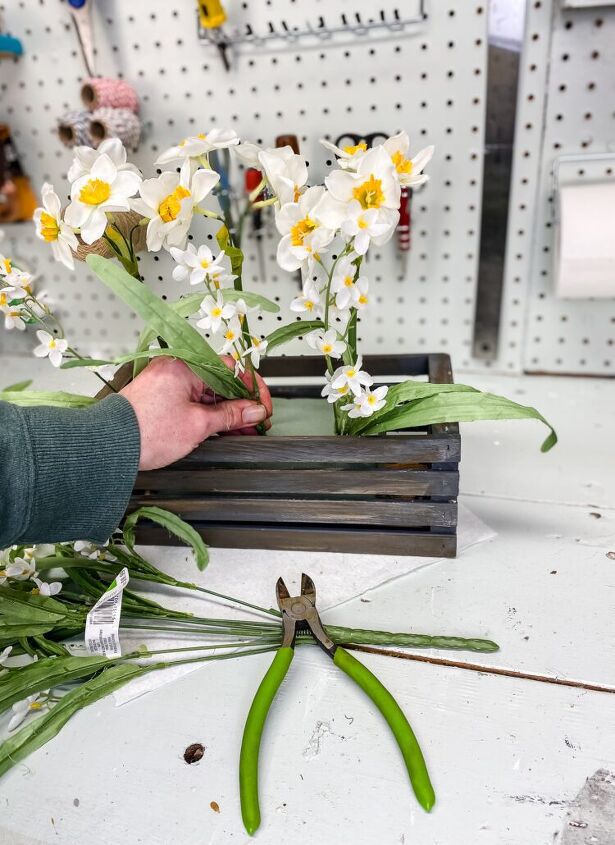
Once I had the daffodils in place in the center of the floral foam I surrounded them with the smaller wildflower stems. I cut the individual stems from the main branch.

Next up in my flower crate was the yellow ranunculus. Just like the wildflowers, I cut the individual pieces from the main stem with my floral wire cutters. The ranunculus has a natural droop to them which I love. They were added all around the crate…front and back.
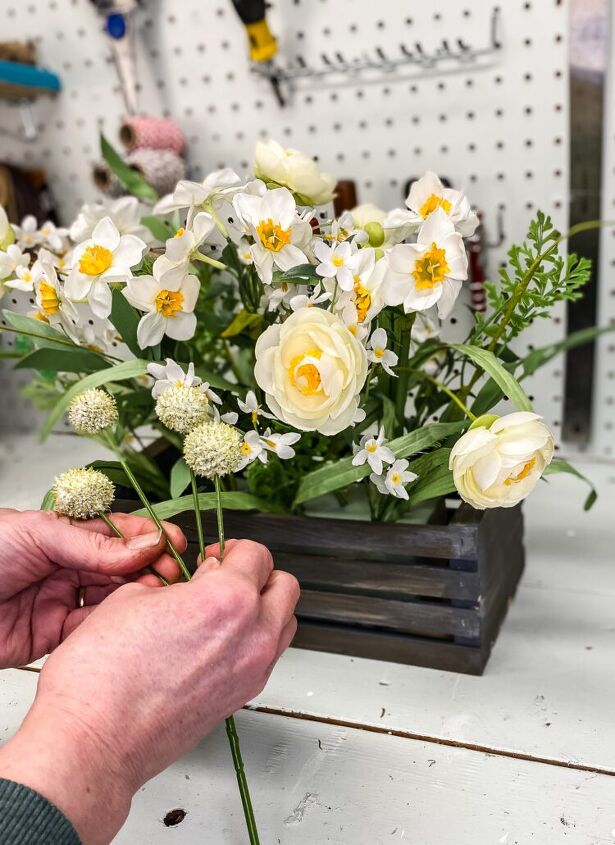
Then I added 2 stems of the white billy balls. For the billy balls, I left them intact and popped one stem on each side of the crate (positioned near the daffodils on each end).
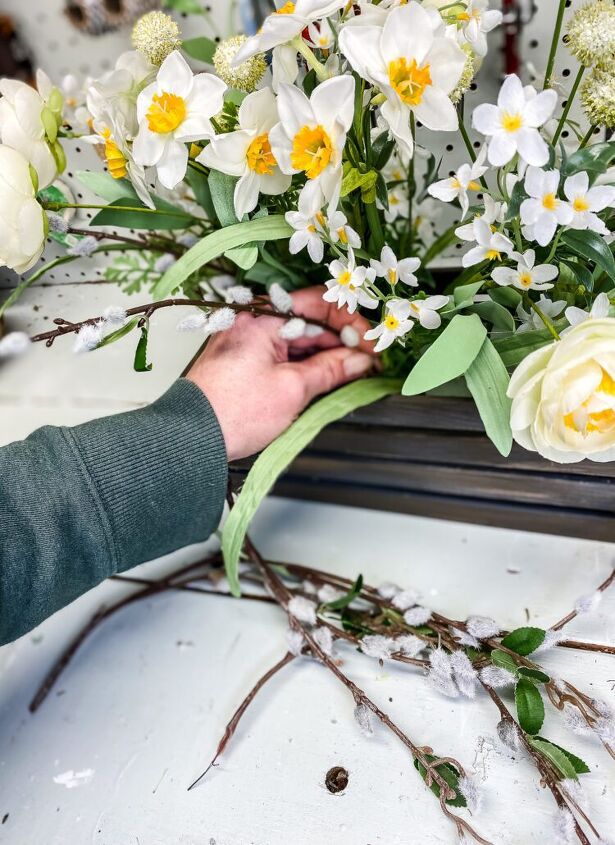
To finish up with the flowers, I added faux pussy willow stems around the edges…I used one big stem and cut off the pieces of pussy willow.
Final touches to my Spring flower in a wood crate project
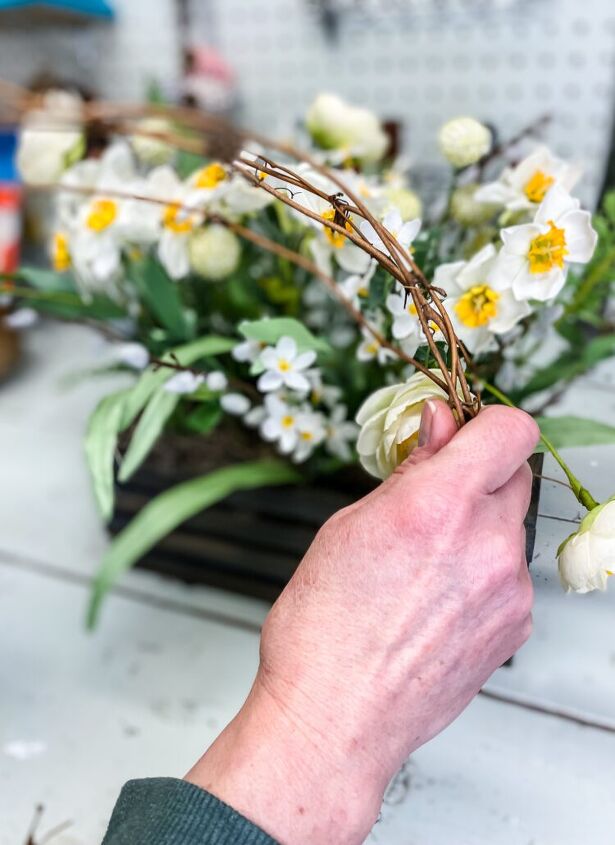
To finish up my little Spring flower crate project I grabbed a few pieces of grapevine from a grapevine garland. This is a great craft item to have around; I’ve used pieces of it in so many projects.
All I did was bend the grapevine into a rainbow shape and push down each end into the floral foam.
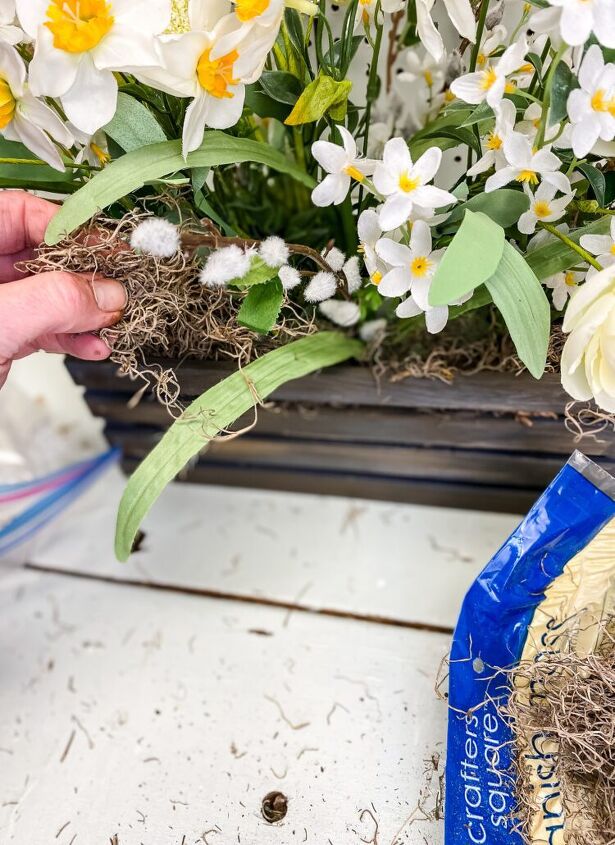
Now to cover the floral foam, I used Spanish moss. First I pushed some of the moss down in between the floral foam and the sides of the crate, then I added it to the top of the floral foam between the flowers.
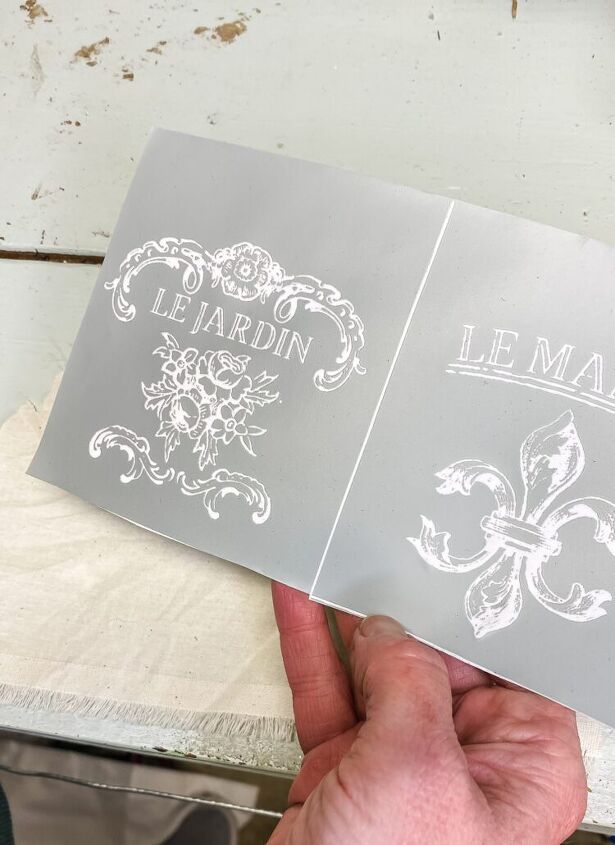
And because I’m feeling extra today…I am going to make a little label to put on my crate. I had this stencil on hand (sorry, I can’t find a link for it!) and a yard of linen fabric in my craft stash.
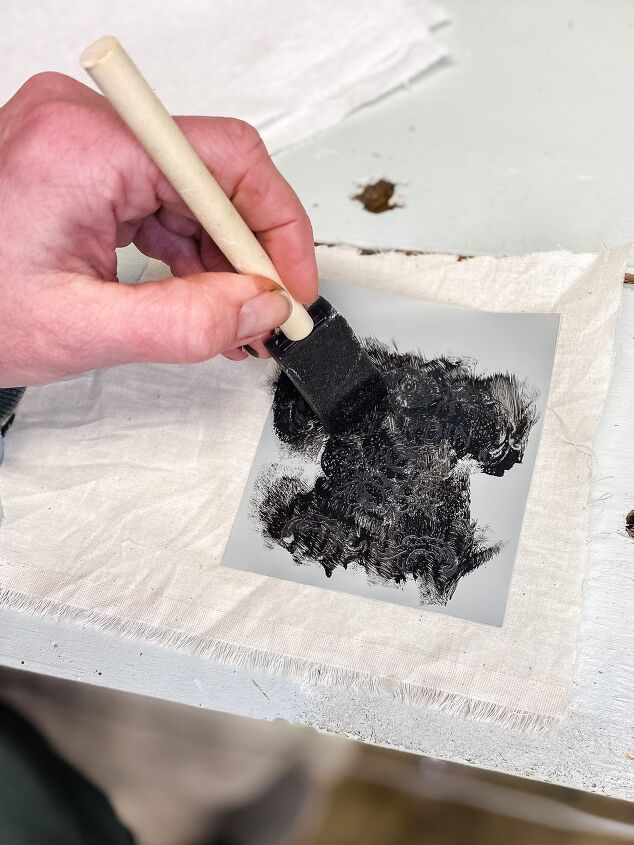
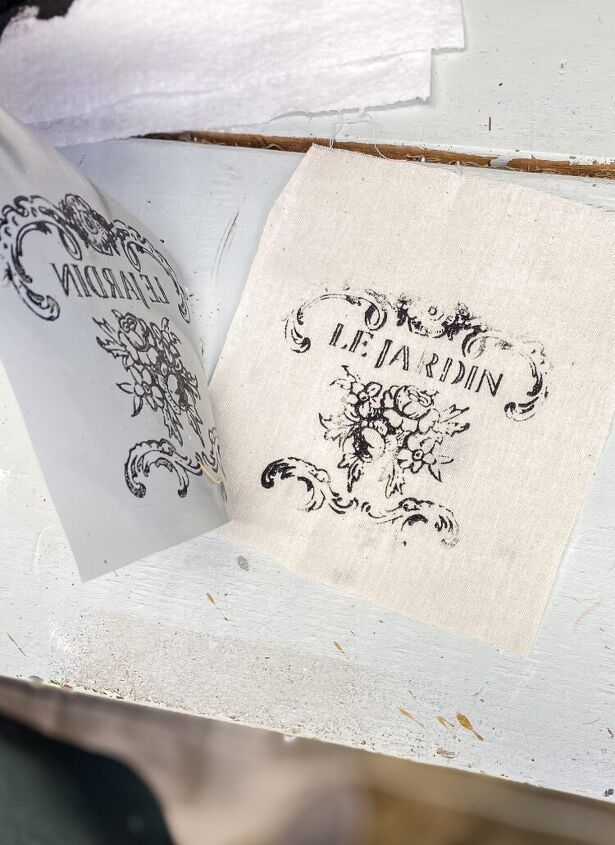
I cut a small piece of the linen that was slightly larger than the stencil and applied it using a sponge tip brush and black acrylic paint.
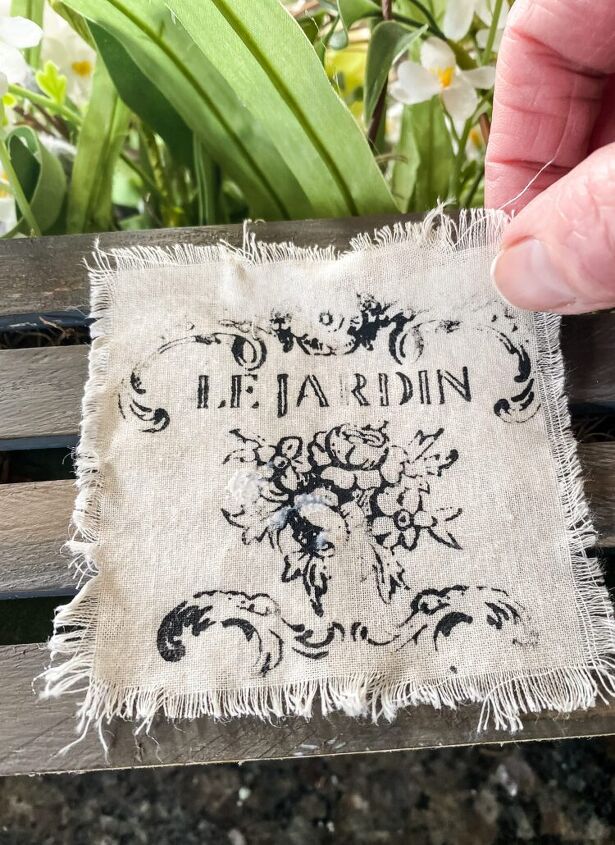
Using fabric scissors I cut off the extra linen then frayed the edges. The simple way to fray the fabric is by pulling at the edge of the fabric until the threads loosen and start pulling a few of the horizontal ones out. You can use tweezers if it’s easier but I could do this with my fingertips.
To attach it to the wood crate I applied Mod Podge to the back of the fabric.
Finished Spring Flowers in a Wood Crate DIY Project
And here’s my cute Spring flower arrangement on my entryway table. I am definitely in the Spring mood now!!
If you love pretty Spring DIYs you have to go check out my Bunny Wreath that I made using the Dollar Tree bunny head wreath frame. And here you can find 16...yes 16 of my Pretty Spring Decorating Projects!!
Resources for this project:
See all materials


Comments
Join the conversation
-
If that doesn't yell come on spring nothing does. I love it, nice job.
-
An adorable way of using these little wooden crates. Great for a centerpiece on a table, sideboard, or on the bathroom vanity. Love it.


Frequently asked questions
Have a question about this project?