


DIY Dollar Tree Planter – Three Daughters Home

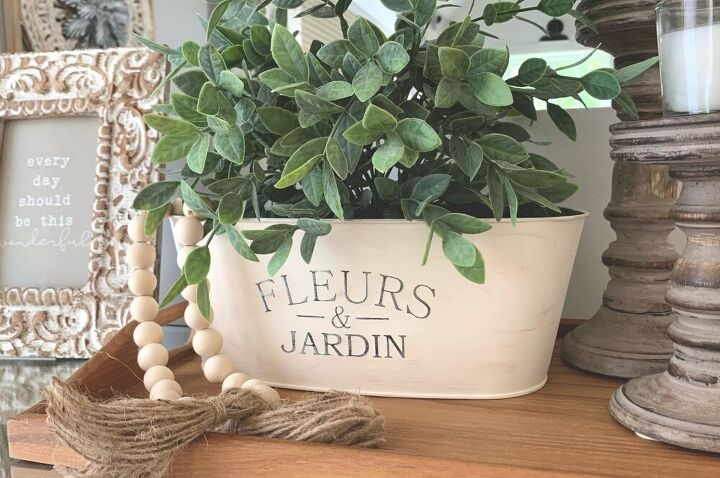
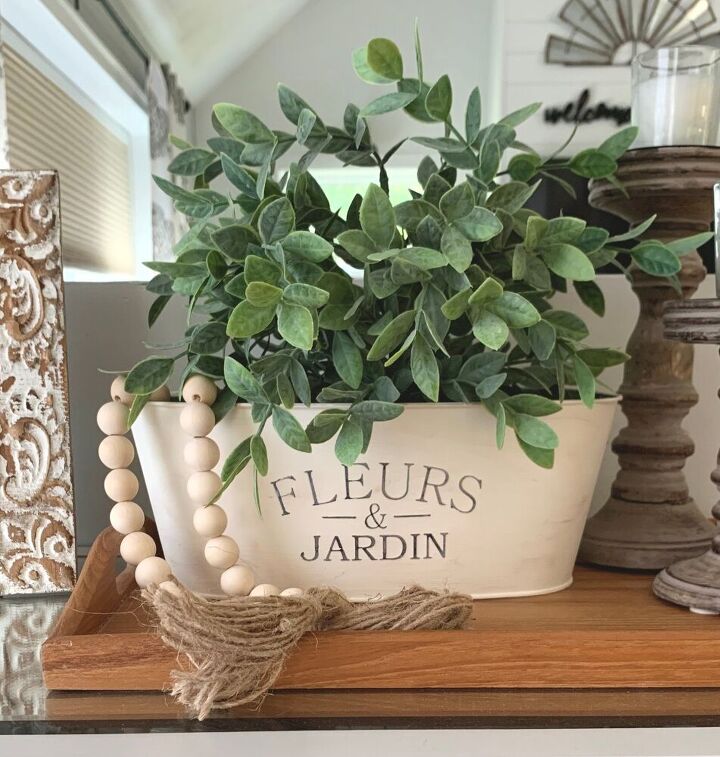
Ever stroll through HomeGoods or Hobby Lobby and come across those pretty, distressed farmhouse style planters? So I made a trip to the dollar store, grabbed my go-to chalky paint, and got to painting! Not too shabby for $1, right?
Keep reading to see how I made this cute DIY Dollar Tree Planter! You could also use this technique on any metal planter. **And if you like this project, please head on over to my blog for more DIYs, and be sure to subscribe! (You'll also get a freebie for signing up!)
What You’ll Need:
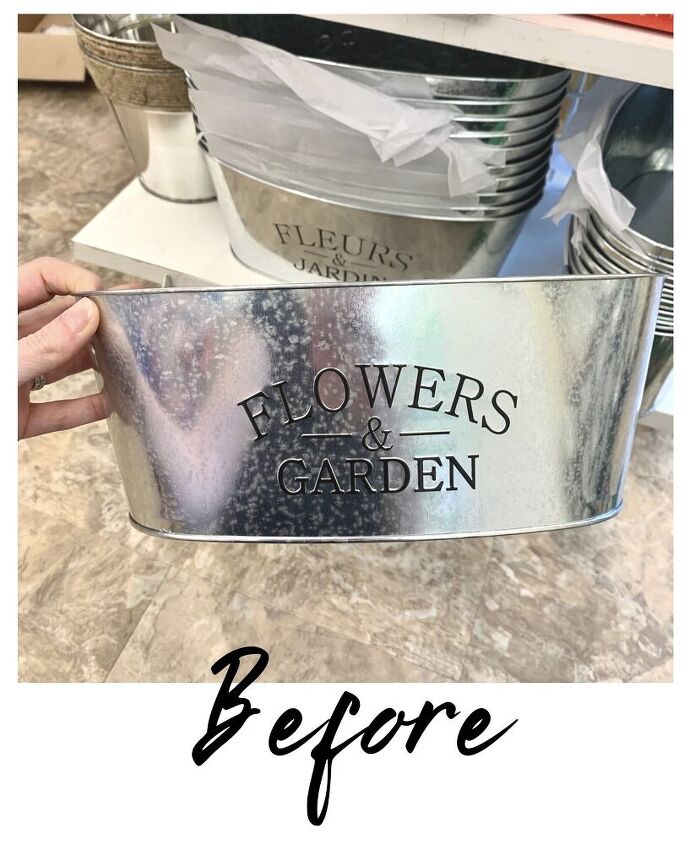
-Planter from Dollar Tree (*there is an English version and a French version. I made one of each!)
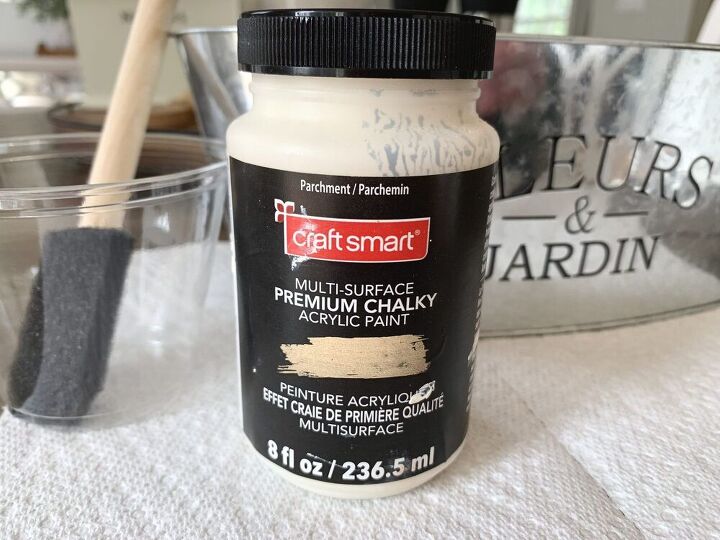
- Chalk paint (I used Craft Smart chalky acrylic paint in the color Parchment from Michael’s – linking similar)
- Antiquing wax (I used ArtMinds wax in the color Tea Stained from Michael’s – linking similar)
- Foam brush
-Cloth or paper towel
- Fine grit sandpaper
How To:
Step 1: Using a craft foam brush, apply your chalk paint to the outside of your planter. You could also paint the inside, but I planned on putting a faux plant in mine and knew you wouldn’t be able to see the inside.

Step 2: After the first coat has dried, repeat x2. I find that three coats gives a great amount of coverage.
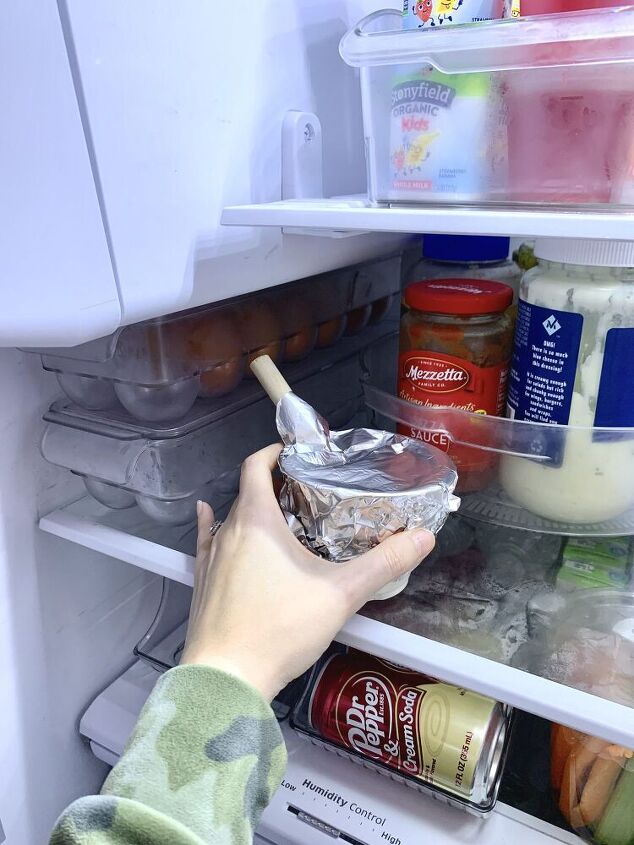
+ PRO TIP: Cover your cup ‘o paint with tinfoil and throw it in the fridge between coats. This will keep your paint from drying up so you’re not wasting it.
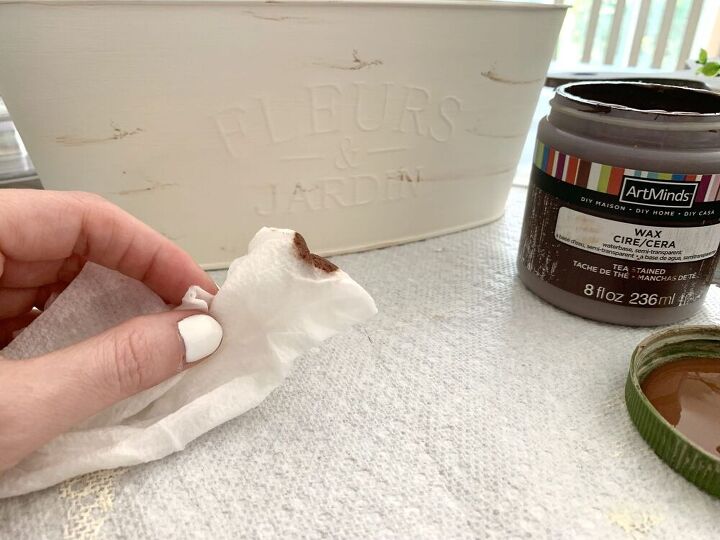
Step 3: Once you’ve applied three coats and it’s all dry, it’s time to add some antiquing wax! This is what is going to give the planter that aged or antique-y look. Word to the wise: a little goes a long way! But no worries; if you use too much you can always just slap on some more paint. You seriously can’t mess it up! Using a cloth or even a paper towel, just dab a little and swipe in random spots on your painted planter. I also made sure to put some around the top and bottom, where it would naturally rust.
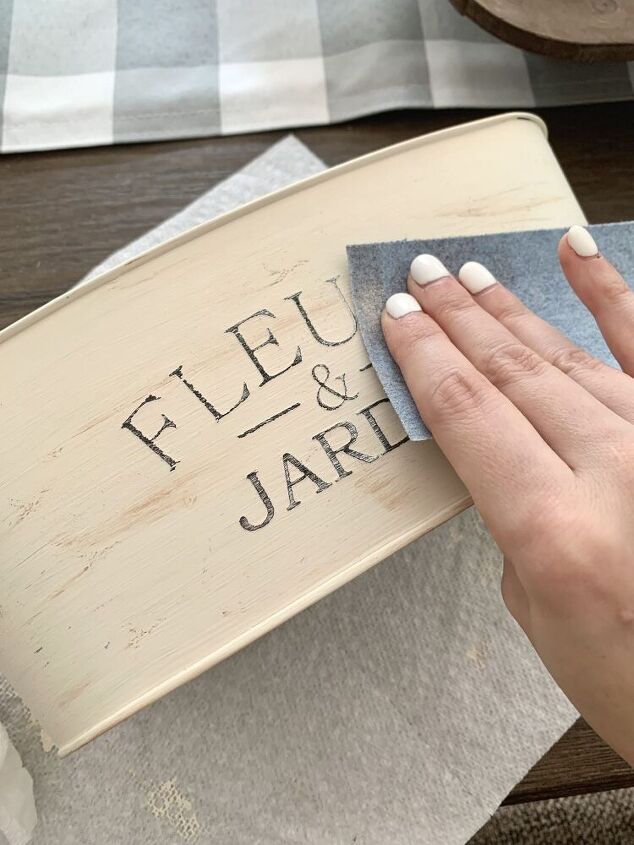
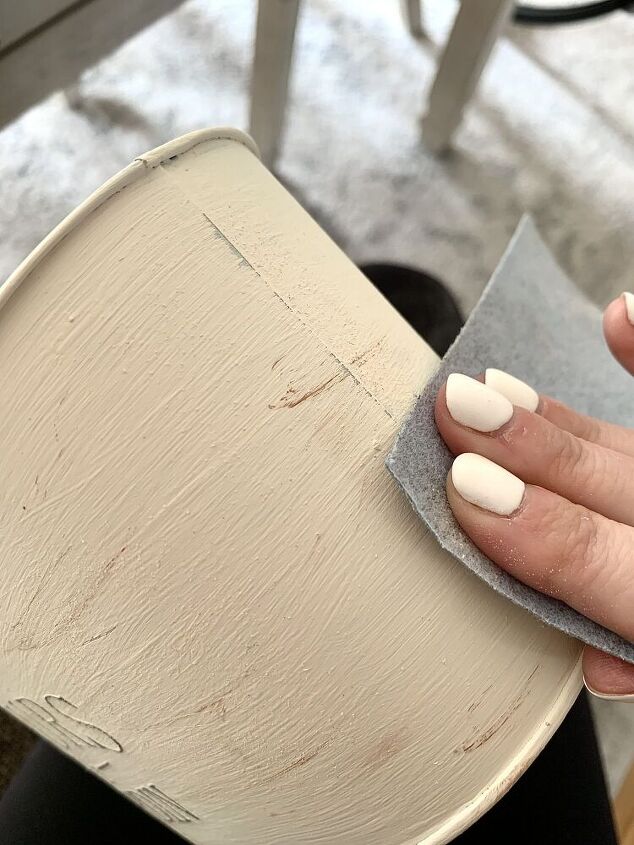
Step 4: Next, grab your fine grit sandpaper. Once you sand over the letters, it’ll remove the paint, re-revealing the letters again. I also sanded along the side seams, top and bottom, and over the wax in spots. Again, you can’t mess it up! The goal is to just give it some light distressing for that farmhouse style vibe.
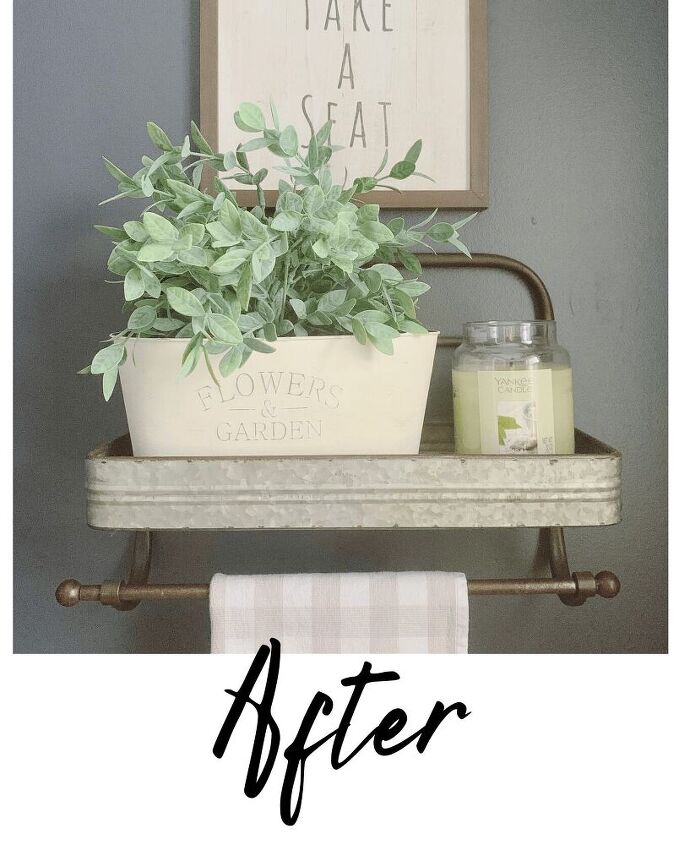
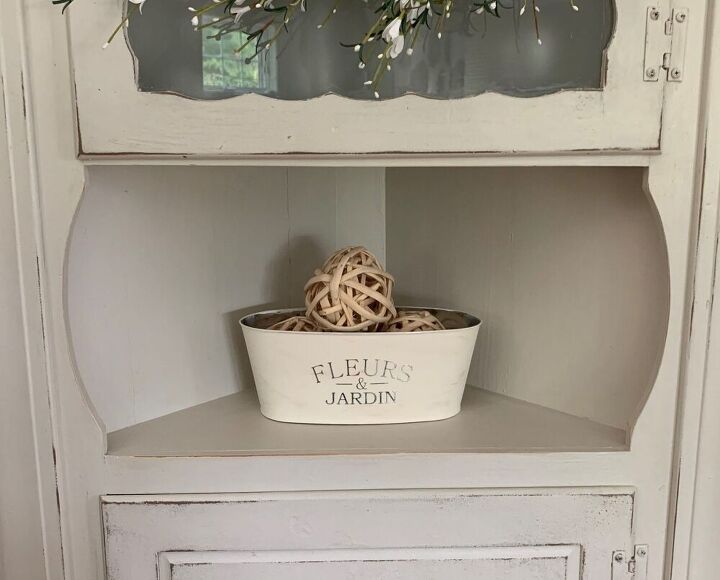
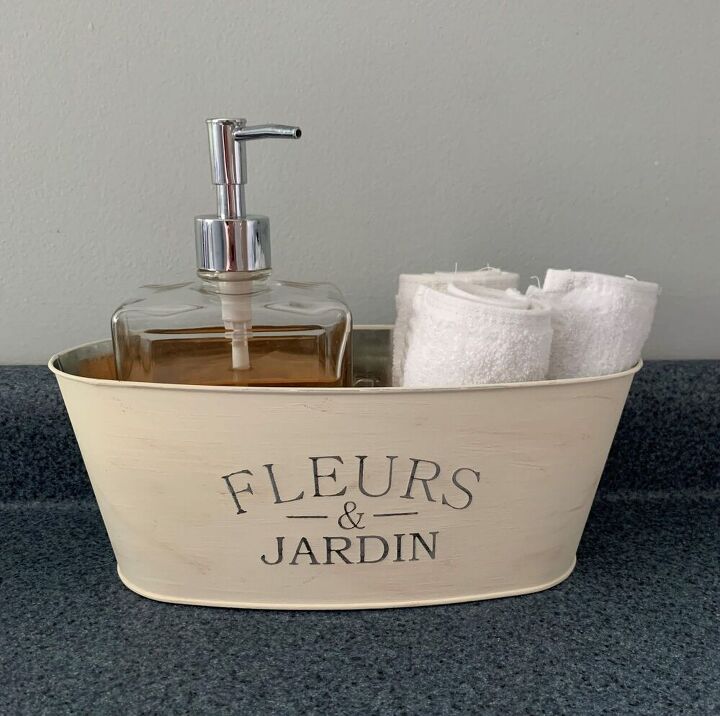
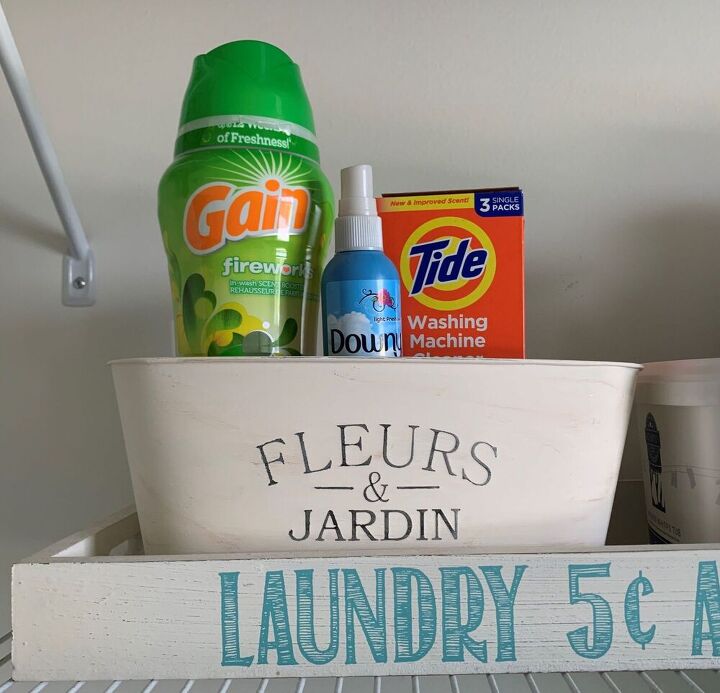
And there you have it, folks! How stinkin’ cute?! I mean, for $1?! You can’t beat it! I made this particular one for someone else, but I also have one in my own bathroom that’s the ‘Flower & Garden’ version. You could also dress it up with some jute twine along the top or rope knots for handles! Use it inside, outside, keep it for yourself, or fill with goodies for a gift basket — The possibilities are endless!
Run to your Dollar Tree and pick up at least one of these, and make a DIY Dollar Tree planter of your own! If you do, please be sure to tag me on IG ( @threedaughtershome) or email me a pic to info@threedaughtershome.com. I’d love to see how you style it in your own home!
For more project ideas, head over to my blog and be sure to subscribe! (You'll get get a free gift as a thank you!)
Resources for this project:
See all materials


Comments
Join the conversation
-
Really cute idea. Wish I was a crafty person. Guess at 90 years old I'm lucky to be alive and kicking.
-
I don’t have a picture but I hot one of these and left as is ( color wise) and glued 4 silver napkin rings on bottom for “ legs”. It sits on my end table with faux pink hydrangea flowers.


Frequently asked questions
Have a question about this project?
I love these ! I have seen them at the 99 cent store for yrs ! I always thought they were too flimsy to do much with. Did you put two together by any chance?
You did a great job on these ! Thanks for sharing !
I love it !!! I am always looking to find a project. I think not only for myself I will make one for a friend too. ! Thanks for your inspiration.