


How To Make Topiary Trees
I’m going to show you how to make topiary trees the super easy and affordable way today. You won’t need many supplies or time for this project either!
OK, OK… I know it’s January but I miss my garden and need to bring a little bit of the outdoors inside to brighten my mood!! To be honest, I become a plant hoarder in January…oh I’m not kidding…I’ve never met a plant I haven’t wanted to put in my carriage!! I just feel better when I have plants and flowers around me during this long stretch of winter.
So for a fun project, I wanted to make some topiaries to spruce things up around here. I wanted them to be easy and affordable to make…let’s see if I can do it!
Supplies for making topiaries
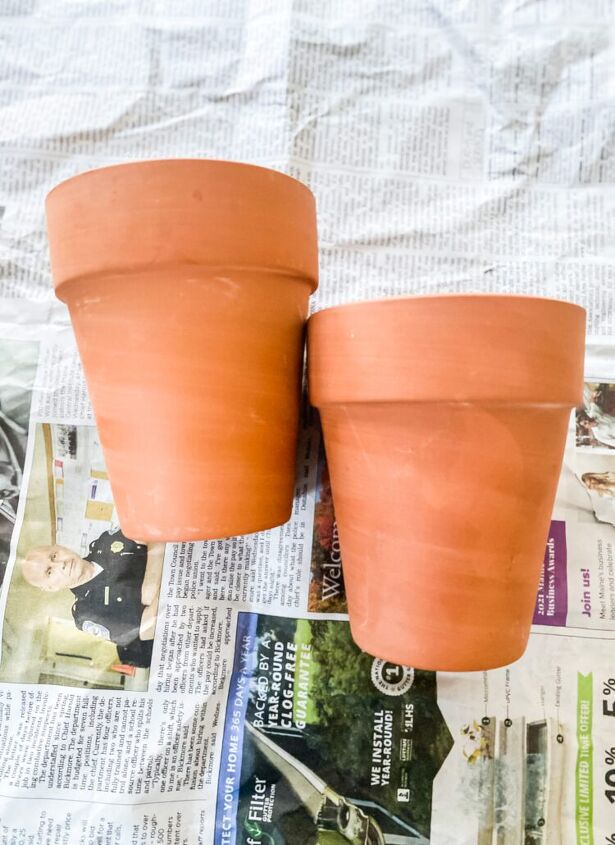
- Small Terra Cotta Pots
- Spackling Compound/ Paint
- Greenery and Floral Picks
- Sticks
- Floral Foam Block
- Floral Tape & Floral Wire
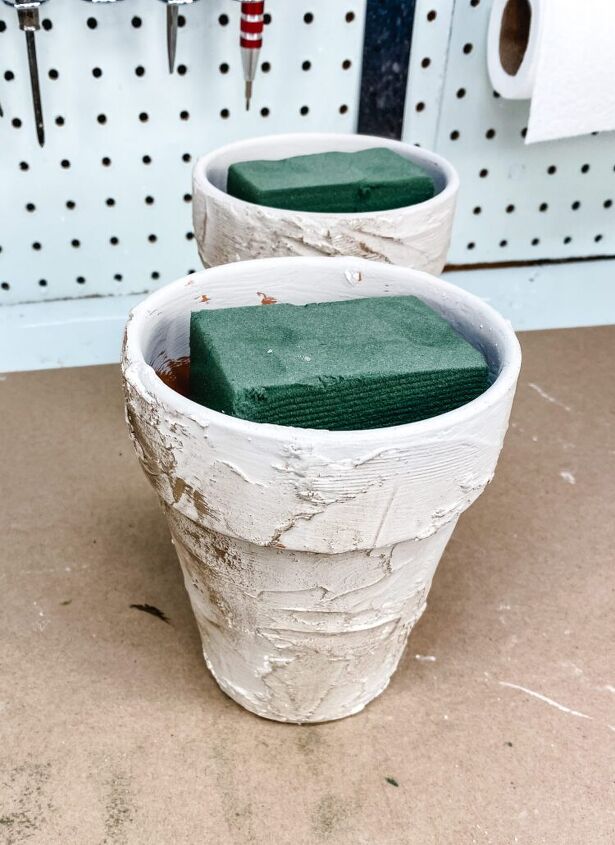
I had a few terra cotta pots in my stash already but they are readily available at craft stores year-round.
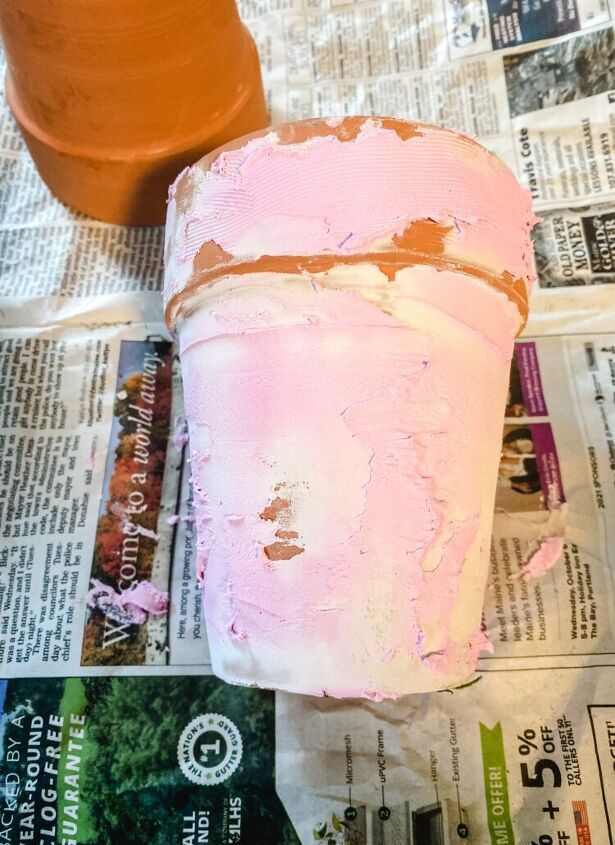
I wanted the pots to have the look of old pottery. The trick I am using is to spread the spackling compound onto the terra cotta pots. I purposely didn’t cover every part of the pot with the spackle.
This step is optional, you could skip this and just move on to the painting…it will still come out looking great!
The spackling compound goes on pink and dries white.
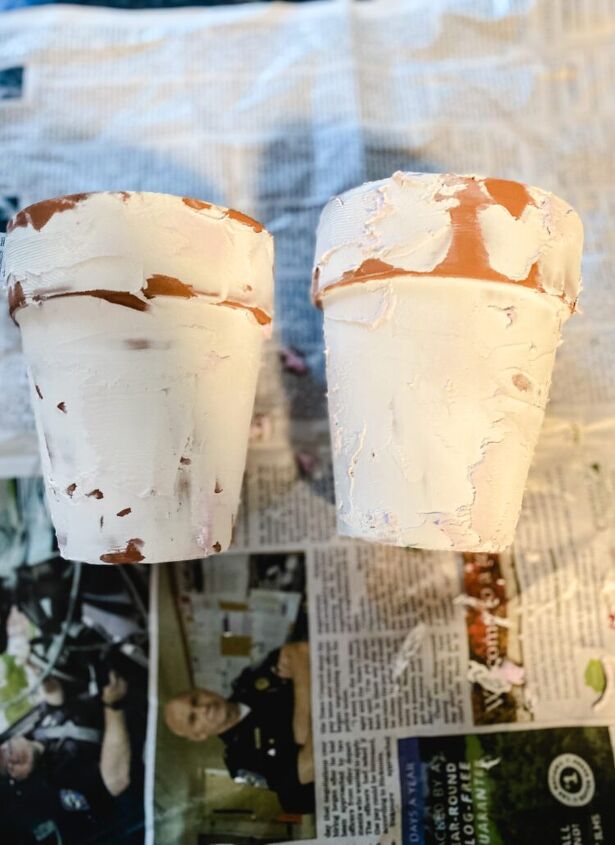
Once the spackle was dry it was time to paint the pots. For my pots, I chose off-white chalk paint.
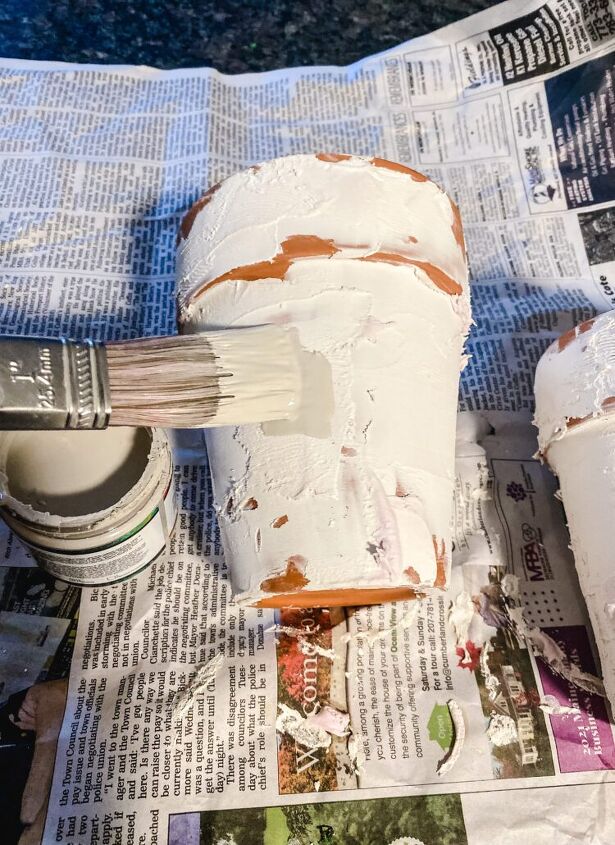
Once the paint was completely dried, I lightly brushed a dark antiquing wax ( Waverly Antique Wax) lightly over the pots. The dark wax helped to highlight the texture that I created with the spackle.
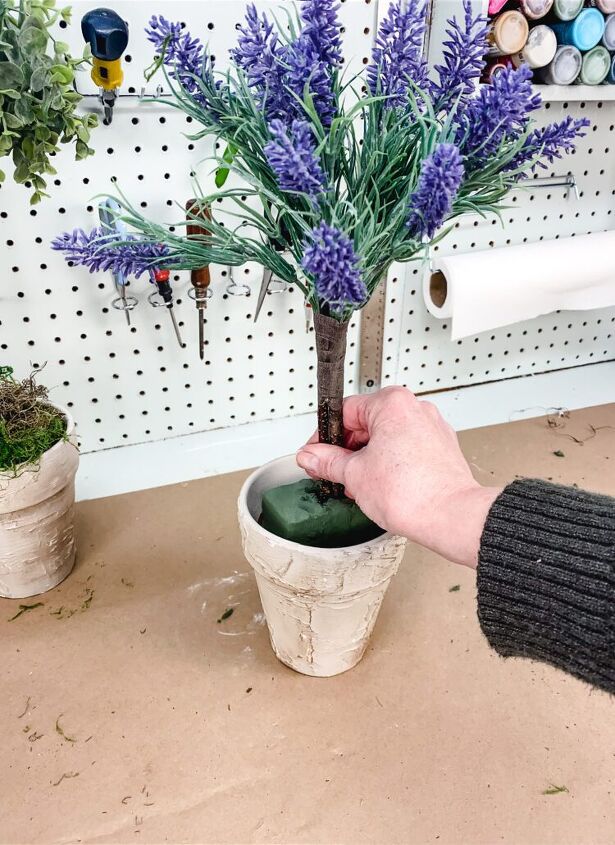
Then I popped a piece of floral foam into each of the pots. (cut off from a large floral foam block)
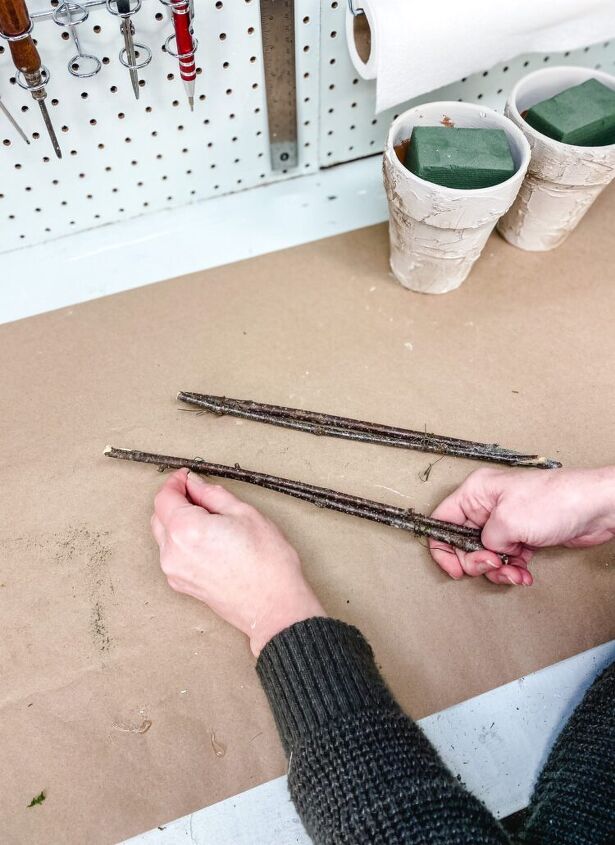
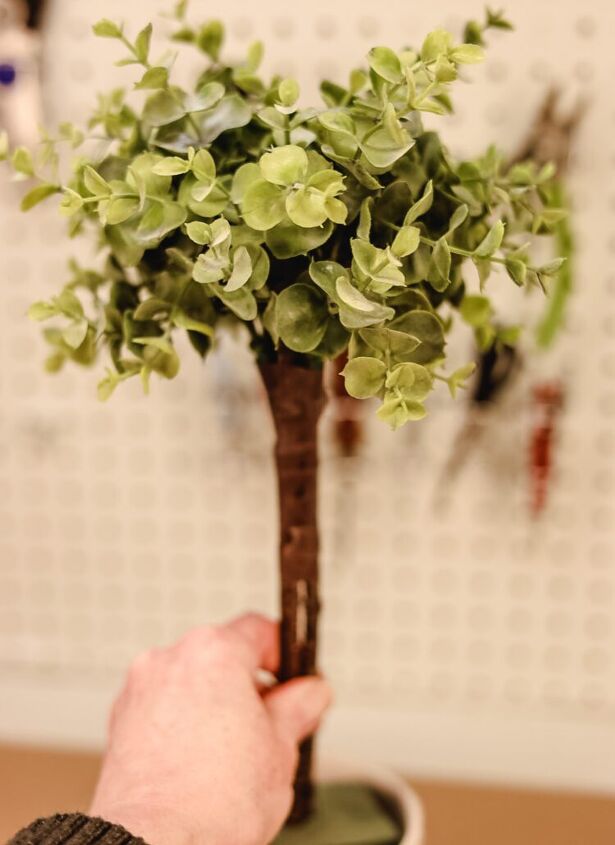
For each topiary base, I am using 2 thin sticks from my yard. I cut the sticks down to about 1 foot each. Using small pieces of floral wire, I twisted the wire at the top and bottom of the sticks to secure them together.
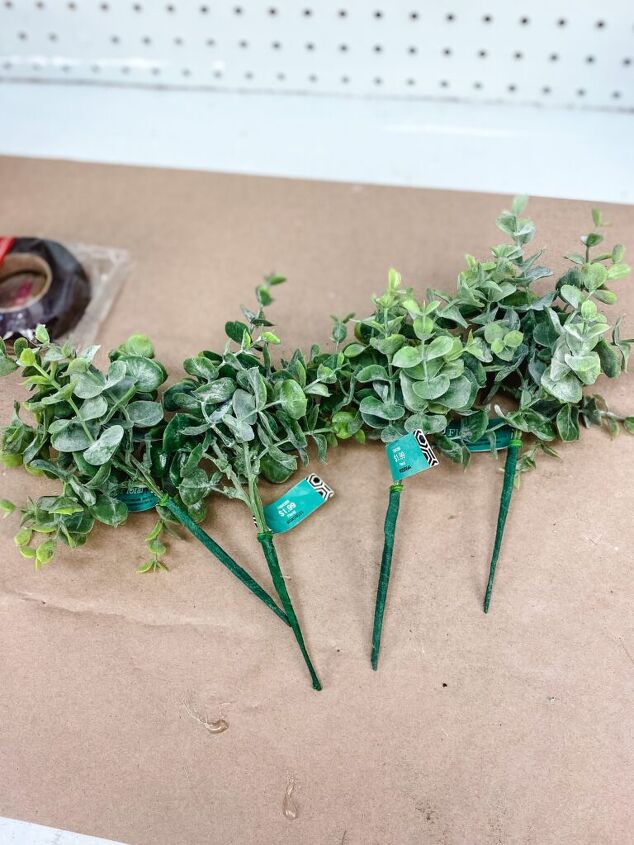
Now to make the topiary part. For this topiary I’m using 4 greenery picks from Hobby Lobby ($1.99)
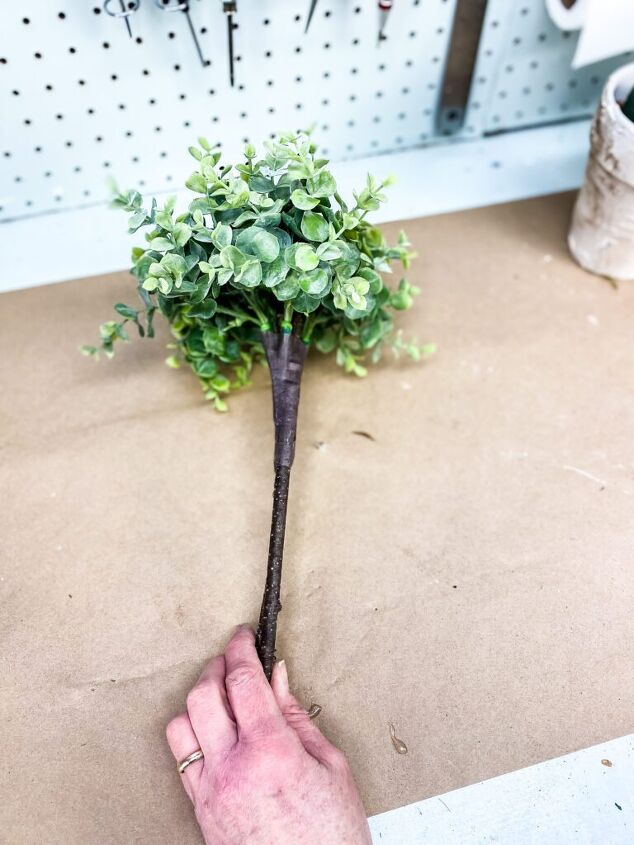
I held 1 pick at a time to the top of the sticks and wrapped the brown floral tape around the picks to secure them to the sticks.
Once I had the first one secured I added the next one and continued wrapping the floral tape around the sticks.

You want to make sure the green floral picks are covered with the brown tape completely…no green peaking out.
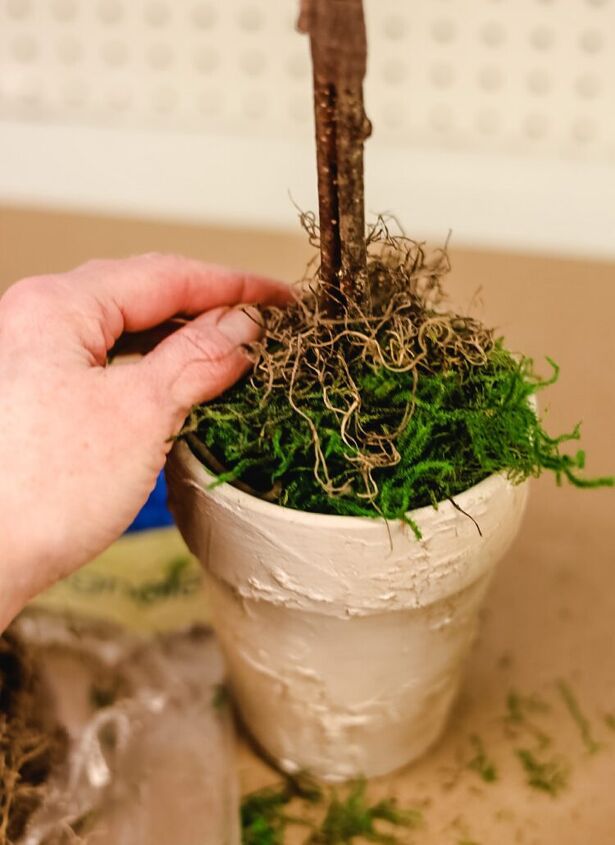
Then I just popped the sticks into the center of the floral block in the pot and pushed it through to the bottom.
To cover the floral foam, I added green moss ( I also pushed some of the moss down into the spaces around the foam).
Once I had the pot filled with green moss, I added a small bunch of Spanish moss around the base of the sticks.
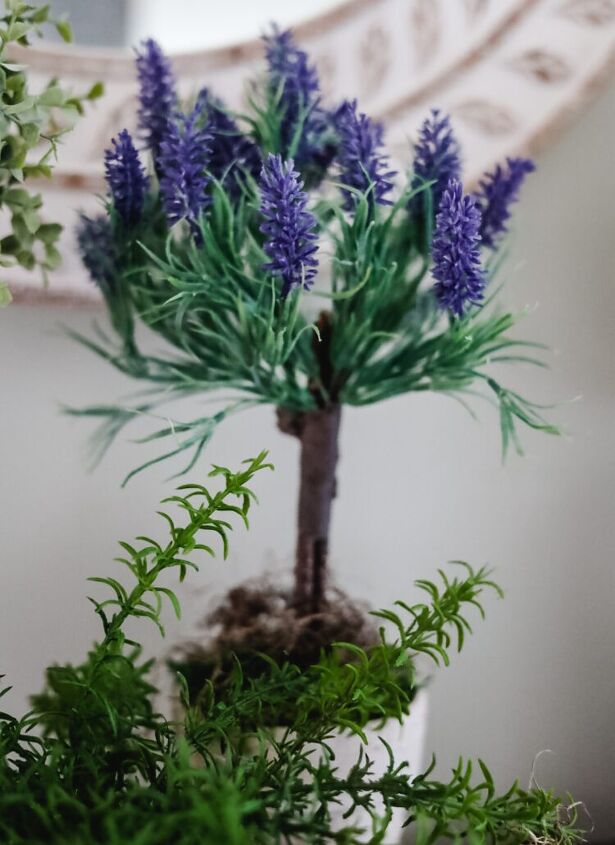
For a second topiary, I wanted to make a lavender one. I followed all the same steps as the one I made using the greenery picks but this time I’m using 4 lavender picks (also from Hobby Lobby)
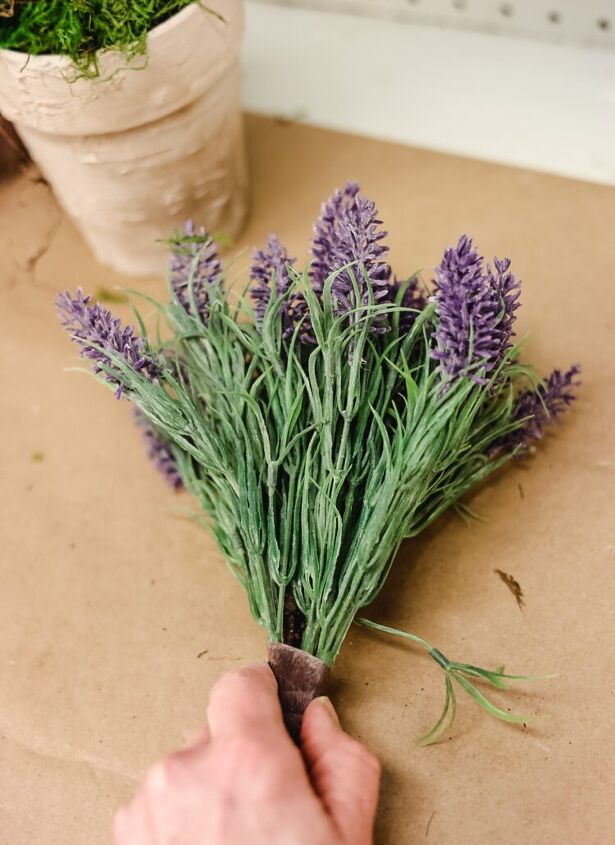
After I had the topiary together, I shaped the lavender picks to mimic real lavender topiaries.
I bent the picks into almost an L shape.
For the greenery topiary, I bent some of the stems downward

And here’s the finished topiaries! Didn’t they come out pretty?? So for under $20 I made 2 unique topiaries that I can use year-round in my home.
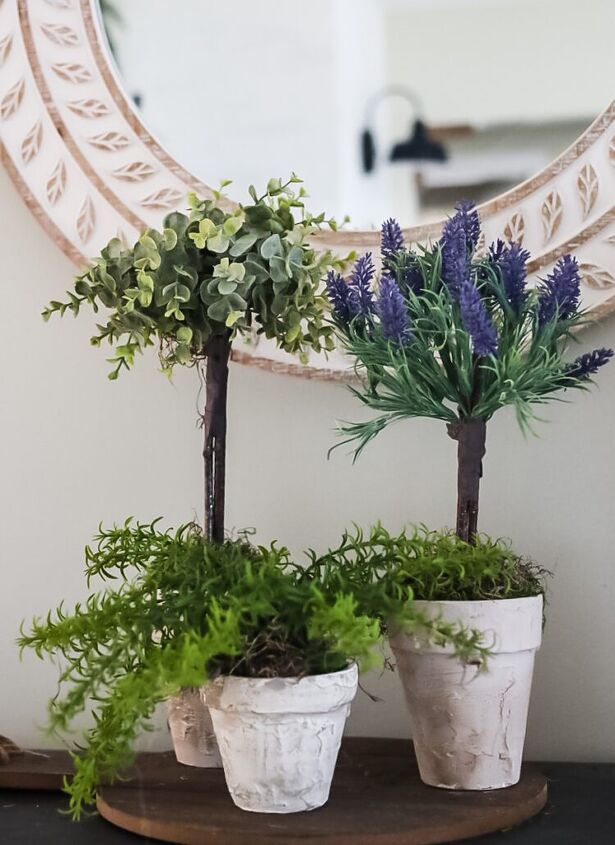
I had another small pot that I used to make a short topiary. This time I popped a herb stem right into the floral foam to make it look like a plant.
It’s always better visually to have an odd number of items placed together when you are decorating.
I love to make my own home decor! Check out some of my other DIY decorating projects for more inspiration for your home.


Frequently asked questions
Have a question about this project?