


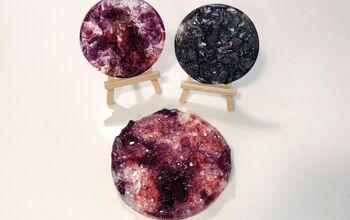
Resin Geode With DIY Crystals

Hello and thank you for taking a look at my project today.
This project follows on directly from my last one where I showed you how to make DIY Crushed Glass Crystals. This project shows you a great way of how you can use these crystals within resin.
Enjoy 
This lovely geode was very simple to make and a great project to tackle if you love making things from scratch. I also made my own silicone mold and have a YouTube video specifically on how to make silicone molds if you're interested in making your own too.
Links to my YouTube channel can be found dotted around including via the video link below, my Hometalk homepage and at the bottom of this post.
I would love it if you could take a look and consider subscribing for future crafty tutorials 
STEP 1 - PREPARING YOUR MOLD
My mold is approx 15 inches by 12 inches in size so my resin measurements are based on this. Scale up or down based on the size of your silicone mold.
I mix up 500mls of resin and then split this into 2. I keep one half clear and with the other half I divide into small containers to colour.
I've used resin from Rockstar Resins and if you use my code HANNAH you can get 10% off any order with them. They also do free shipping! Click that link to view their site I've used their 4 Star 1:1 Thin Coat resin for this project.
My colour choices are as follows but you can pick whatever colours you like: Gold, bronze, champagne-coloured-glitter, turquoise, white, navy and purple.
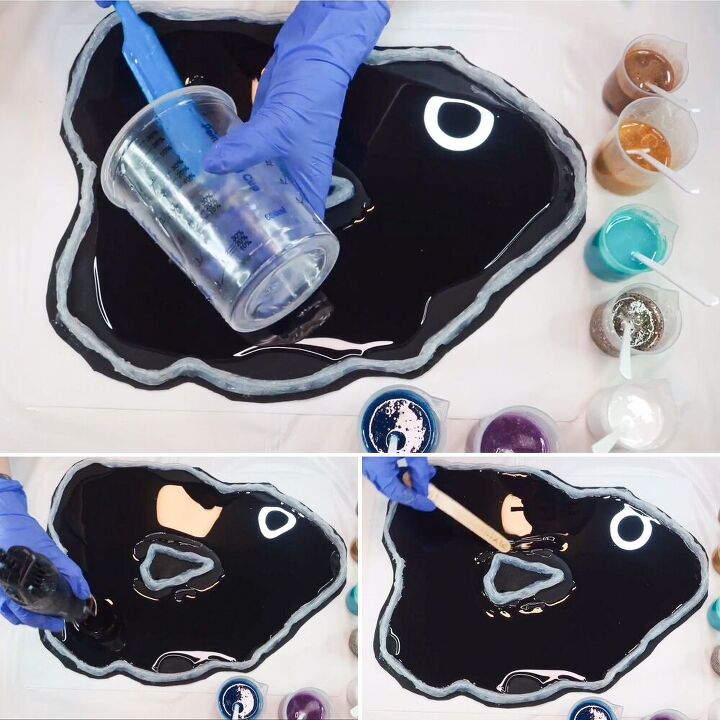
I then add the clear 250mls of resin to the mold and spread this around the base and pop any little bubbles using a blow torch and heat gun.
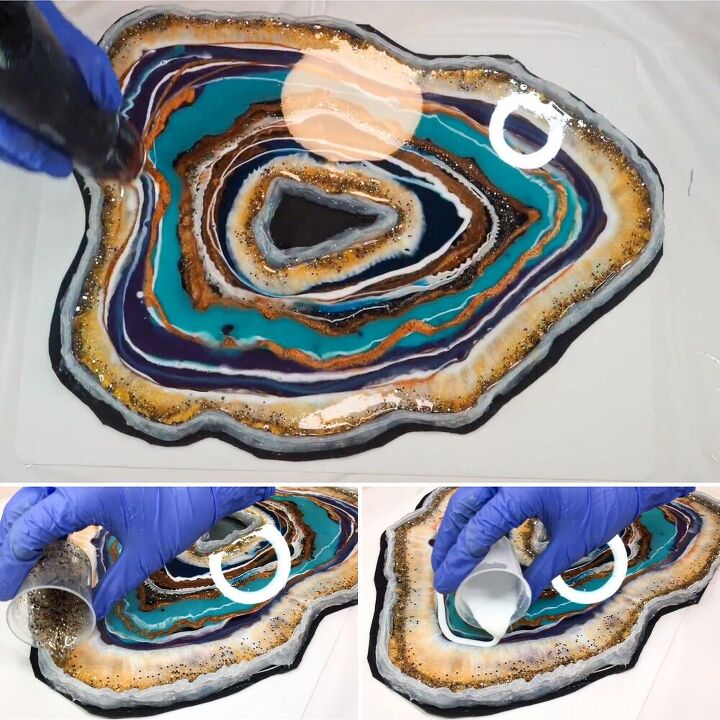
STEP 2 - ADDING THE COLOURS
This next step is so fun and easy but if it's something you've never done before and would like to copy what I've done then you can watch my YouTube video, linked above. Click to view and I go through each step and colour so you can follow along at your own pace.
I take it in turns now adding each colour, in a circular fashion, into the shallow clear resin geode 'bath'.
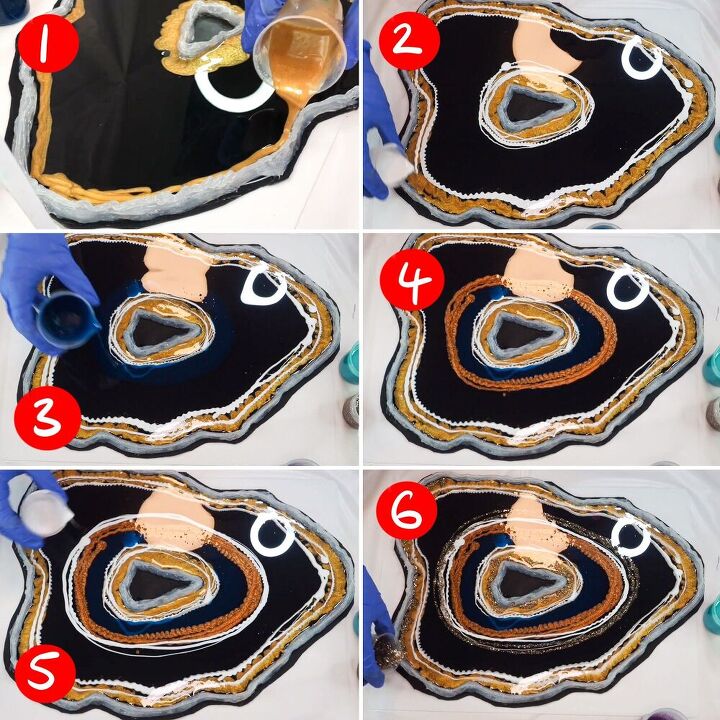
As mentioned above, you can follow my YouTube video if you want to watch exactly how and when I add each colour or you can get a good idea of my colour placement from my pics in this post.
You can of course go wild and add colours wherever you like in whatever order you like. I made it all up as I went along so it's definitely not an exact science, or I'd be in trouble!
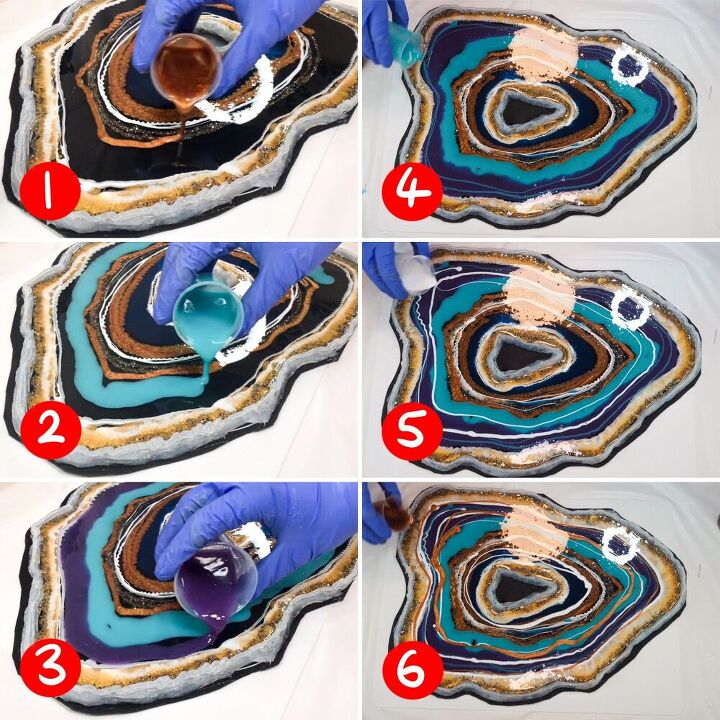
In case you're interested, here's a written order of which colours I add and when:
Gold > white > navy > bronze > white > glitter > bronze > turquoise > purple > turquoise > white > bronze > glitter > white > navy
Make sure you fill the mold fully, don't scrimp on your portions, you want a nice sturdy piece at the end.
If the geode is too thin it will be a bit harder to get that wonderful deep crashing-wave effect where the colours meet. It'll also make for a great tray if it's a bit thicker.
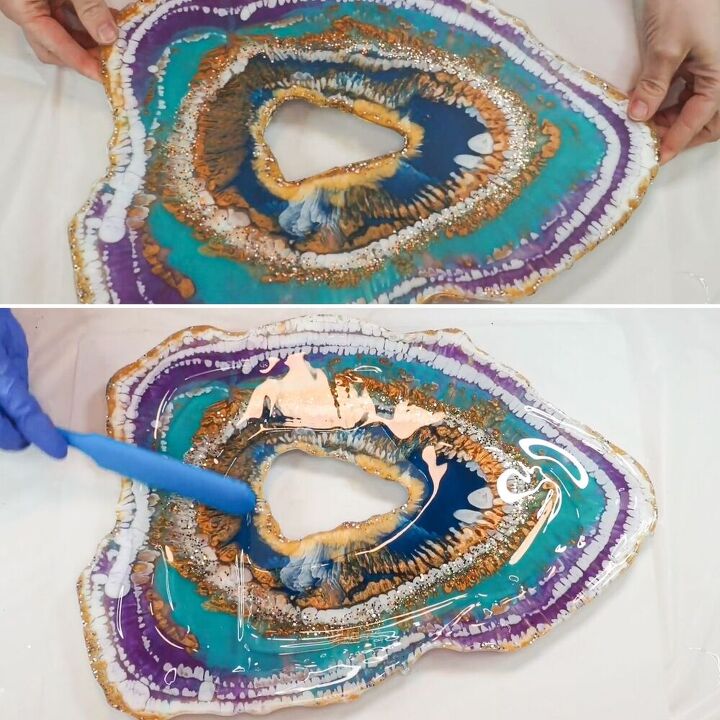
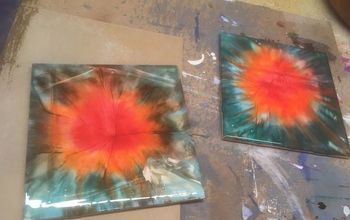
STEP 3 - LAYERING
It's difficult to tell sometimes what the finished look will be like because the resin moves around between the pour and the curing stage.
To help ensure the resin has it's best chance of looking stunning, use a heat gun to softly blend the colours together where they meet. I just find this gives a more interesting look (like that crashing-wave effect). It also pops bubbles at the same time
If you have any left over resin, add more layers and repeat the blending process with the heat gun.
Lastly, pop any little surface bubbles with a blow torch before leaving to cure fully.
STEP 4 - FINISHING TOUCHES
Demold your work of art.
If your mold was shiny when the resin went in then your geode will come out shiny too (it mimics the surface it cures against). My silicone mold had a matte finish on the underside so, I add some liquid latex to the back and a top coat of resin for a lovely glossy top surface.
The liquid latex makes the removal of resin drips easy-peasy but you can also use painters tape.
I also needed to sand the edges of my geode beforehand because my DIY mold has rough edges. You may be able to get away with no sanding if your mold is shop-bought.
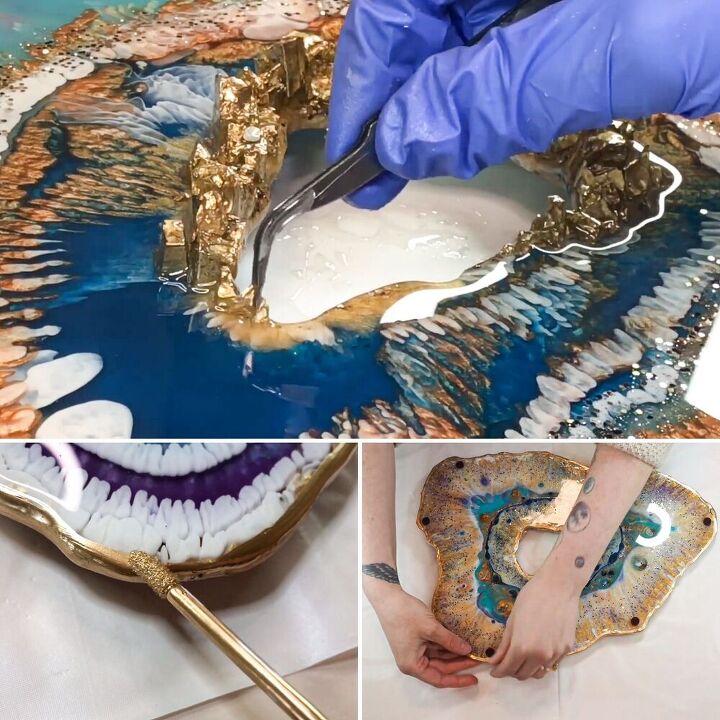
If you have made your own crystals as per my last Hometalk post or if you have bought some, then it's time to add them.
I spray my glass crystals with gold spray paint and then mix them in a small bit of the left-over resin I used to top-coat my geode. This ensures they will cure firmly attached and makes them look like part of the geode (same shininess).
I add them in clusters around the edges and centre using some tweezers. If you look at mine, you'll see I've added them in a sort of graduated size order.
Let your geode cure before adding enamel paint edging and felt feet for the final finishing touches.
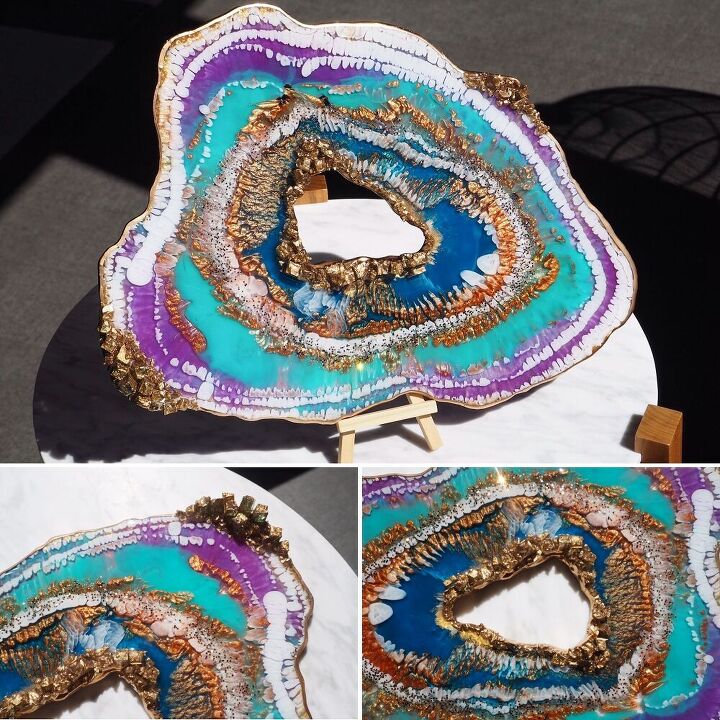
ETSY
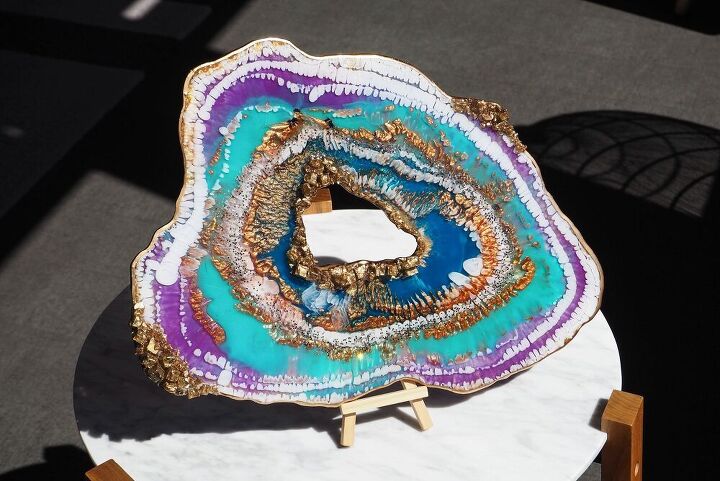
You now have your very own geode display piece or decorative tray.
If you don't already know, I have my own Etsy Store and have added this piece to it. If you're interested in buying it or having a look at the other handmade bits I have for sale then just click this link to be taken to my shop.
Thank you so much for viewing my post today. Let me know what you think and if you have any questions just drop them below.
Please also remember to give my YouTube channel a quick visit if you get the chance and consider subscribing
Have a lovely day,
Happy crafting x


Comments
Join the conversation
-
So beautiful!
-
That look awsom


Frequently asked questions
Have a question about this project?