


How to Create an Accent Wall With Shiplap – DIY
How to create an accent pattern wall with shiplap boards. This has turned out so gorgeous and I am very thrilled to share this with you all. This DIY is part of my Master Bedroom remodel series.

DESIGN
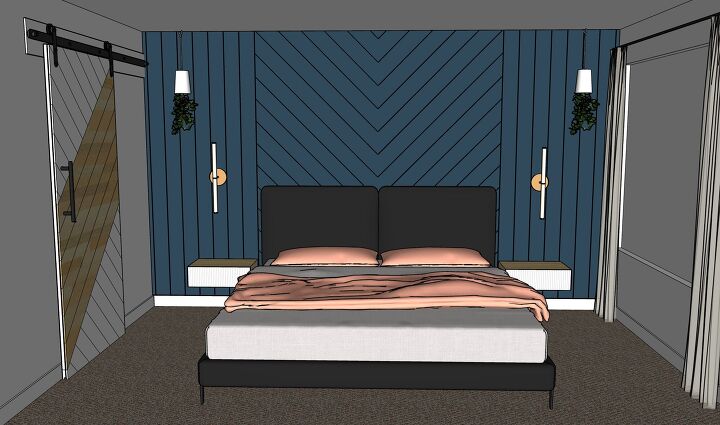
I made a few design concepts with different materials and finalized with the one below.
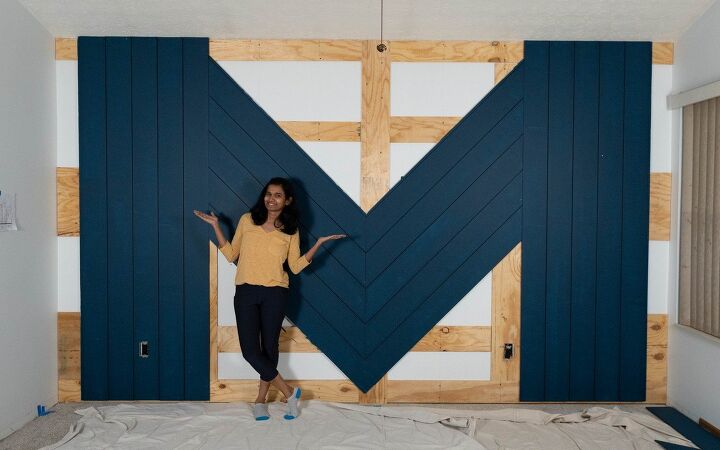
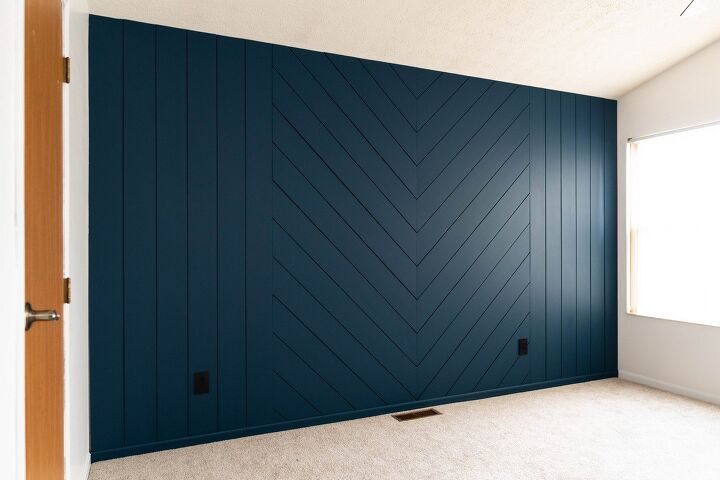
The full wall is going to be boarded with shiplap but in a pattern. The center portion behind the bed will have a chevron pattern and verticals on either sides.
What is a shiplap?
It’s a thin wood or MDF board that has two opposing rabbet joints that overlap each other, giving the boards a tight seal. It creates a little shadow between the boards, that looks really great. Traditionally the boards are placed in a horizontal pattern, but you can get creative and place them in any way you like to make a statement wall.
Alternate option to Shiplap:
Actually, you can make this pattern by cutting wood or mdf strips on your own and fixing them on the wall with spacers to create the gap. It is cheaper than shiplap boards. But, I think rabbet joints in ship lap provide even spacing, stay the same over time and more importantly these look much more professional.
How to mount them?
If it’s a simple horizontal pattern, you can simply nail through the drywall directly into wall studs. But if the pattern is a little complex like mine, you have two options. One is to use a construction adhesive and directly stick it to the wall by temporarily securing it with nails. Second, is to run wood framing that is screwed to the wall studs and shiplap boards are mounted on top of these framing. This way, you get the flexibility to nail anywhere there is wood backing. I chose the latter option, because with the adhesive, if we wanted to remove the shiplap in the future, the dry wall would get damaged and have to be replaced.
CALCULATE THE QUANTITY
Best way is to draw out the pattern to scale on a piece of paper or on CAD (like I did) and measure the quantity. Remember to also consider the board wastage due to odd cuts.
Due to material shortage all over the country, we had to hunt for these boards. Finally found it in a store 35 miles away and loaded up our cart. But before heading to the store I did a rough calculation on how much I needed and we ended up getting 30 boards. By the way, these are 1×8 boards that are 8ft long.
STEP – 1 – FRAMING
For this framing, I am using a ½ inch thick plywood. I bought 4.no of 2 x 8 plywood boards. Then, I cut them with a circular saw.
Here is how I planned the framing. check out my video tutorial for better understanding.
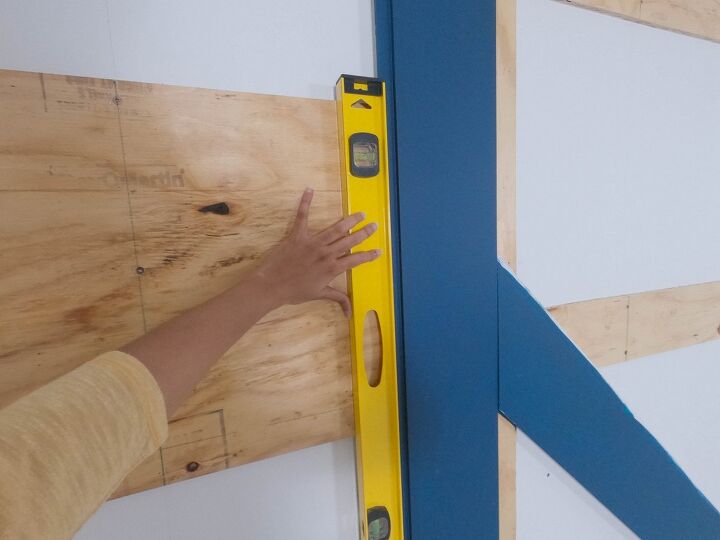
First, find the wall studs and mark them on the wall. Also mark center and the width of the chevron pattern.
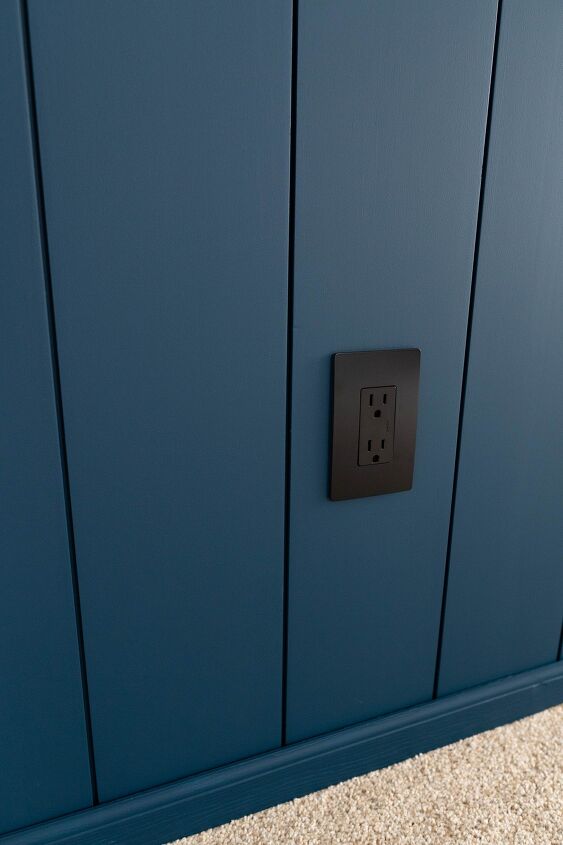
I divided the 14 ft long wall in half. Then added top and bottom pieces. Next, place the vertical backing where the chevron pattern ends. Based on the wall studs, I widened my frame boards so that the ship lap board and vertical boards will get enough support. Then added horizontal strips one by one securing with 2 inch screws wherever there is stud and 2 inch brad nail on other areas. Since I am planning to have wall mounted side tables and wall light, I made those boards much wider to give me the flexibility to mount and add a good support. Also, wherever there is a wall socket or switch, turn off the power remove the socket and trace it on the board and make a cut out for it before fixing.
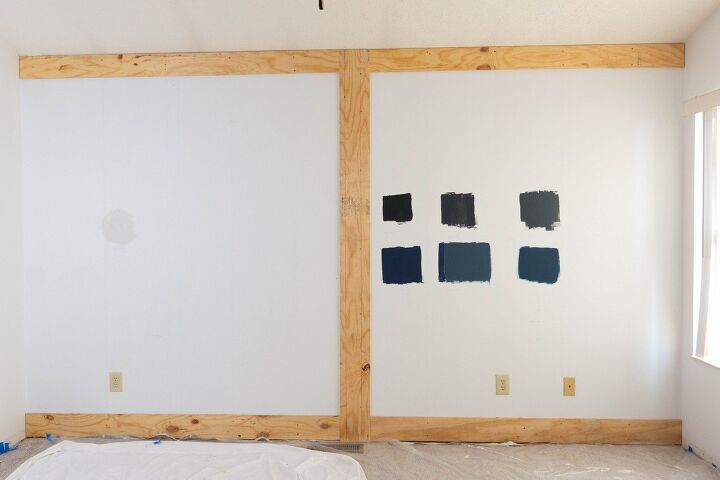
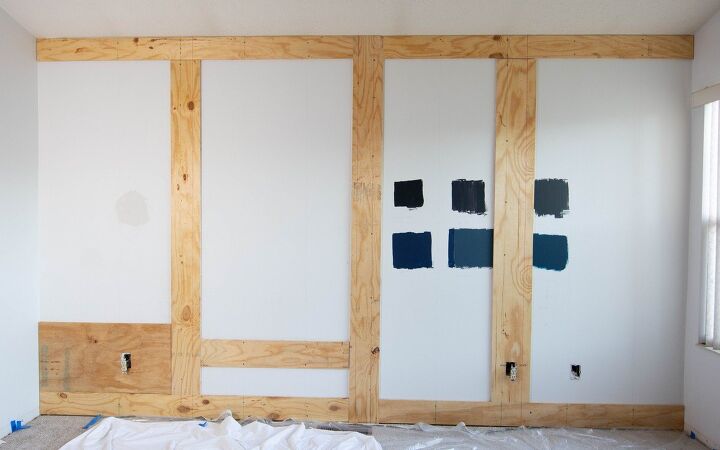

While doing this, make sure to mark the stud positions and pattern edges over the framing too.
STEP – 2 – CUTTING
Check out the video tutorial for better understanding.
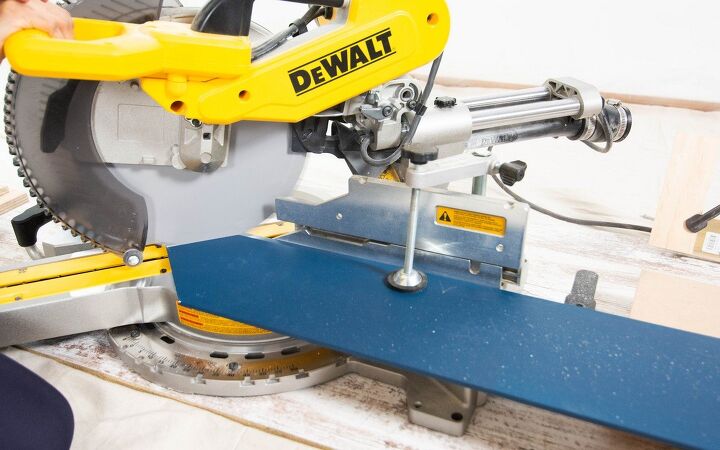
There is a little trick for cutting this pattern. The longer boards of the chevron are the same size with 45degree angle cuts on both ends. But they need to be cut as a mirror of each other. First let’s cut the one on the left. Set miter saw to 45 degree and place the board like so. Good side should face up and this bottom rabbet faces you. First make a 45 deg cut to remove the edge off. Then measure the length and cut the other angle end. Since this is going to be a repetitive cut, I made a stop block with some scrap wood.
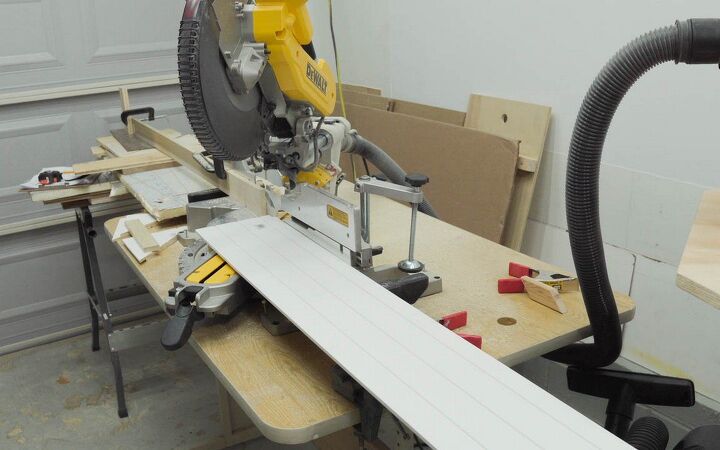
Next, let’s cut the board on the right. This time flip the board. The underside of the ship lap should face up. And the bottom rabbet should be on the other side. Cut 45 degree to remove the edge off. Then using the stop block measurement cut the other angle end.
Now you have two boards in the same size, but mirrored cuts.
Just to be sure I installed the first set of chevron boards on the wall. For this, you definitely need an extra pair of hands, if possible two more pairs.
First, I installed a wood strip on the bottom that is on perfect level. This will act as my guide and reference. Later this can be removed.
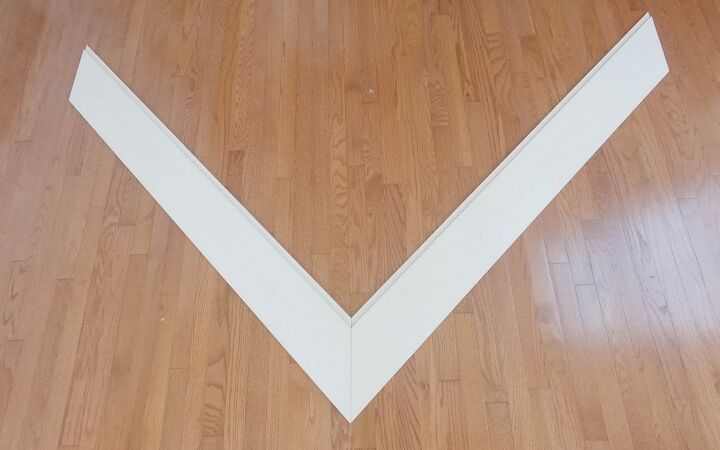
Now use the wall centerline and chevron edge line that was marked before as reference and position the boards. The top edge of the boards on either side should be at the same height from the wood strip at bottom. Also, use a speed square to check the angles. Once you think it’s looking good, nail it.
I only made this first cut to check if my sizing was right. Now, based on this I proceeded to cut the remaining boards.
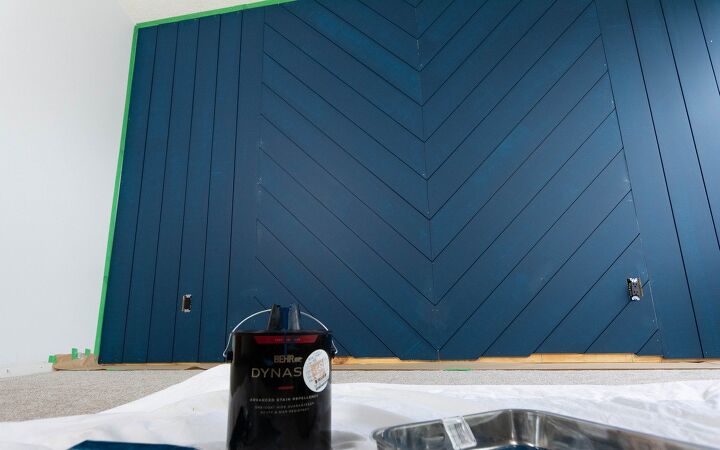
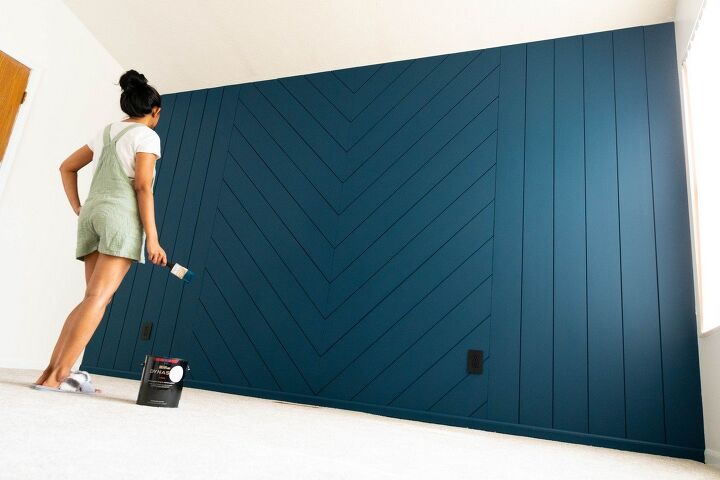
STEP – 3 – PAINT
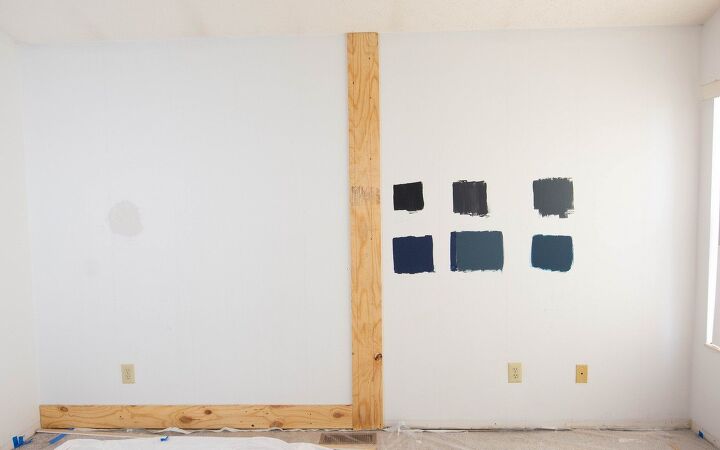
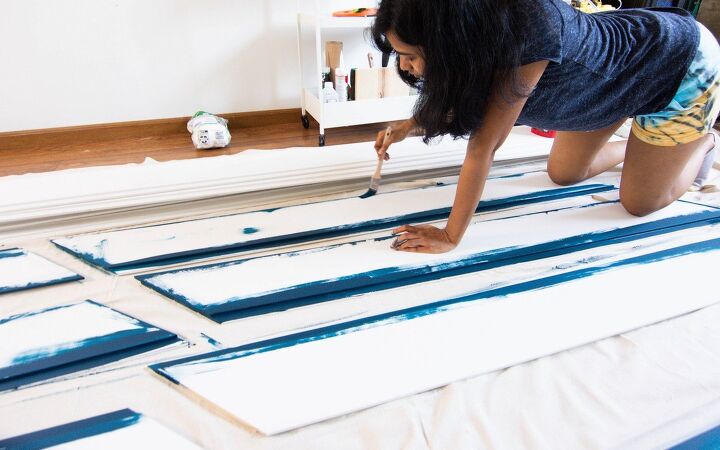
Before installing, paint the boards. Particularly the groove areas. Once you fix the boards on the wall, these grooves will be hard to paint. So, painting beforehand makes the job a little easier. I tried out a few color samples on the wall before adding the wood frames and we finalized on a shade called ‘nocturne blue’ from Behr in matt finish. Both of us just loved this color! It looks like peacock blue with a green tint.
STEP – 4 – MOUNT - More pics available at my blog - https://www.thenomadstudio.com/how-to-create-an-accent-wall-with-shiplap-diy/
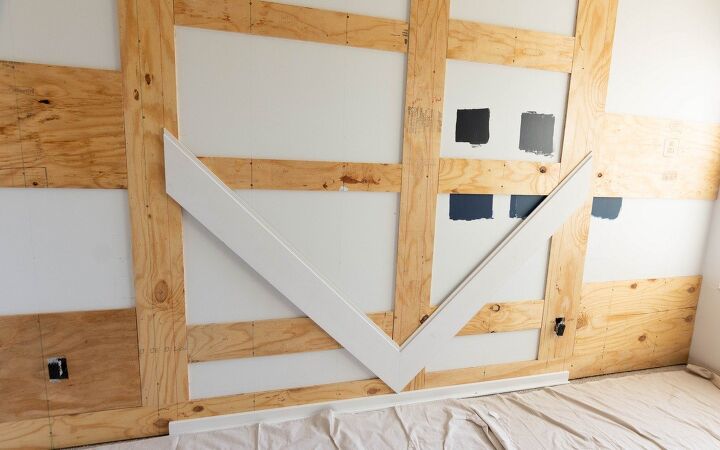
First I removed the bottom guide strip and started by installing the first verticals on either side. Checking the level is very important here. Also, you definitely need someone to help you with this install. Once you mount the first board on perfect level rest will be easy and the rabbet joints will perfectly sit with equal spacing. On the left side, we had a socket. So, I measured, marked and used a jigsaw to cut it out on the board. The end boards have to be cut to size, so I will do it last.
Next, I placed the chevron pieces. Just need to make sure everything is aligned and maintain equal gaps.
After you get to the top, you have to pretty much measure and cut each and every piece one by one.
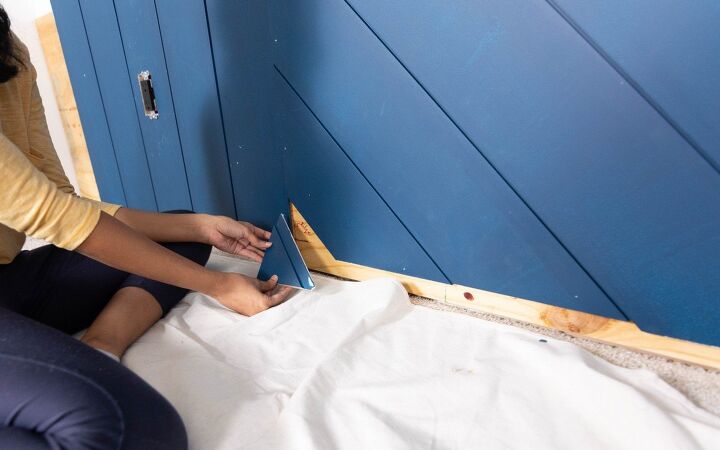
Same thing goes for the bottom. This took me a whole day even though I had help. The bottom panels should be cut an inch short, so that you will have clearance to slide the panel in. It’s ok if the Bottom is uneven. They will hide behind the base trim.
STEP – 5 – FILL HOLES & FINAL COAT
Once you have fixed all the boards, time to fill the nail holes and do a final coat.
STEP – 6 – SOCKET AND BASE TRIM
Finally, paint the base trim and install. Then add the wall socket plates.


Comments
Join the conversation
-
That's one of the prettiest walls I've seen! Job well done!
-
Great job! I heard a designer say to paint light plates and plug in plates same color as wall. Just a thought!


Frequently asked questions
Have a question about this project?
What was the cost?
Could you use wood grain vinyl flooring that already has adhesive backing