


Letter Tile Wall Art

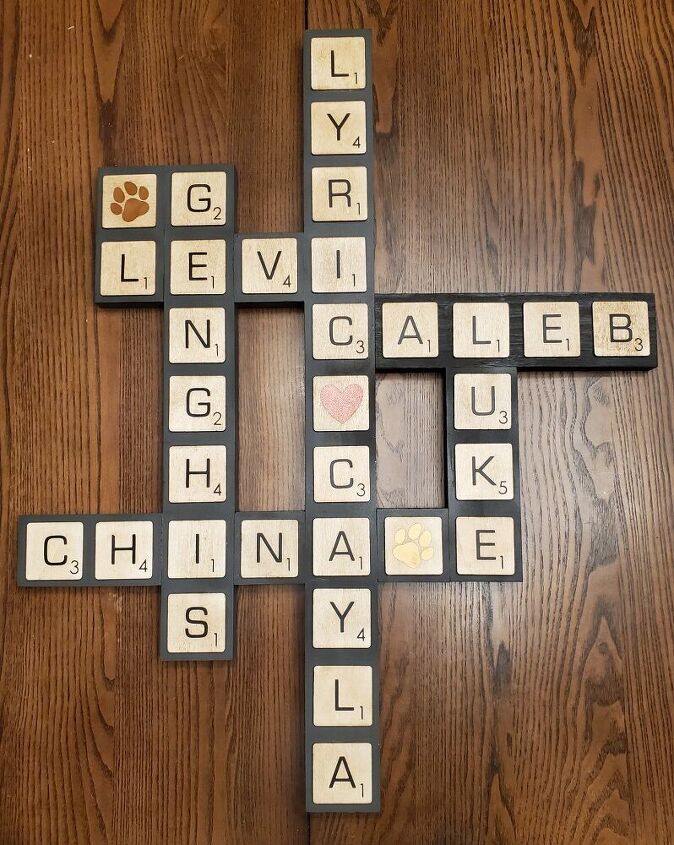
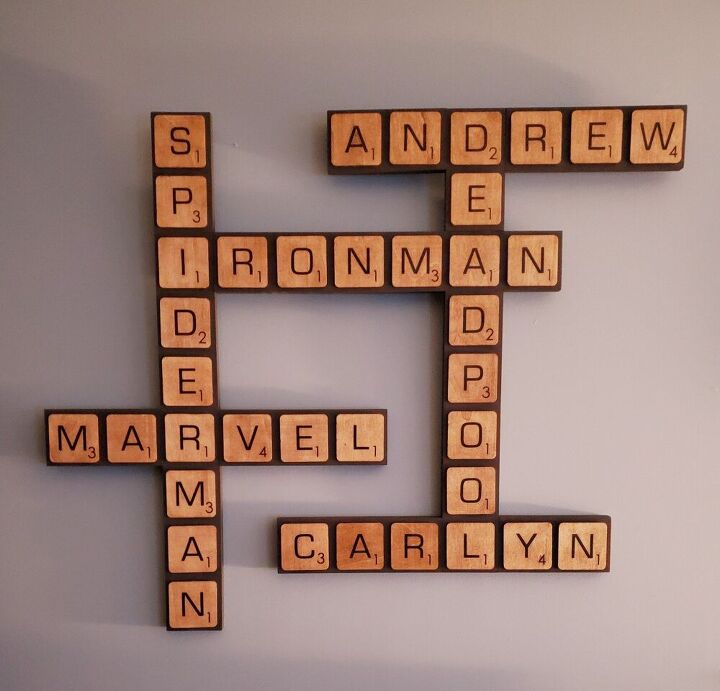
I've been on a Scrabble kick lately. For Christmas, I made a letter tile wall hanging for each of my three daughters with their family names. My youngest doesn't have her own family yet so hers was made with her favorite superheros' and her boyfriend's names. Now I'm making one for my friend to memorialize her fur babies past and present.
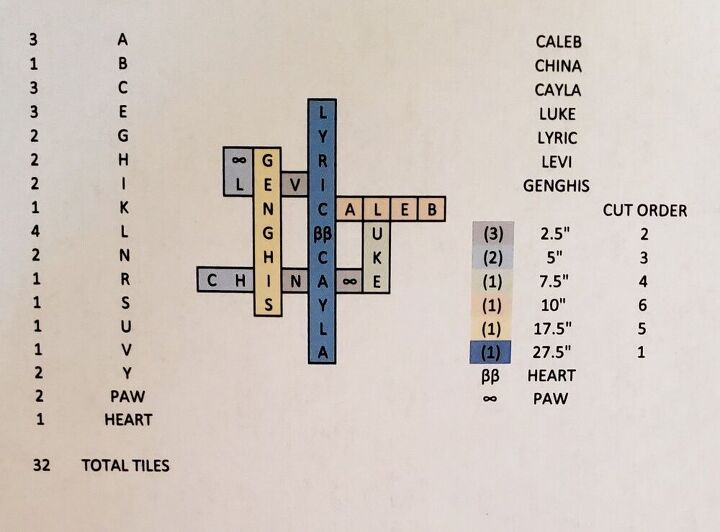
Before doing anything, I had to map out the project, including the names to be used, the layout of the letters, the sizes to cut the boards, a letter count for the Cricut design, and even the order of cutting to make the most of my boards.
You can't skip this step, as everything depends on it.
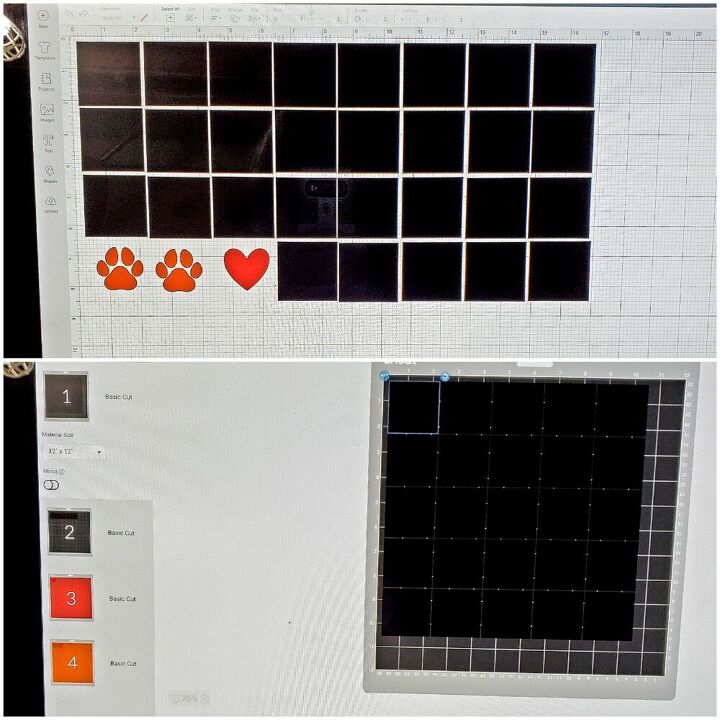
After the initial design was created, I set up a new project on my Cricut, using Design Space. The font for the tiles was purchased on Etsy. I used Oracle 651 vinyl sheets in three colors...black for letters, red for the heart, and gold for the paw prints. You should have familiarity with the Cricut before doing this.
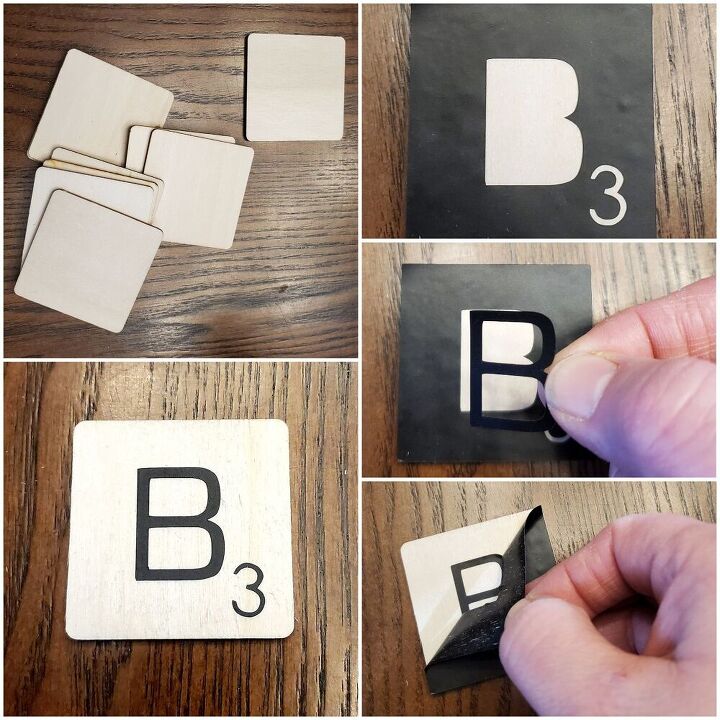
Once the vinyl was cut, it was time to apply them to the wood squares. I purchased a bag of 2" wood sqares from Amazon. They are about 1/8" thk. First I peeled the square piece of vinyl to use as a placement template. Next I applied the letters and numbers in place. Lastly, I peeled off the vinyl square to reveal a perfect letter tile.
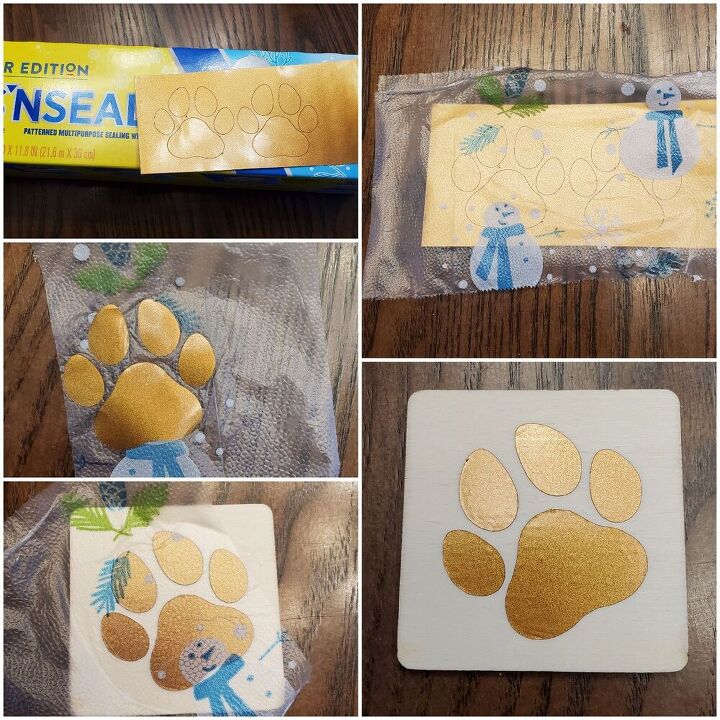
Applying the paw prints was a little trickier. First I smothed a piece of Press and Seal plastic over the paw print - sticky side down on right side of the paw. Next, I peeled away the vinyl from the backer paper, slowly, making sure the vinyl is sticking to the plastic as I go. Then, I apply the vinyl to the wood and remove the Press and Seal. Thats how to transfer a cut with multiple pieces and keep exact spacing of the design.
After all of the tiles have been lettered, it's time to build the base. I used 1x3s for this project. It took just under 7' total. I cut the pieces according to my plan.
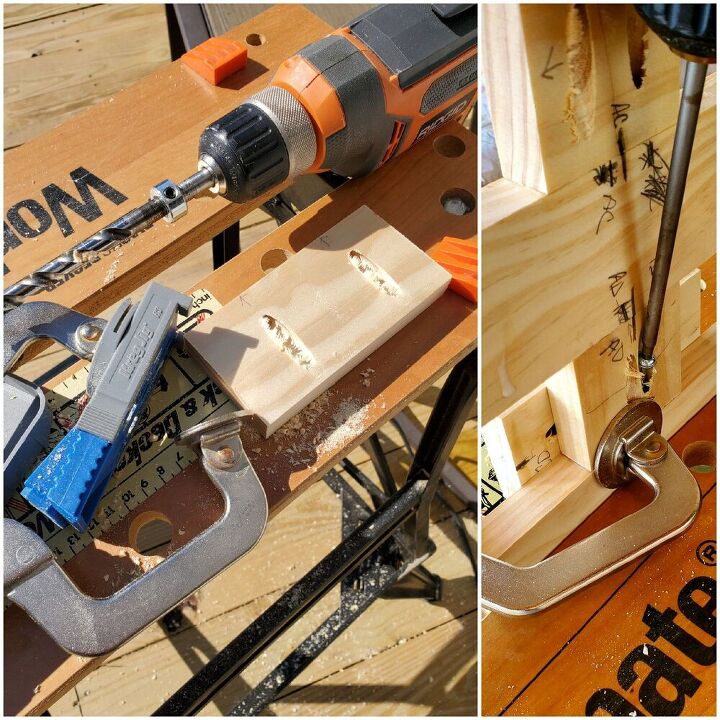
I then determined where to make pocket holes for the screws. To make the pocket holes, I used a Kreg jig, a Kreg clamp, and a drill.
You might be able to skip this step and just use glue but I can't comment on the outcome of that.
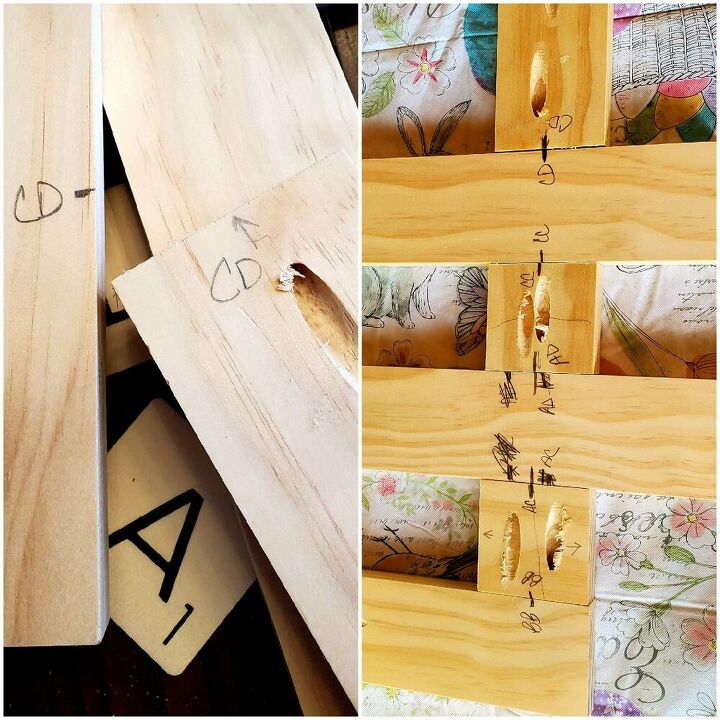
Next, I set my wood pieces in place with the backside facing up. I marked each connection point with letters. I then put each piece in place by carefully measuring their location. I notated a line for reference when screwing the pieces together. (see above photo of Kreg pocket holes)
Use a dab of glue at each connection.
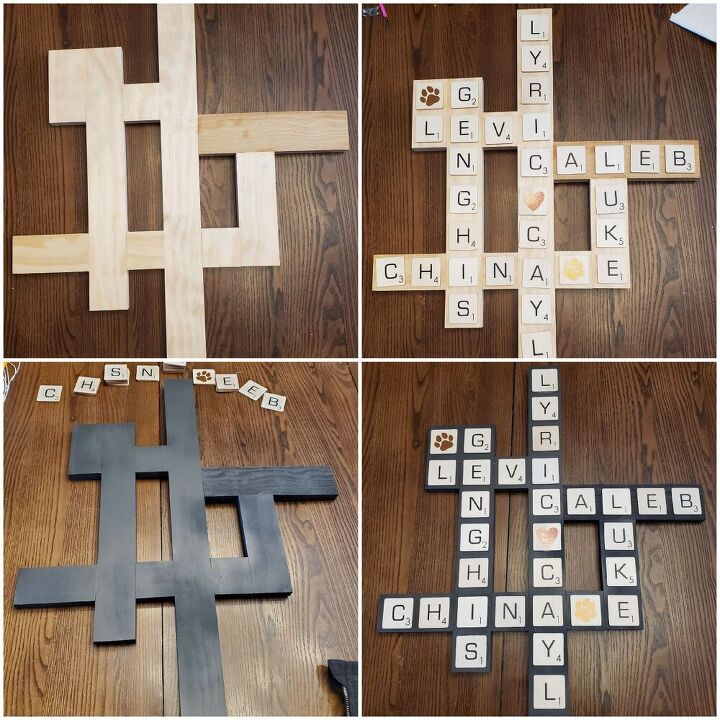
This is the base. I placed the letters on top to confirm everything was in order. I then spray painted all sides of the base with Rustoleum Chalked in Charcoal. Finally, I glued the tiles in place.
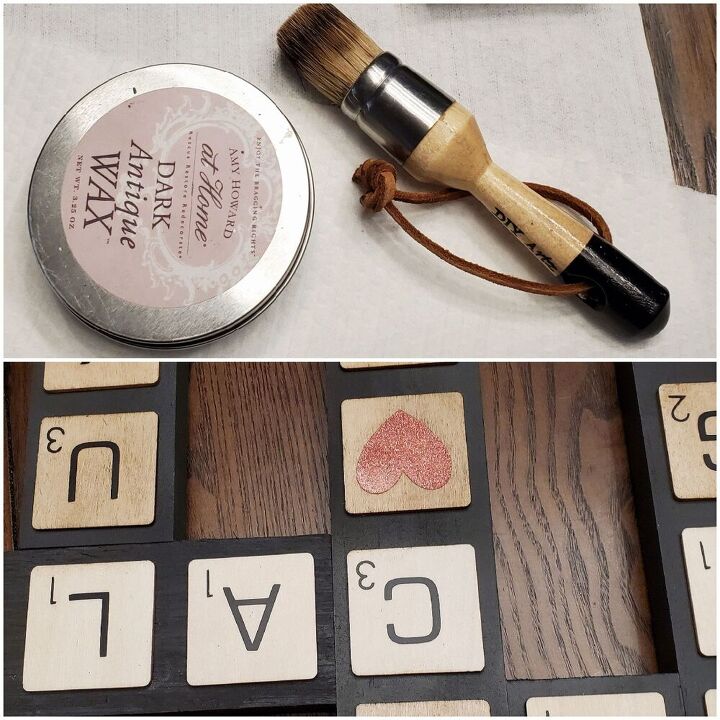
To finish it off, I took dark wax and a stiff brush and applied wax to each tile.
The finished piece. It measures about 24" w x 27" h. I nailed a sawtooth picture hanger on the back.
This is my youngest daughter's.
Comments
Join the conversation
-
I must admit, I’ve got an old scrabble game sitting here at my house. Been thinking about what to do with it. Now I know! Thanks for the inspiration!
-
What a great idea! I love them!


Frequently asked questions
Have a question about this project?