


Buffet Makeover: From Sad to Glorious!

by
Anita K
10 Materials
$170
2 Weeks
Medium
Don't overlook that old, worn piece of furniture! It is just a diamond in the rough, waiting for you to polish it and give it new life. This buffet is the perfect example!
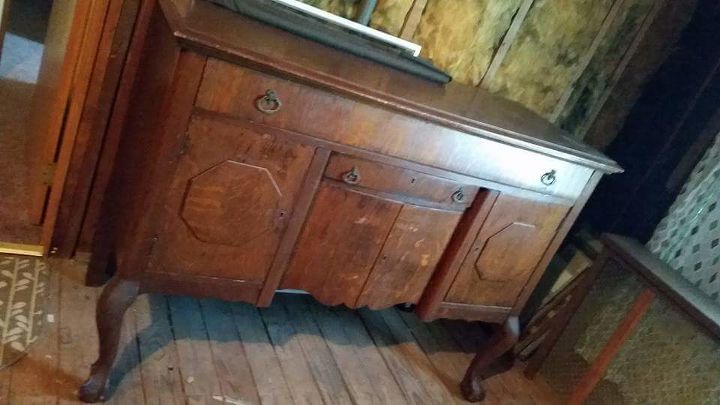
Our neighbors were moving and wanted to get rid of this old buffet - I bought it from them and set to work. It was in very sad shape: broken claw foot, water damage, and broken back leg. Yikes! My husband and I saw the potential in this awesome piece of furniture and took on the challenge.
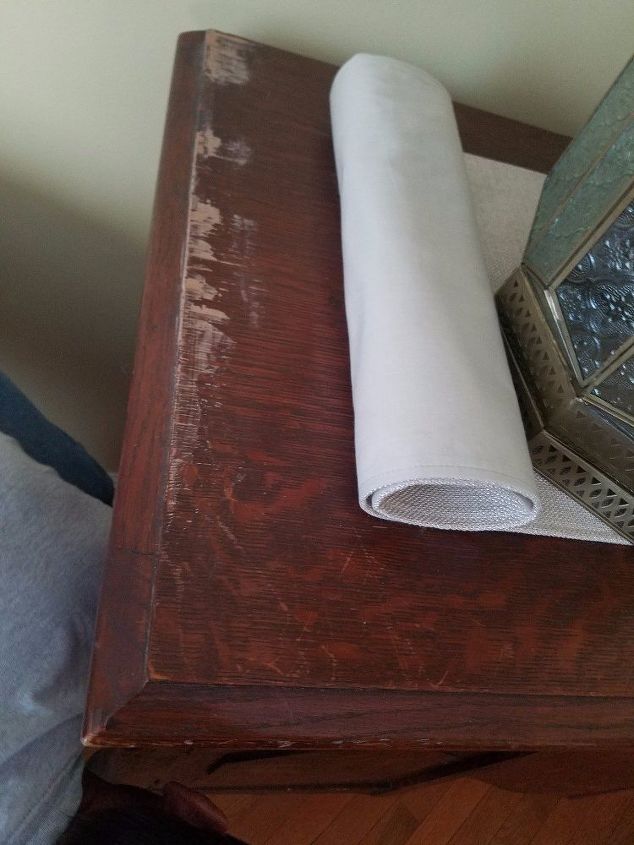
My husband filled in the spots where the veneer had flaked away on the edges. He then used wood glue to reattach the broken claw foot, and used wood screws and wood glue to repair the rear broken leg. Once dry, he lightly sanded the areas where he used wood filler. The top of the piece was also sanded. (He did this while I was outside, working on another project - sorry, no pics!)
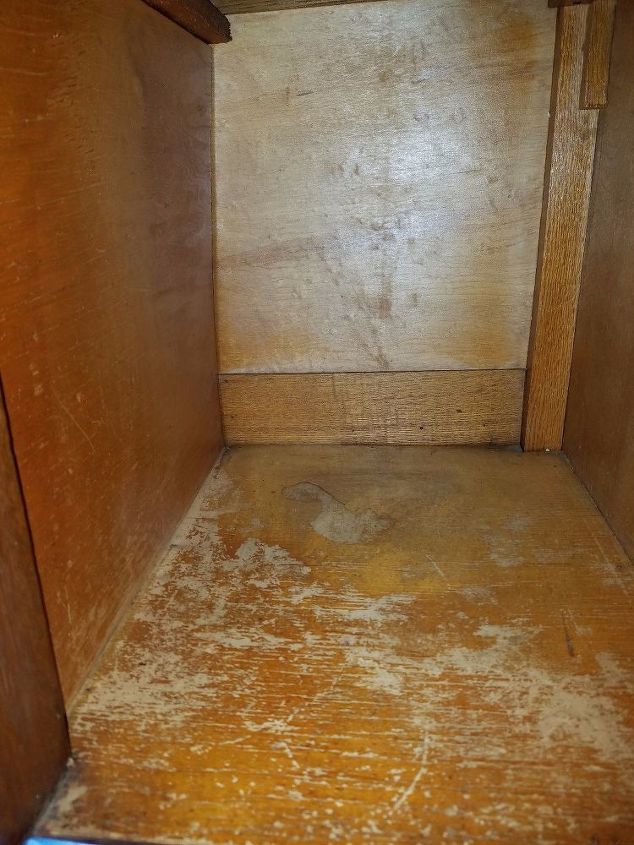
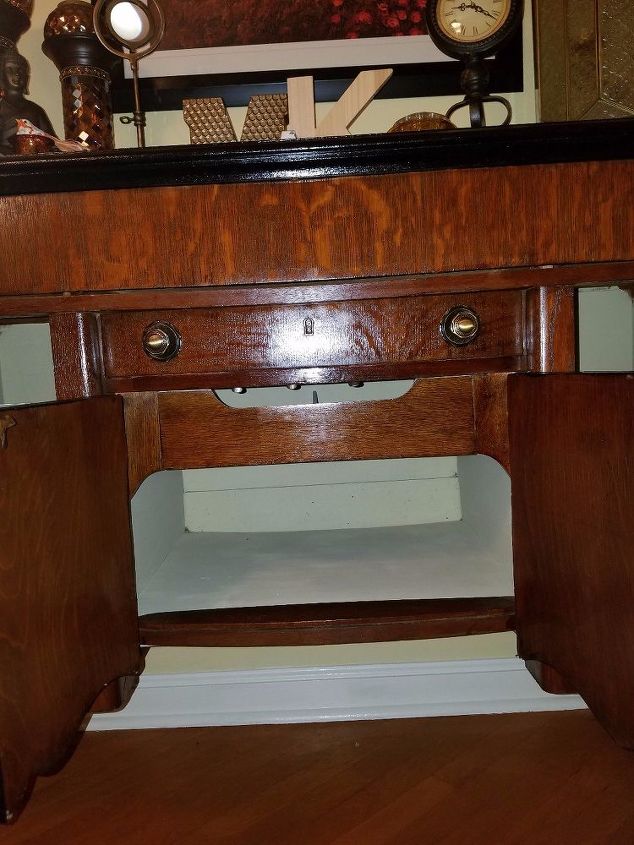
The inside of the piece also required a lot of work - here is one side of the interior - I deglossed the entire piece, inside and out. The complete interior, including every drawer and both side cubbies - was painted with three coats of chalk paint in a linen color. I used a wide brush designed for chalk paint - what a lifesaver! Highly recommend using one for larger areas.
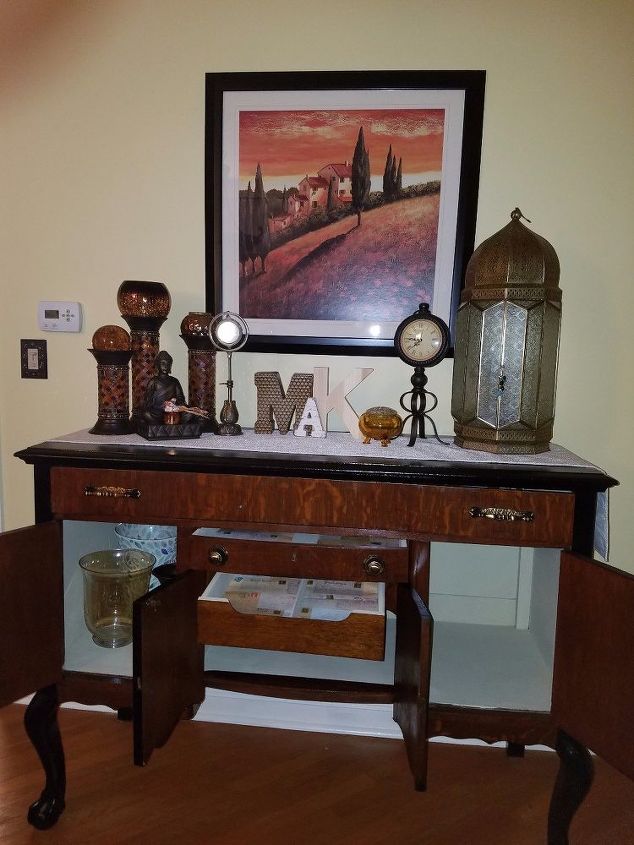
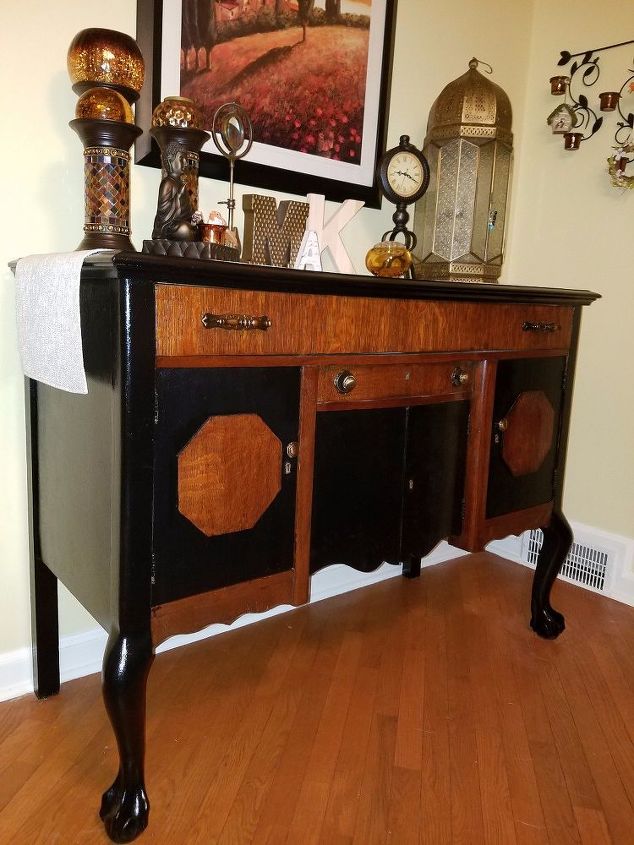
My plan was to showcase as much of the tiger wood veneer as possible. The drawers were all stained in red mahogany. The inside of the doors were also stained. And...the hexagon shapes on the doors were stained, so that feature would pop against the black doors. To apply the stain, I used sponge applicators. I wiped away any excess paint and reapplied, until the desired color was achieved.
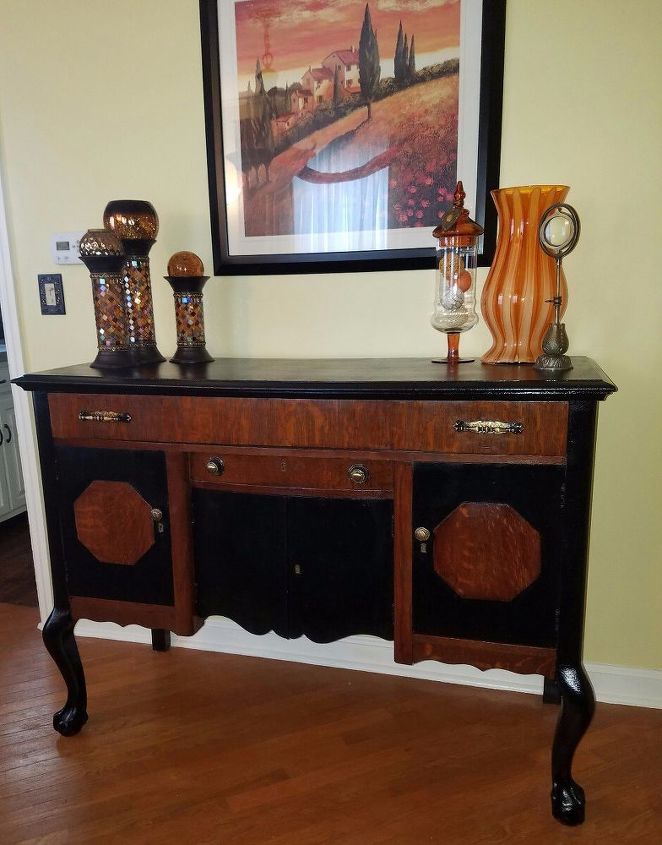
I chose to paint this piece to match our decor - and opted for black so that it would have impact against our newly painted pale walls. The top, sides, legs and front doors were painted in high-gloss black. I used a small roller brush for the black paint.
Tip: It is important to allow for sufficient drying time in-between coats of High Gloss Enamel paint. Use a fine-grit sandpaper in-between coats, then use a damp lint-free cloth to wipe away any residue. This allows for proper adhesion of each coat of paint, and also results in a smooth finish.
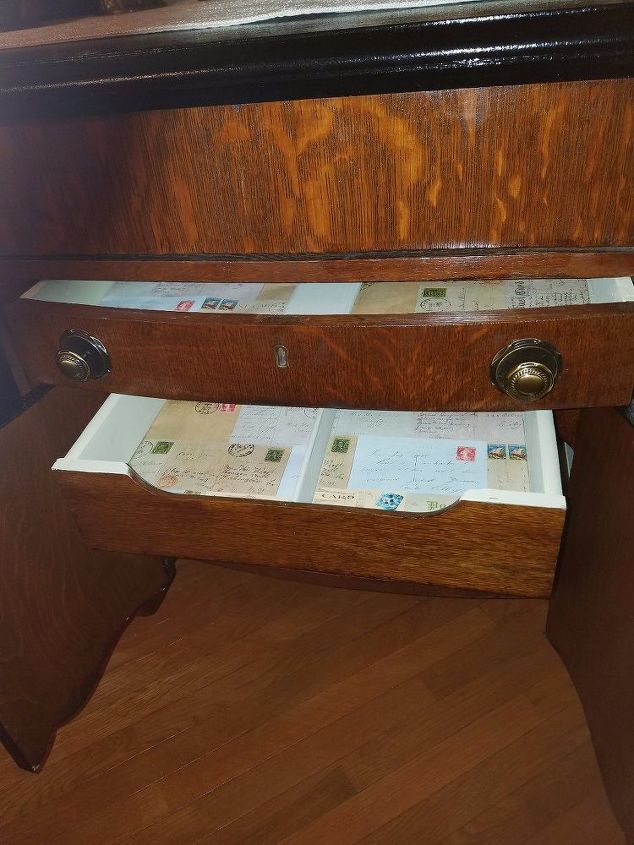
I cut poster board to fit the inside of the two small drawers. Then, wrapped them in heavy gift wrap in a fun, postcard print. I like to incorporate a bit of whimsy in every piece I refinish.
The handles presented a problem - they were not original to the piece - I noticed they were smaller than than the wear pattern on the drawers, and too small to work efficiently. I saved them for a future project! I found the perfect hardware in a hammered brass. My husband drilled holes for the two side doors, which had no pulls, originally, and the long top drawer. The keyholes are original - although we needed pulls, not keys, to open the doors!
A project like this requires some planning and patience - enjoy the process and take your time - and you will create a piece that your family will enjoy for years.
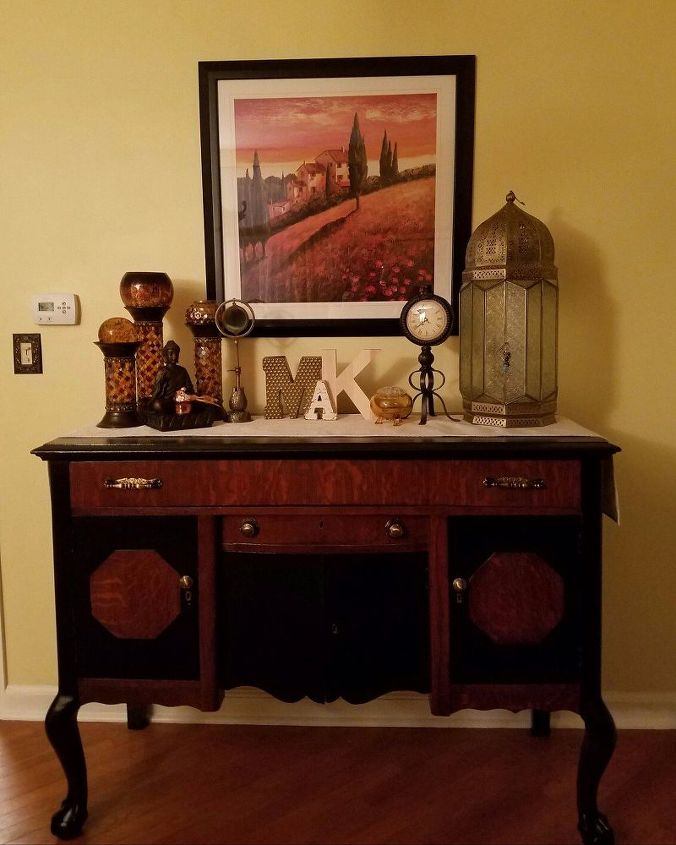
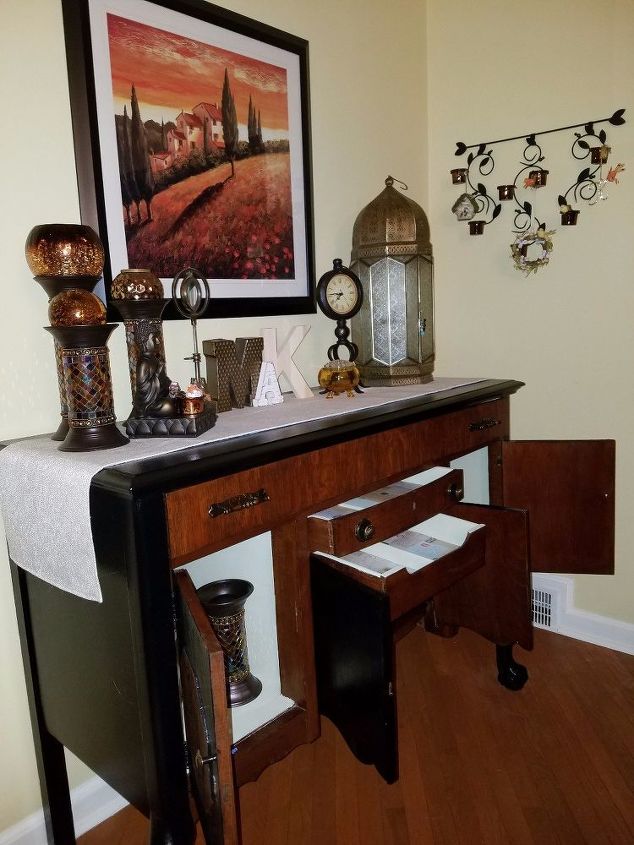
Now, we have a gorgeous buffet in our dining room - it offers tons of storage for dishes, glasses, silverware and place mats - and....bonus!....another display space for decor! It was a project my husband and I enjoyed working on together and the final product is one we are proud to have in our home!
Comments
Join the conversation
4 of 23 comments
-
Wow! Your efforts paid off quite nicely. I absolutely love this whole project especially the linen painted interior. That would make it so much easier to spot things placed inside; whoever would have thought to do that? A really great blend of paint, stain & hardware!
-
Fantastic job


Frequently asked questions
Have a question about this project?