


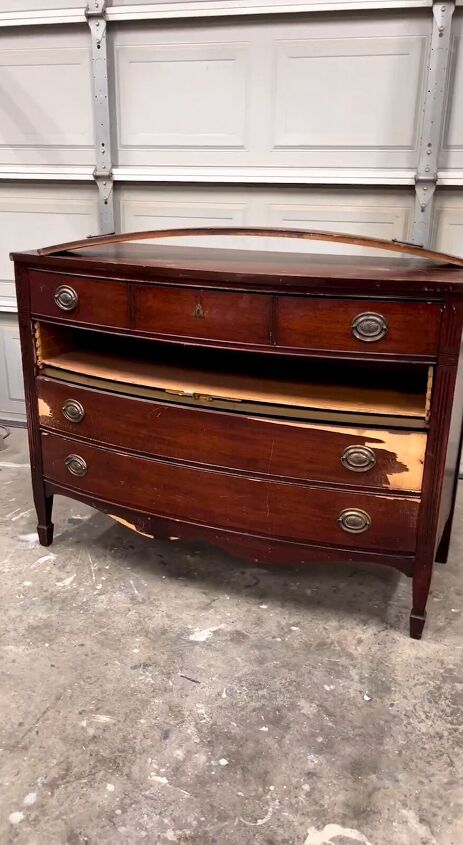
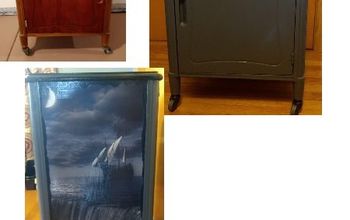
How to Turn an Old Dresser Into DIY Fluted Drawers
Adding fluted drawers is a fantastic way to transform a traditional dresser into a modern and stylish piece of furniture. In this step-by-step tutorial, I'll guide you through the process of refinishing an old dresser by incorporating fluted drawer fronts.
With the right materials and some creativity, you can achieve a stunning result that will impress everyone. Let's get started!
Tools and materials
- Old dresser
- Wooden dowels (sized to your preference)
- Scrap wood
- Miter saw
- Wood glue
- Nail gun
- Wood filler
- Sandpaper (various grits)
- Primer
- Paint (color of your choice)
- Paintbrushes
- Screwdriver
- Optional: Drawer pulls or knobs for a finishing touch
- Safety goggles and ear protection (when using power tools)
Steps
Step 1: Prepare Your Workspace
Begin by setting up a clean and well-ventilated workspace. Lay down a drop cloth or newspaper to protect the area from paint and wood filler.
Step 2: Remove Hardware and Drawers
Use a screwdriver to remove any knobs, handles, or hardware from the dresser. Take out all the drawers and set them aside.
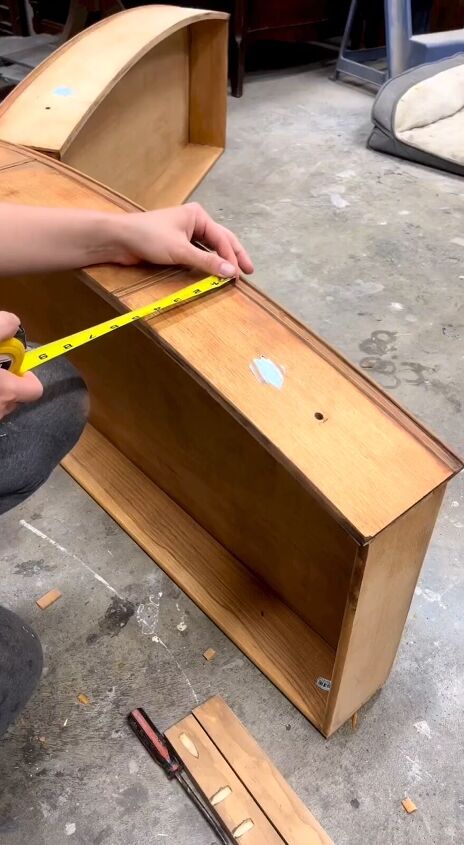
Step 3: Measure and Cut Dowels
To create the fluted look on your drawer fronts, measure the height of each drawer and decide how many flutes you'd like to add.
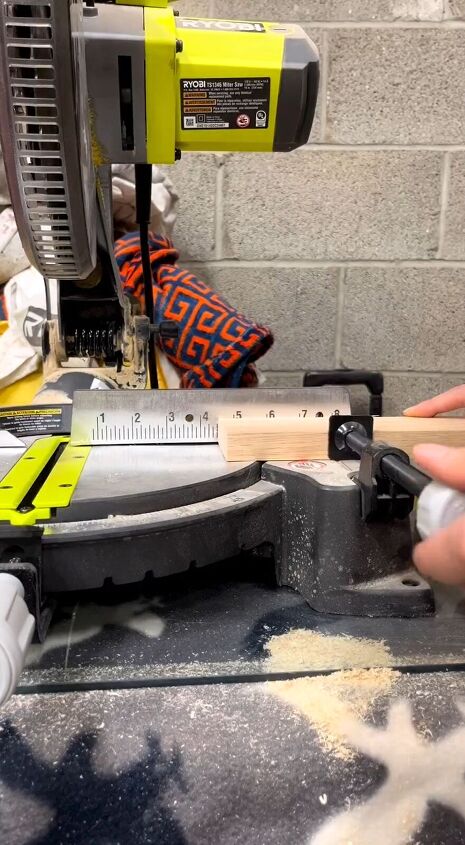
Then, set up your miter saw and clamp a piece of scrap wood to it. This will serve as a guide to ensure consistent dowel lengths.
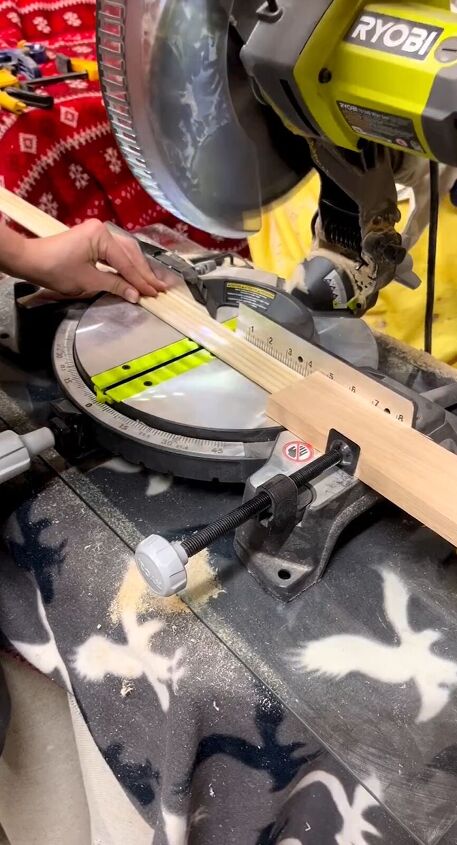
Cut the wooden dowels into the desired lengths for each flute.
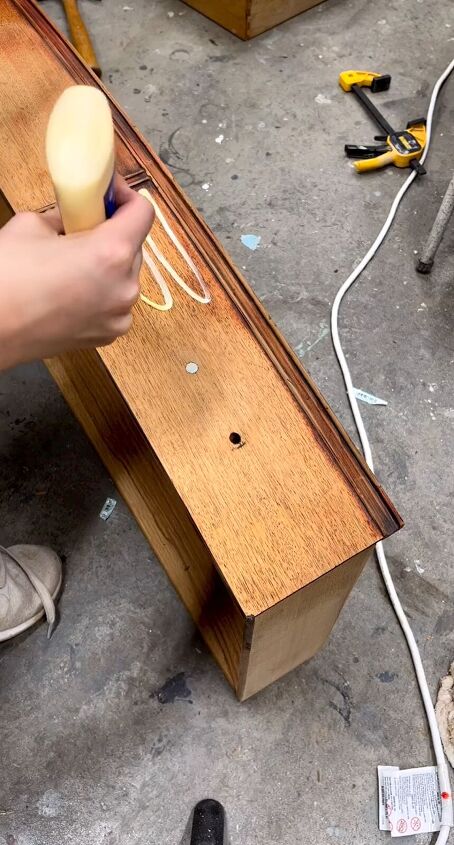
Step 4: Attach Dowels to Drawer Fronts
Apply a generous amount of wood glue to the face of the drawer and the back of each dowel and use a nail gun to secure them to the drawer fronts.
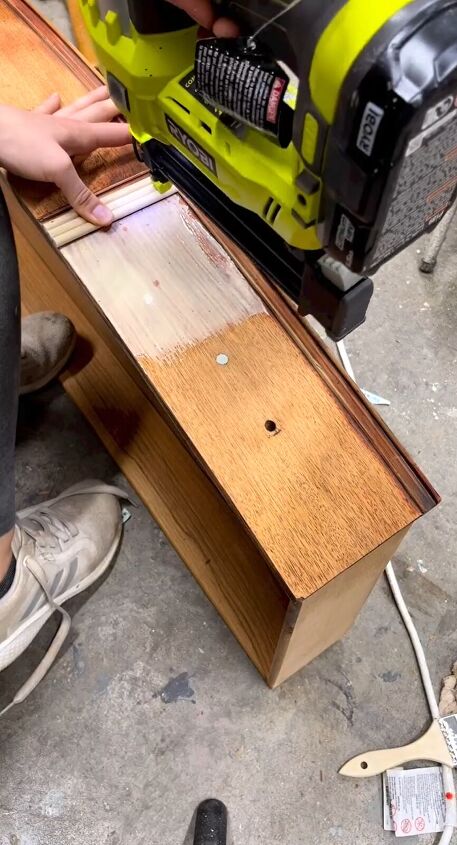
Make sure the dowels are aligned properly. Allow the glue to dry according to the manufacturer's instructions.
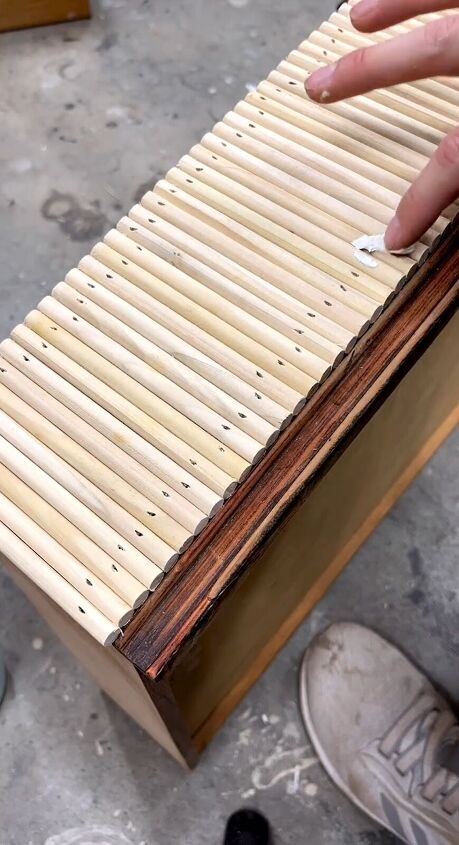
Step 5: Fill Holes and Sand
The next step is to fill in all the holes left by the nails with wood filler. I did this using my fingers. Once the filler is dry, sand the entire surface of the dresser, including the dowels, to ensure a smooth and even finish. Start with coarse-grit sandpaper and gradually move to finer grits for a polished look.
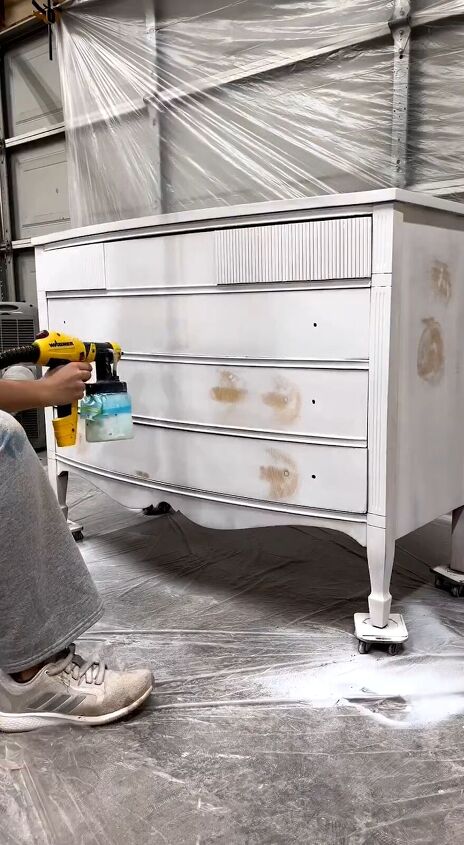
Step 6: Prime the Dresser
Apply a coat of primer to the dresser to create a smooth and even surface for painting. Allow the primer to dry completely before moving on to the next step.
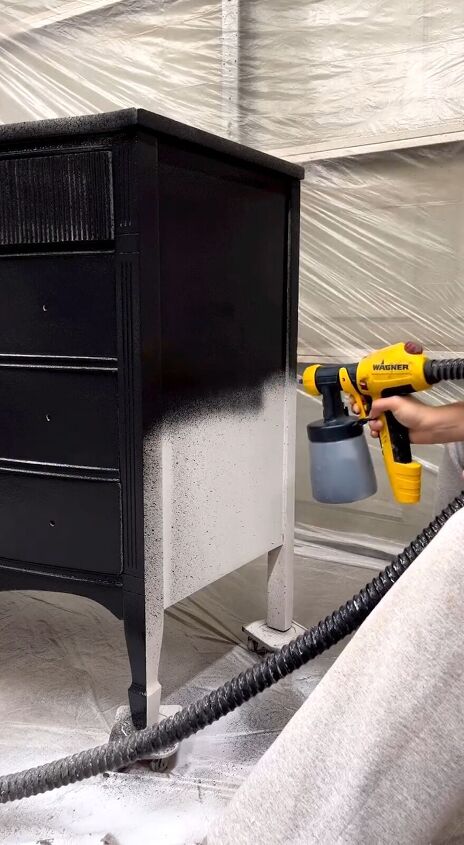
Step 7: Paint Your Dresser
Now comes the fun part! Paint your dresser in the color of your choice using a paint sprayer gun or a paintbrush. Apply multiple coats if needed, allowing each coat to dry before applying the next. Be sure to paint the dowels and all the nooks and crannies for a professional finish.
Step 8: Reassemble and Finish
Once the paint is dry and you're satisfied with the finish, reattach the hardware to your dresser drawers. Slide the drawers back into the dresser, and your fluted drawer dresser makeover is complete!
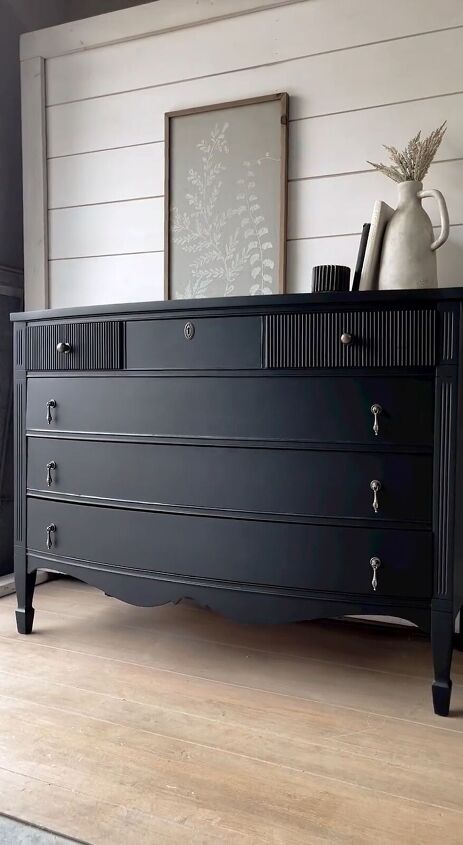
DIY fluted drawers
Congratulations! You've successfully transformed your old dresser into a stylish piece of furniture with fluted drawers. This DIY project not only adds a touch of modern design but also gives your dresser a unique and personalized look.
Feel free to experiment with different colors and finishes to match your decor. If you enjoyed this tutorial, share your thoughts in the comments below. Happy crafting!
Follow @rhettsrefinishes on Instagram for more DIY ideas.


Frequently asked questions
Have a question about this project?