


Log Cabin Bird House

by
Eamon Walsh
2 Materials
$1
2 Days
Easy
The idea to build this log cabin bird house came after storm Ophelia passed over Ireland on the 16th October 2017 causing a lot of damage to property and also uprooting and knocking trees. During a brief let up in the winds I ventured outside for a look around only to hear and see a hedge nearby alive with birds taking shelter from the storm. I don't know if they were frightened or if it was the sheer number of them but the noise they were making was deafening. I would never cut down a tree to make a bird house so I spent some time the following day collecting small branches and sticks that had been broken or had fallen during the storm. This project was made using only hand tools.
{
"id": "4417517",
"alt": "",
"title": "",
"video_link": "https://www.youtube.com/embed/6g-LqE_ddE0",
"youtube_video_id": "6g-LqE_ddE0"
}
{
"width": 634,
"height": 357,
"showRelated": true
}
Firstly have a look at the video above to see how I built the log cabin from start to finish.The only hand tools needed for this build are: A hammer Hand saw Tenon saw Hatchet Utility knife and blades Materials: Sticks Some pieces of pallet wood (Roof) Panel pins Polythene Grass sod Chicken wire Staples Glue
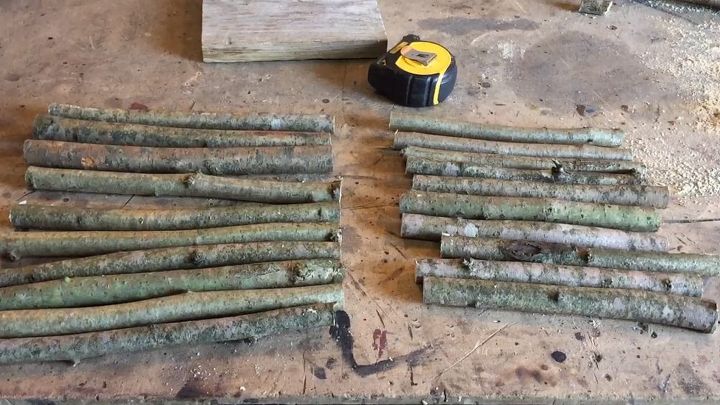
I started off by cutting a piece of the pallet wood to 8 inches (200 mm) x 6 inches (150 mm). This piece will eventually become the floor of the bird house but to start I will use it to set the size of the cabin. Using my tenon saw for a finer cut, I cut a number of pieces of sticks for the front, back and sides.
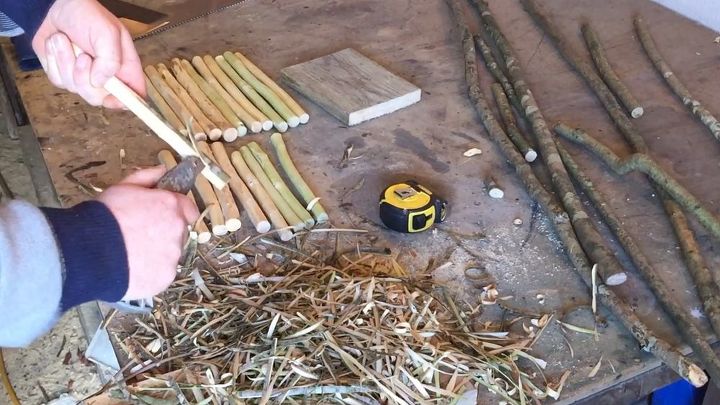
Next using a utility knife I striped all the bark from the sticks. The sticks I used were from a mix of 3 trees. Ash, hazelnut but I don't know what the third type was. The bark came away easily as the wood was still very fresh.
I set the sticks around the pallet wood base and marked the intersections where they cross over with a pencil.
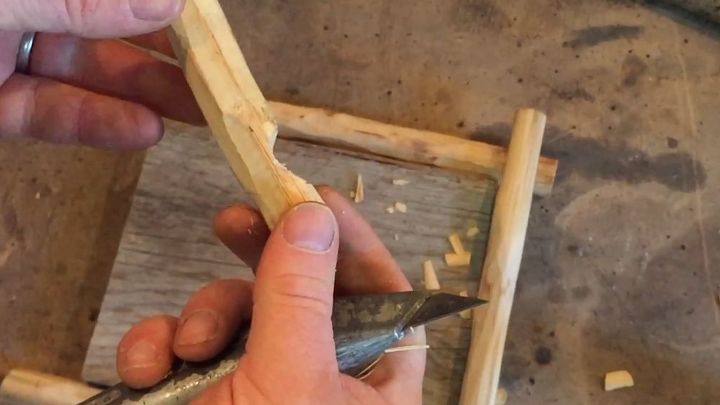
I then marked a curve to half the width of the sticks and set about carefully cutting out the curve with a sharp utility knife. This process does take a bit of time. I test fitted the joints as I went and did adjustments where required.
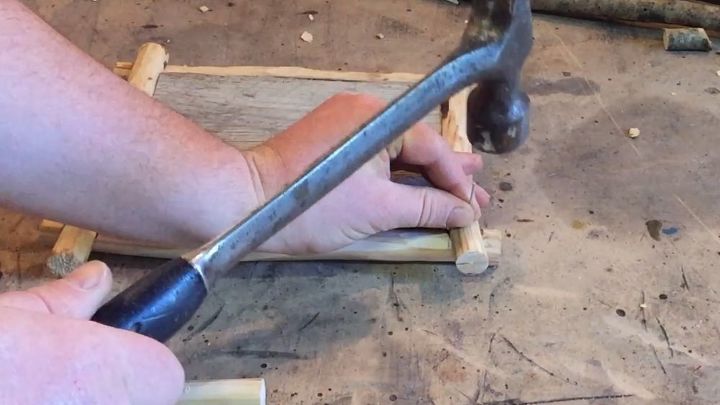
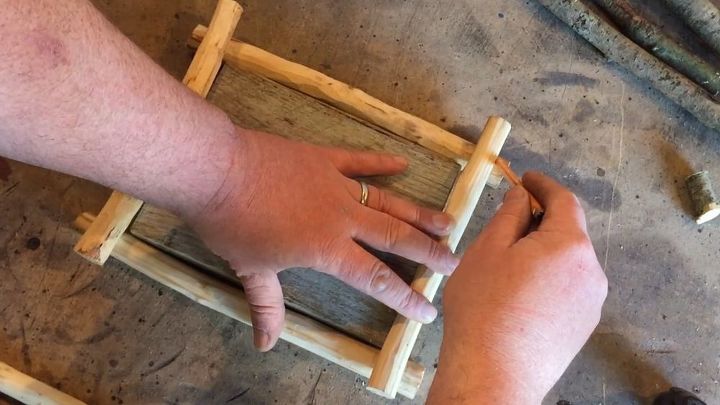
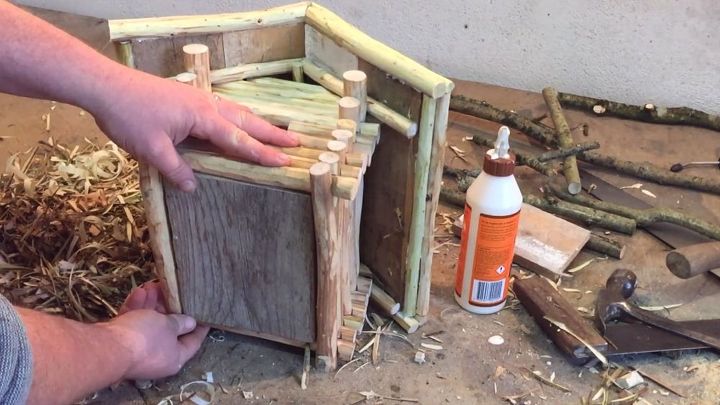
When I was happy with the joints I applied a little exterior wood glue before nailing it with a panel pin in each joint.

Once the first set of logs (sticks) were pinned it was just a matter of fitting each log in the same way as before until I reached the height I was happy with. For the entrance I fitted a log as normal and then cut the ope before pinning it. For the last two logs on each side I left then about a half inch longer, this was to create an overhang for the roof.
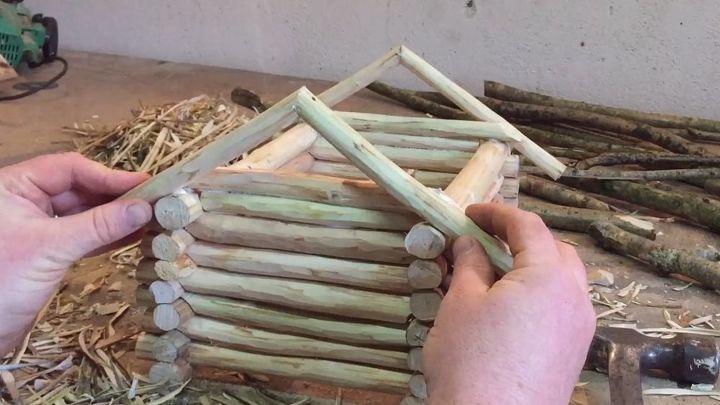
The roof pitch is somewhere around 25-30 degrees. I cut a few rafters and pinned them together before attaching them to cabin. I was going to add more rafters but felt it did not need them as these rafters were going to be attached to the gables and this would be good enough to hold the roof. For the gable logs I marked them off the rafters to get the correct angle to cut them. I then pinned them in the same way as before.
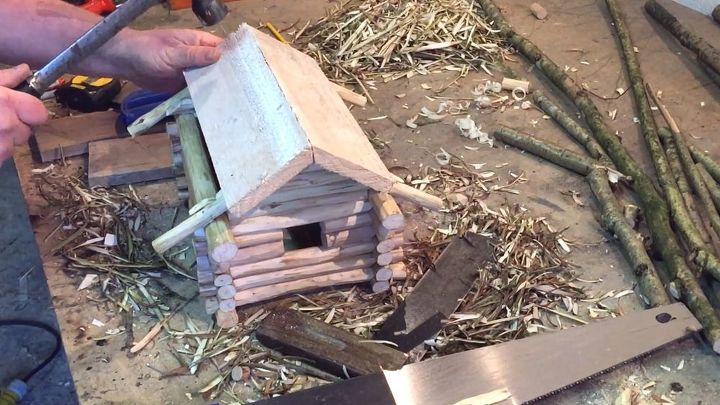
I needed something to support the grass roof so i used some pallet wood I had. Using a hatchet I cut off the edge to form a miter along the ridge where the two pieces of the wood would meet. You don't really have to do this as it will all eventually be covered but I did. When I was happy with the fit I attached all the pieces of wood for the roof using panel pins.
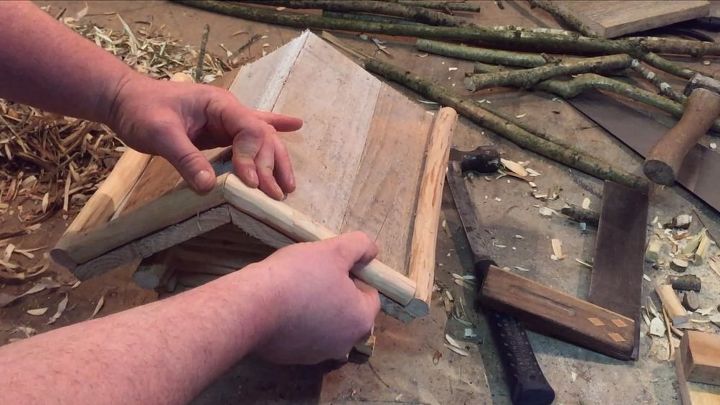
I added some trim/fascia also make from sticks all around the edge of the roof . This was to hide the edges of the grass when it was fitted and also to hide the edges of the pallet wood i used for the roof.
At this stage I attached the base that I had cut earlier. I just used longer panel pins to do this. I may need to remove the base again some time to clean the inside and it should be easy enough to it by removing the pins I put in.
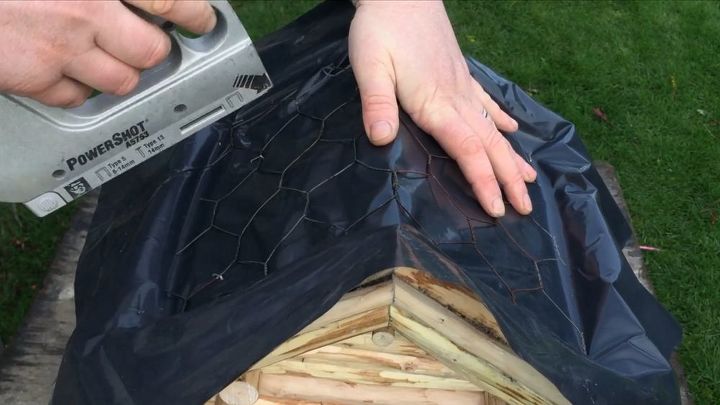
To help protect the wood and waterproof the cabin I stapled on some polythene and then some chicken wire. This was to hopefully prevent the grass sod from slipping on the polythene. I trimmed off some of the extra polythene at this stage.
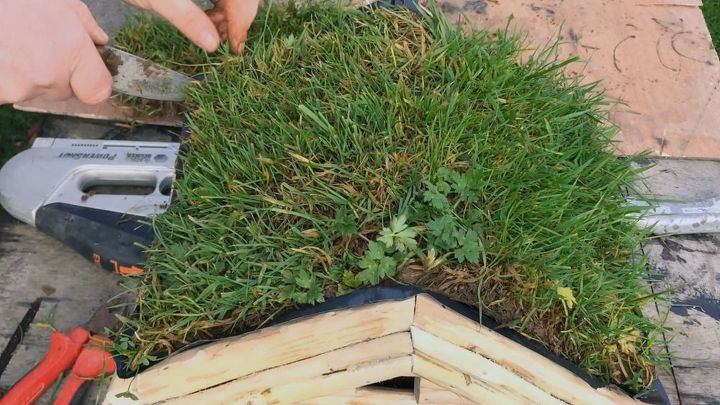
I went to a corner of my garden, far away from view and using a knife I cut up some grass sod. Take your time doing this and peel a little at a time until it is removed. Place the sod onto the roof and gently pack it into place and cut off any excess. I am not entirely sure how well the grass roof will hold up over time. It should be fine for autumn, winter & spring in Ireland anyway but I fear in the summer months it will dry out if not watered. Time will tell.
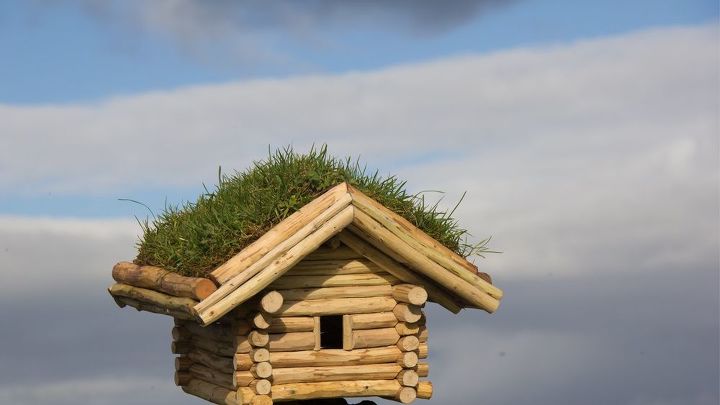
And this is it! The finished log cabin bird house. I hope you like it and maybe have a go making one. It is an easy project to make using only a few hand tools but it will require a little patience when doing the joints.
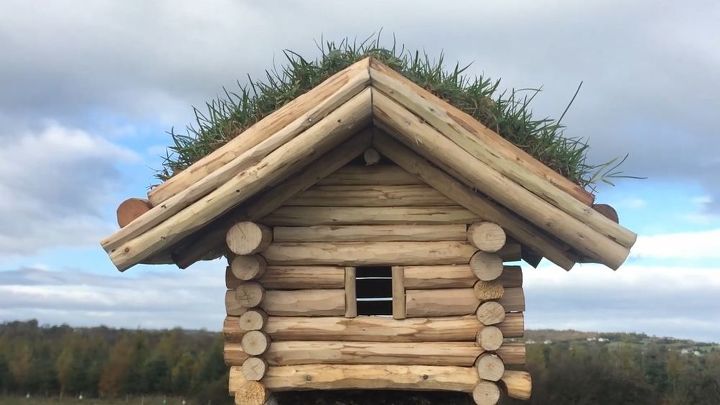
This will probably be the biggest log cabin I will ever get to make so I think that's why I spent the time doing all the joints where I could have came up with something a lot quicker and easier to make. I am glad I spent the time making it and am very happy with the result and I think it was a good way to use some of the fallen wood from the storm. The rest will probably end up in my stove!If you would like to see more projects from me check out my YouTube channel here: https://www.youtube.com/c/EamonWalshDIY


Frequently asked questions
Have a question about this project?