


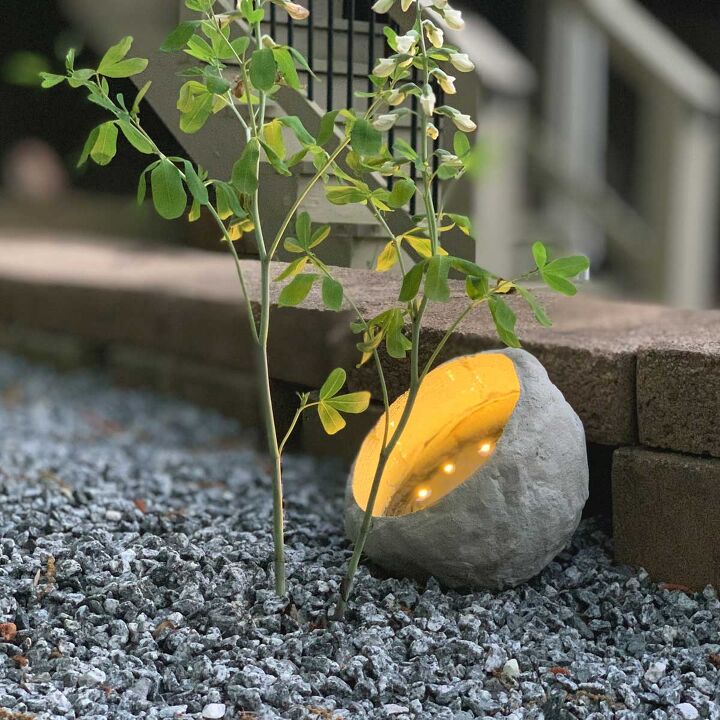
DIY Concrete Rock Solar Light
There’s nothing more beautiful and welcoming than a warmly lit path, or garden. And concrete rock solar lights are perfect because during the day, the unsightly black lights are disguised.
Probably the best way to add curb appeal to your home is by adding solar lighting to your outdoor space.
When it comes to outdoor lighting, your options are hardwired, plug-in or solar power.
Solar lights are an excellent choice for DIY’ers because they are both easy to install and low-cost to purchase and to run.
 Video processing...
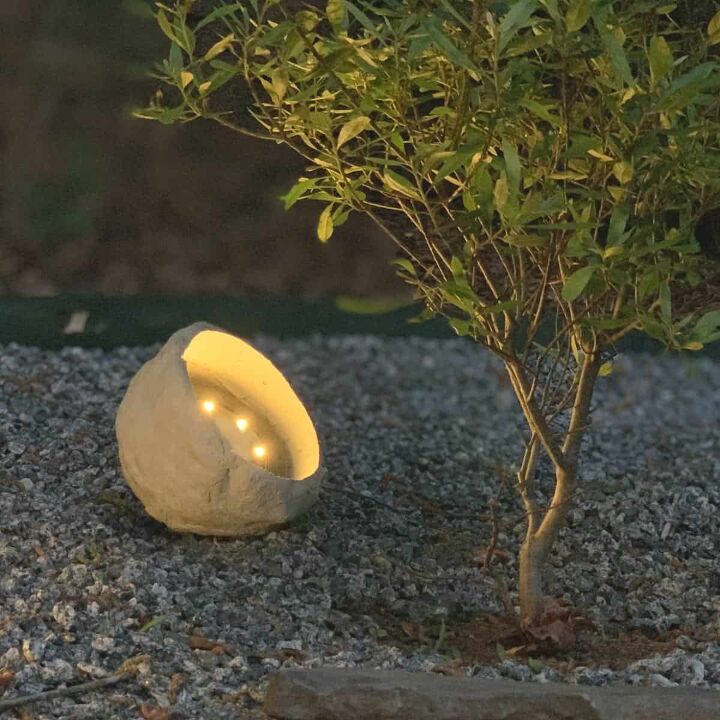
These DIY concrete rocks have been in my plans for years, and after finishing the low-maintenance gravel garden last week, I thought a nice finishing touch would be to add landscape lighting.
When I bought the lights and placed them in the garden, some looked great, but some looked oddly out of place, depending on what vegetation I had to hide them in.
I already had a small semi-rock garden area, so hiding some of the lights in fake landscaping rocks was the perfect solution.
A simple, elegant uplight, illuminating the foliage makes it look beautiful at night, plus during the day, it‘s the perfect garden decor.
And if you have something like a garden sculpture, a bird bath, or garden fountain, then this is perfect for that!
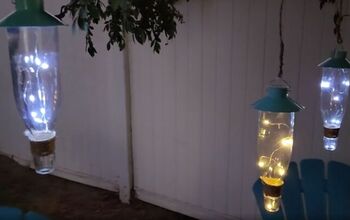
Or how about this cool patio solar light project that’s a light stand with twigs in a floating concrete base.
* Important Note: By the way, the solar light units can’t be fully submerged in water, so I’ve designed drainage for the concrete rocks.
However, if you live anywhere where the temperature falls below freezing and water sits inside the concrete rock, then it’s possible that expansion and contraction can cause it to crack.
**Before you ask** Using a bowl for the mold doesn't work unless you want it to look like a bowl.
I'm the cement balloon planter lady, so a balloon was of course my first thought. These can work with using a balloon, but you have to guess at the size and make sure the opening is just right. This method gives you a perfect fit and only takes 20 minutes longer. It's also much easier to sculpt rock shapes with the sand than over an unstable balloon.
Step by Step Guide for How to Make a DIY Concrete Rock Solar Light
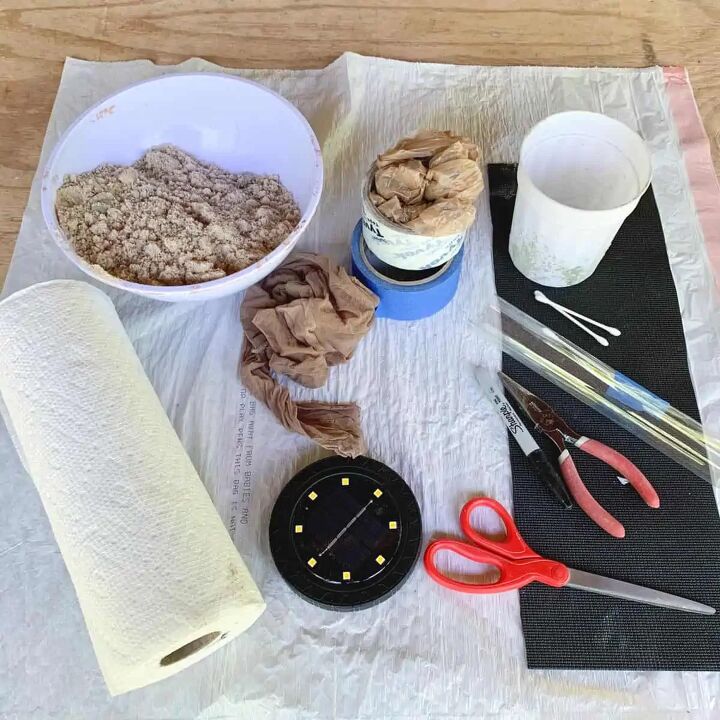
Step 1. Prepare the Solar Light Shell
First, lay the kitchen bag on your work surface to act as a tablecloth.
Take the solar light and turn the switch on the back to the on position and let the solar light charge in the sun for a full day.
These may have come with a partial charge already, but this way you’ll definitely be ready to see your lights when you finish making the fake rock.
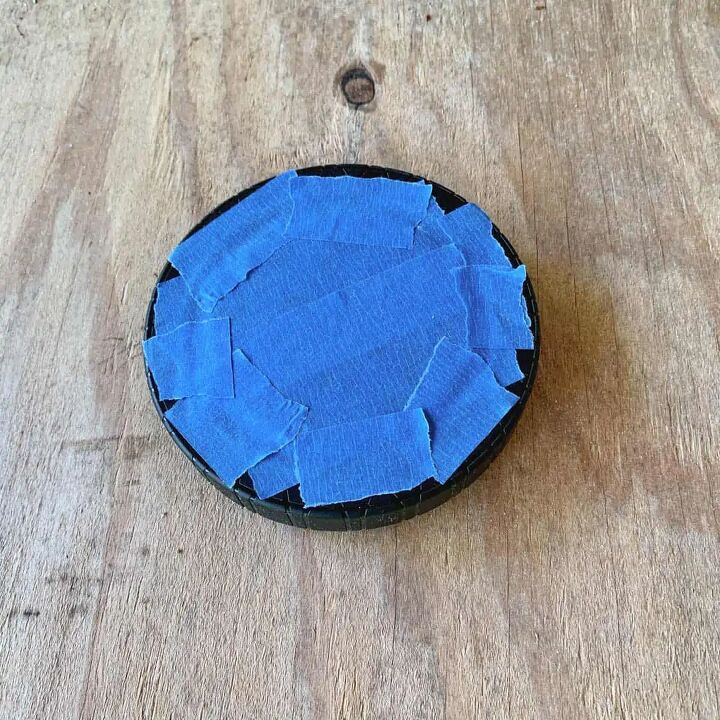
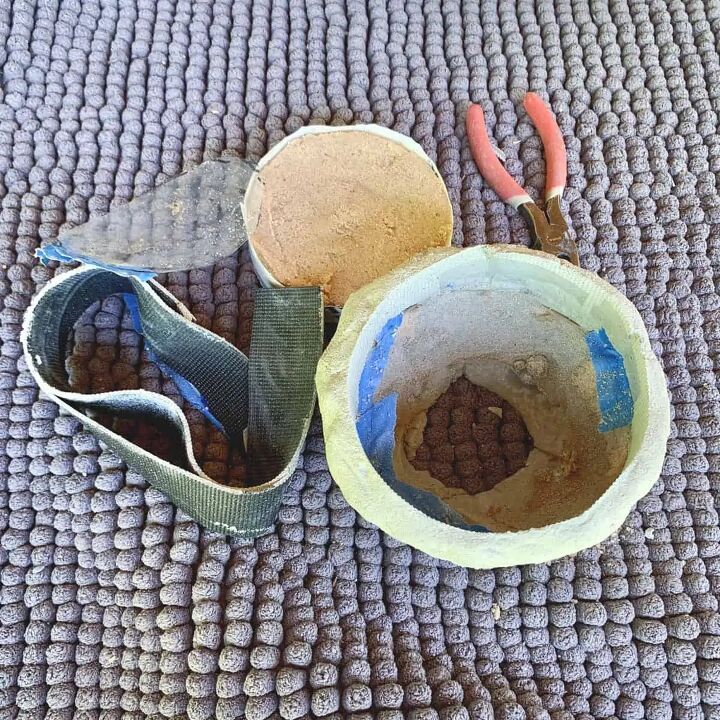
After it’s charged, turn the switch off. Protect the solar light by sticking blue tape to the face of the solar panel, and don’t go past the sides.
Then place packing tape on the backside.
Be sure to cover the switch, as well as all the screws. Also, take care not to go past the sides.
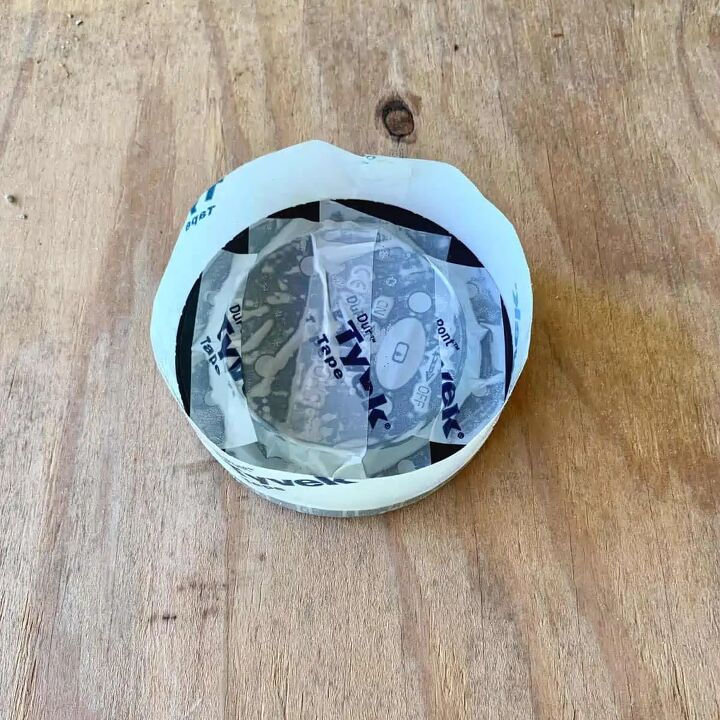
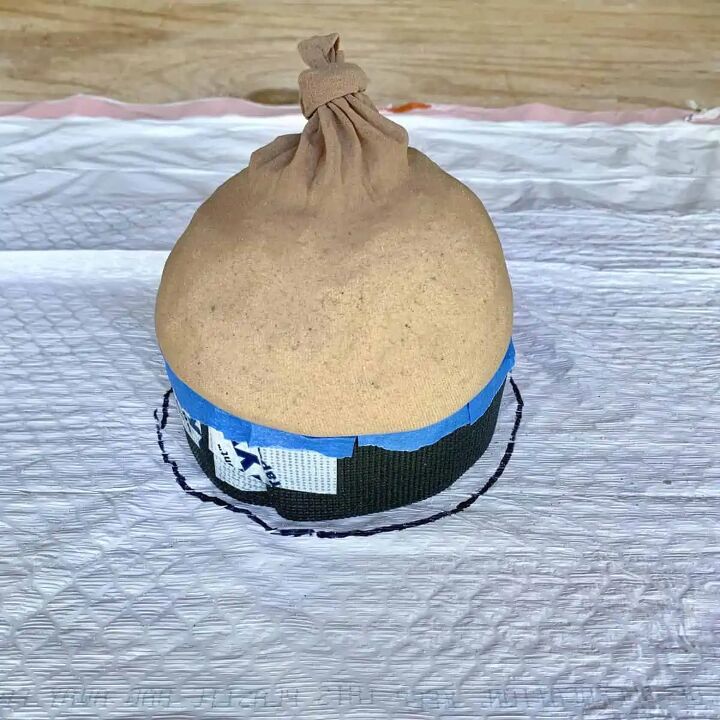
Take another piece of packing tape and wrap it around the solar light. The light should be face down. This will create a collar around it.

Now add damp sand to the inside of the collar. The reason for this is so that when you add cement on top in a later step, it doesn’t get on top of the light.
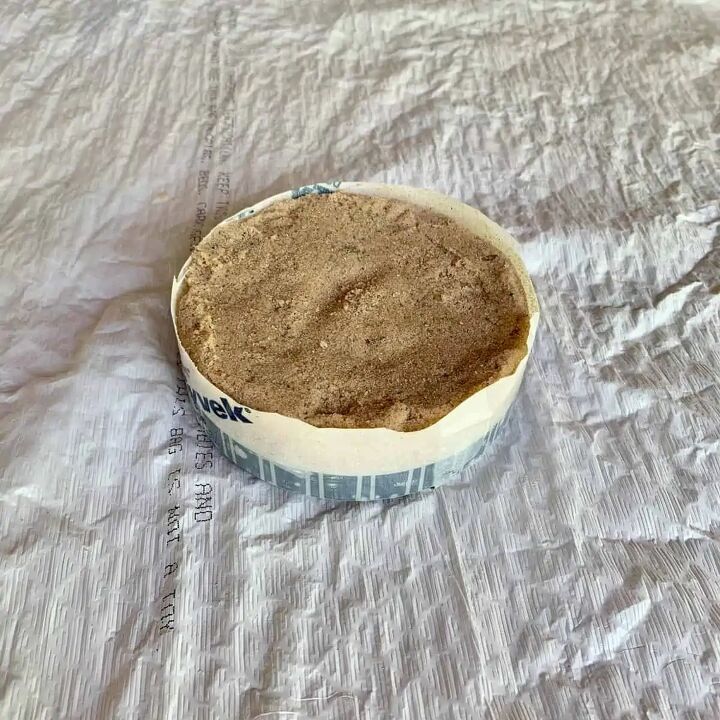
Trim the tape so that it sits just about ⅛” above the sand line.
There needs to be space between the opening of the concrete rock and the solar light. To create a spacer, use the rubber mat material.
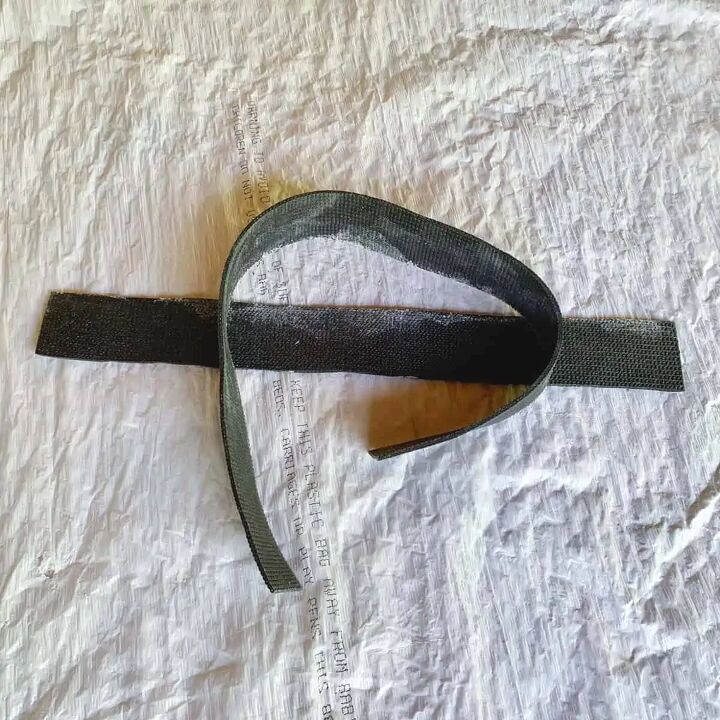
Cut a strip of the rubber mat. You need enough to wrap twice around the light and it should be the height of the packing tape collar.
I used leftover scrap pieces so instead of one long one, I had two pieces and taped those together.

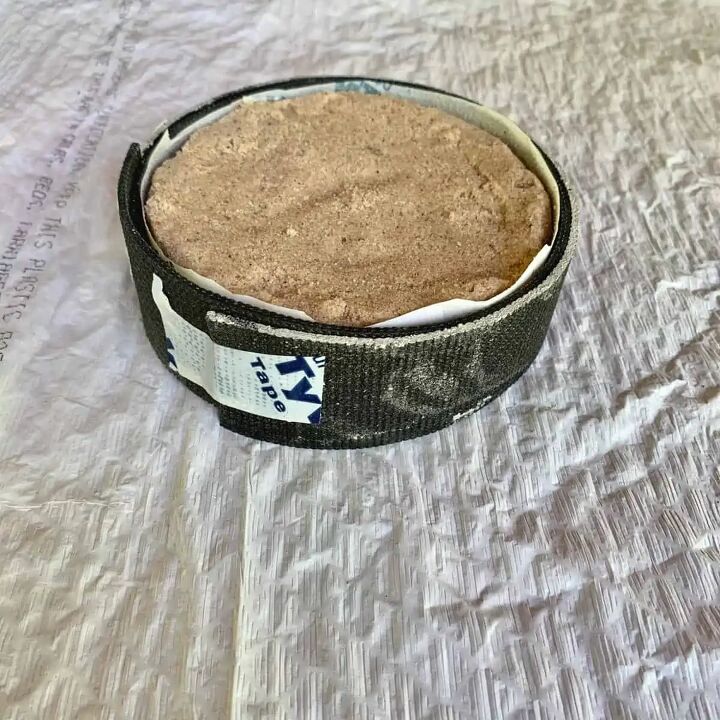
Next, take a piece of acetate film, or a plastic food lid and trace it over the sand opening and then cut it out and place it inside to act as a lid.
Use packing tape to close the gap between the two strips. This will help make demolding easier.
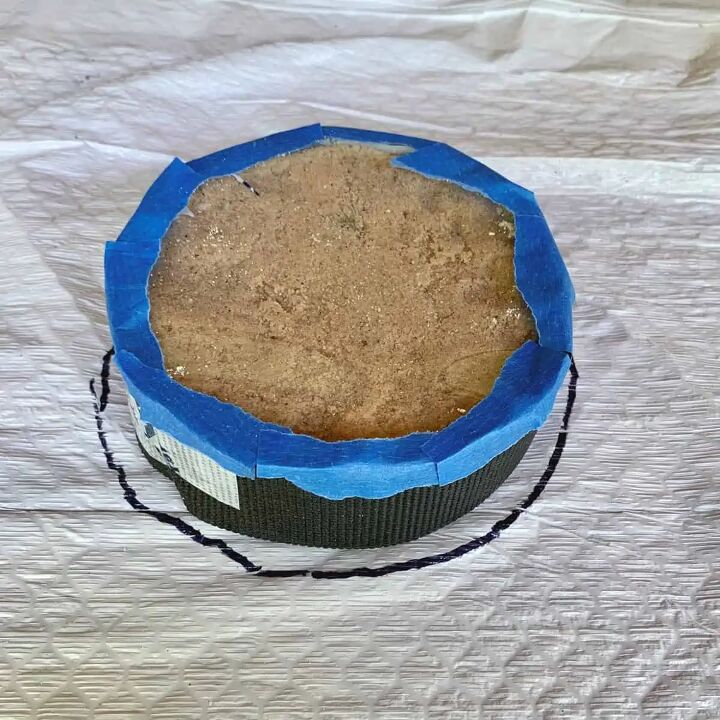
Now use a marker to trace a circle around the collar of the rubber mat. This line should be about ⅜” wider than the collar.
This line will be a guide to show you the thickness of the cement once molded. I just eyeballed it.
It needs to be more than ¼” but not quite as much as ½” or it will be heavy and more difficult to sculpt.
Step 2. Make the Sand Mold Base Shape

Fill a wide-mouth cup with sand, then take a nylon stocking or sock and wrap it over the mouth of the cup.
Turn it upside down and place it on top of the solar light’s bottom and let the sand flow into the sock.
Go slowly to see how much sand you want and shape it as you go.
Once you have the shape and size the way you’d like, put the cup down and take the sock off. Then tie a knot at the top.
Step 3. Mix the Cement and Sculpt the Solar Light Into A Rock Shape
**If you love making concrete projects, then check out my Pocket Guide to Concrete Mixes! I tested 6 mixes and made a handy reference chart. It's a FREE download. 😉
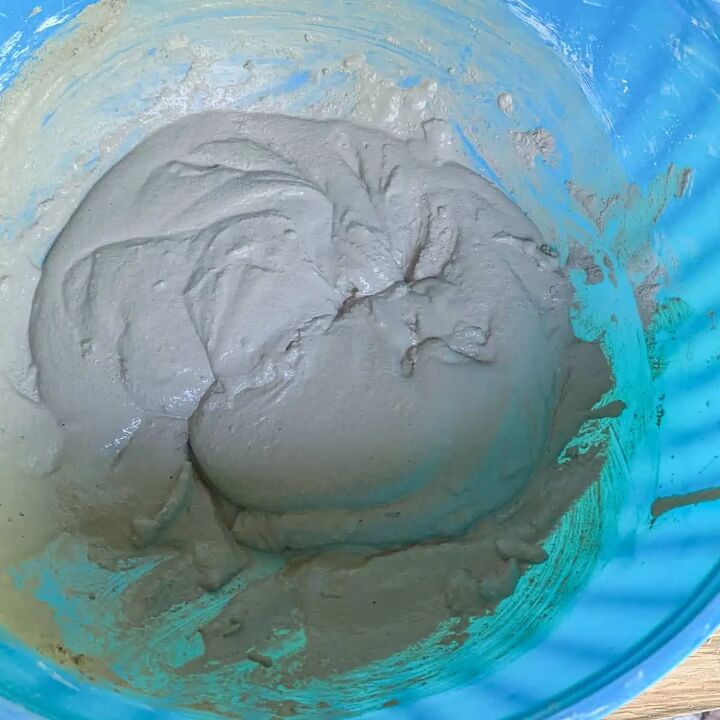
Mix the cement to a wet mud pie consistency. When it starts to have some form and stops slumping back down immediately, it’s ready for sculpting.
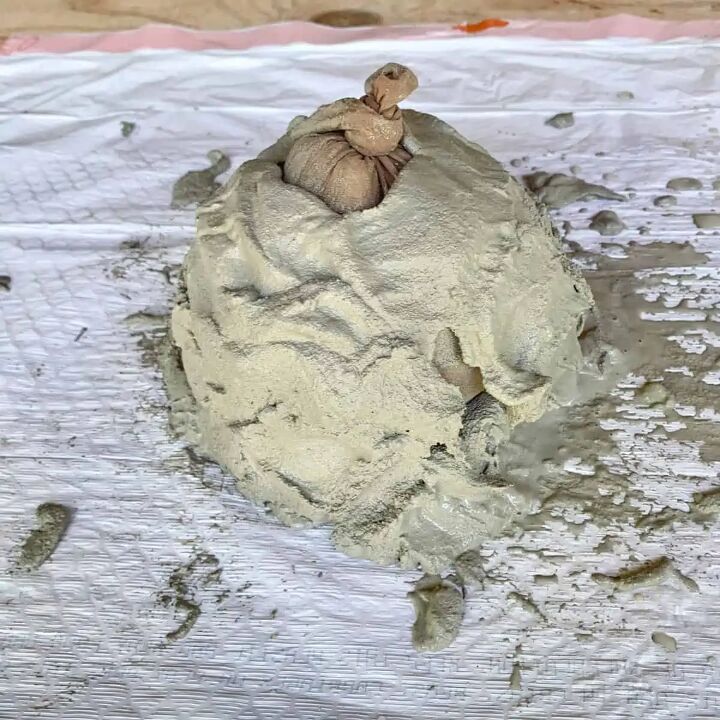
Scoop it up and place the mix on top of where the stocking with sand is.
At the location where the knot is tied, you will be keeping this free of concrete.
This is the drainage area. My hole is roughly 2 ½” and the shape is barely what I call a circle.
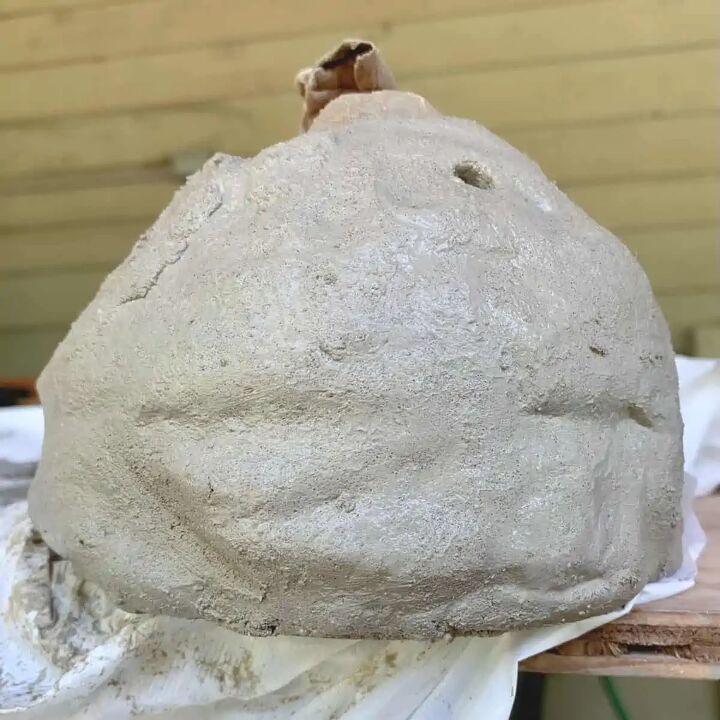
Use your hands to mold the cement around the top first and then work your way around the sides and bottom.
If the cement isn’t sticking to the stocking, that means it’s a bit too runny. Just wait a minute or two, because the cement will thicken as it sets more.
The cement will get a little bottom-heavy and you’ll be fighting with it as it will want to become a pyramid shape with a wide bottom and narrow top.
Be patient and cup your hands at the bottom and carefully lift up. Push the cement back up toward the center if you want a rounder middle.
Another trick is to pull the plastic trash bag to the edge of your table and let the edge hang just slightly so you can round the cement under a bit.
Use the bag as if it’s a turntable so you can get all around the rock.
You can add natural rock shapes by angling your hand and pushing inward toward the sand mold. I added a few cross cuts and wavy subtle ledges.
If you find that the cement is starting to set and harden, you can add a little water, but only a little.
A great way to do this without overdoing it is to dip your fingers into the remaining water for the mix. This will soften the cement a bit, to make it more workable.
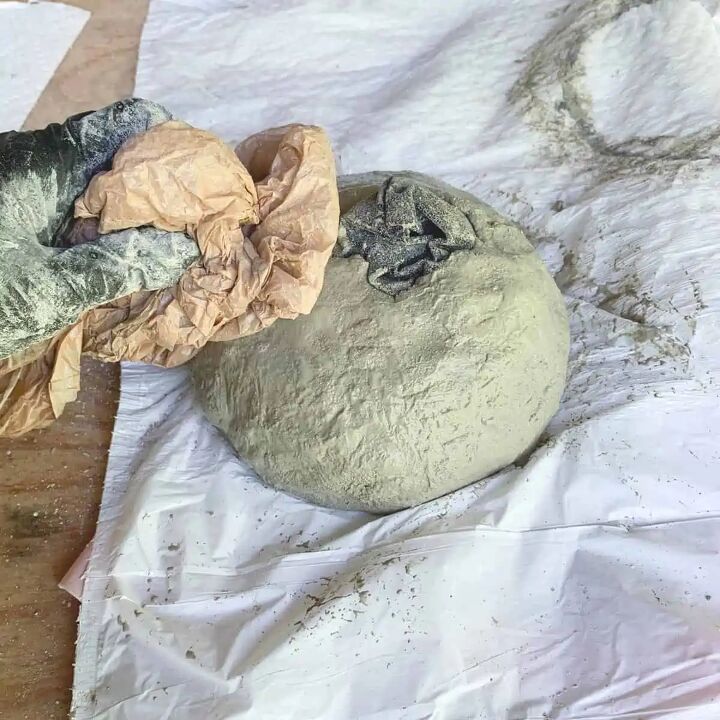
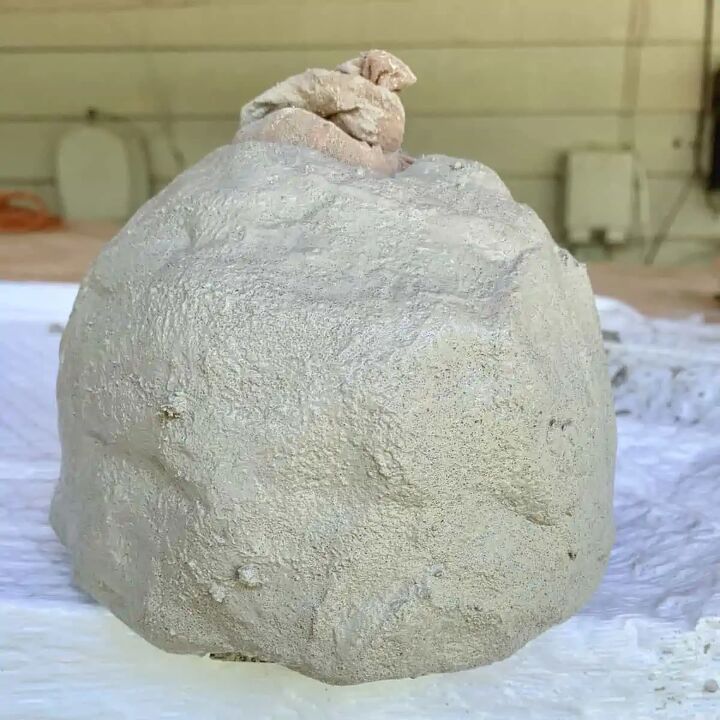
Once you are satisfied with the shape, use the plastic bag to give the rock some texture. Just crumple it and pat the surface of the concrete.
Again, if the surface has hardened, you can lightly wet the bag, but then quickly pat it on a paper towel and then pat around the rock.
You can also create a specific spot for the rock to sit. I knew I wanted mine to sit at a 45 degree angle to point at the lower portion of a shrub.
To do this, just press the palm of your hand in that location to flatten it.
Because this rock will have some natural form, it may not sit squarely where the wide opening is.
For this reason, it’s best to add a few more drainage holes, especially if you created a flattened area away from the main drainage.
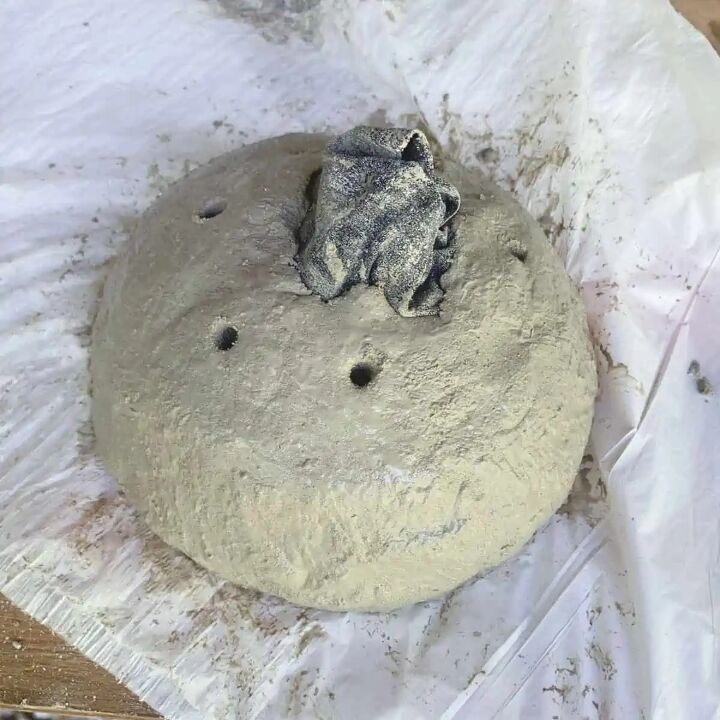
Use the q-tip to add some holes near the main drain hole, but leave about an inch of space between them.
If the cement is getting hard, you can dip the q-tip in water to push it through. Stop once you hit the sand-filled nylon.
Let the concrete sit for about two hours to cure.
Step 4. Demold The Concrete Rock with Solar Lights
To demold the concrete rock, first cut the sand-filled nylon with scissors. Then use your finger to dig out the sand.
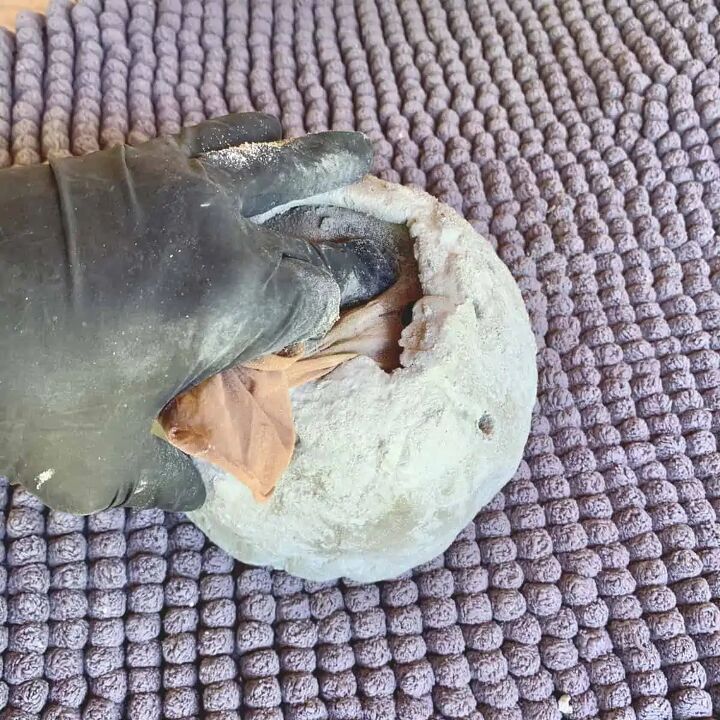
Once the sand is out, push on the stocking from the top (the bottom of the rock– at the drain opening) to free it from the concrete.
Work your way around until it’s free from the top and sides, then pull it out.

On the front opening, use your fingers, needle-nose pliers or the tip of scissors to move the rubber mat liner away from the concrete.
Then you should be able to push the light out from inside, from the drain hole.
If the hole is too small for your hand, then try pushing it with a marker or the scissor handles.
The acetate with the sand and the light should come out together, then you can just pull out the liner.
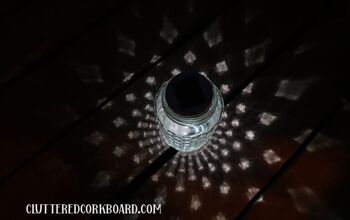
Now you can remove the tape, switch on the light and into your concrete rock solar light.
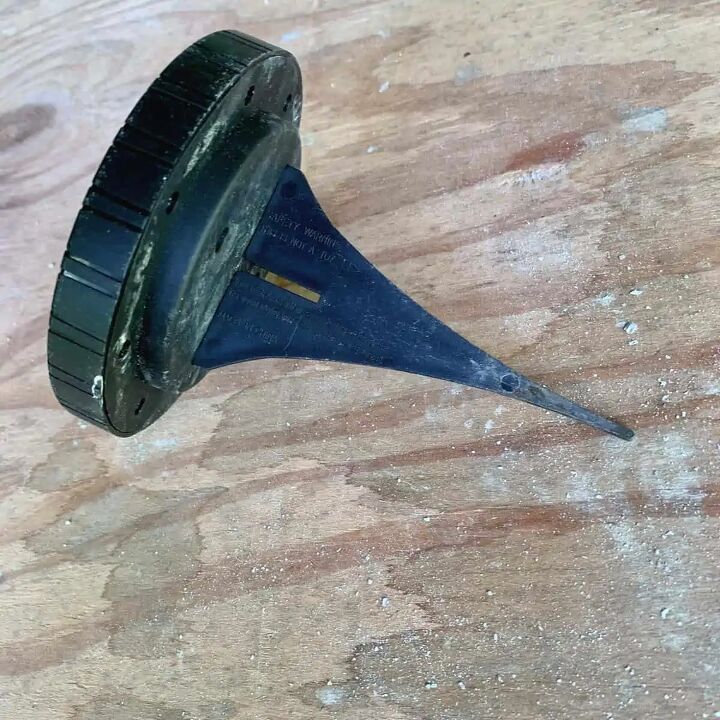
Use the stake that came with the lights to adjust how far forward or back you want the light to sit within the rock.
The stake goes into two of the holes in the back and then into the ground. The angle you tilt the rock at and how far you place the stake in the ground will determine this.
In the photos, I have mine set almost all the way back acting as an uplight.
It can look more like a solar lantern, be accent lighting, you can make it more of a spotlight by setting the stake at a shallow depth so the light is close to the top of the rock’s rim.
Now place the concrete rock solar light in your garden or along a path and patiently wait for the sun to go down!
And just a reminder, please don’t forget about my important note at the bottom of the intro about expansion and contraction during freezing temperatures.

Comments
Join the conversation
-
If you make these to sell I would buy 5 of them
-
I really like the look of this,but you lost me with all of the steps. Great job.


Frequently asked questions
Have a question about this project?
Hi there. I love this but I’m not sure how it will ever charge a second time when the part the sun is supposed to shine on is completely covered up. Do you have to physically take it out of the rock to charge it each time and then put it back in at night? Thank you