


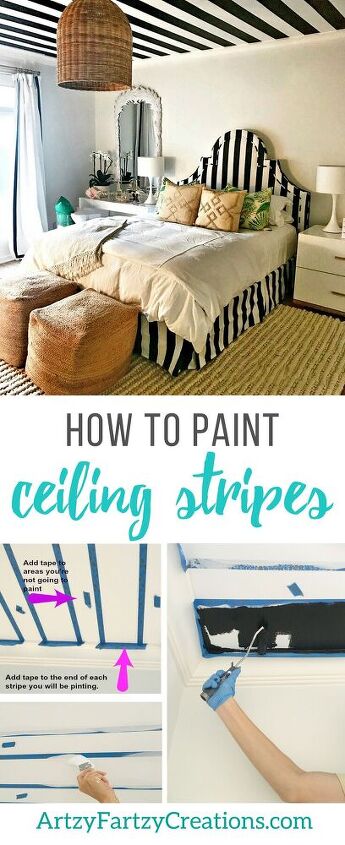
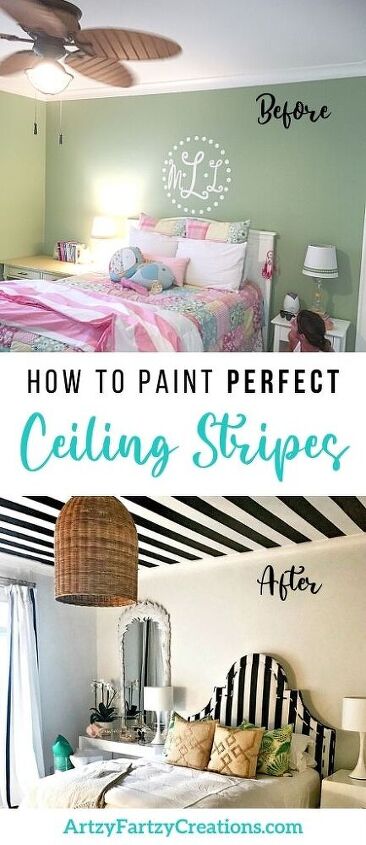
Black & White Striped Ceiling

When you grow out of your little girl room and it’s time for a big girl room, what do you do?
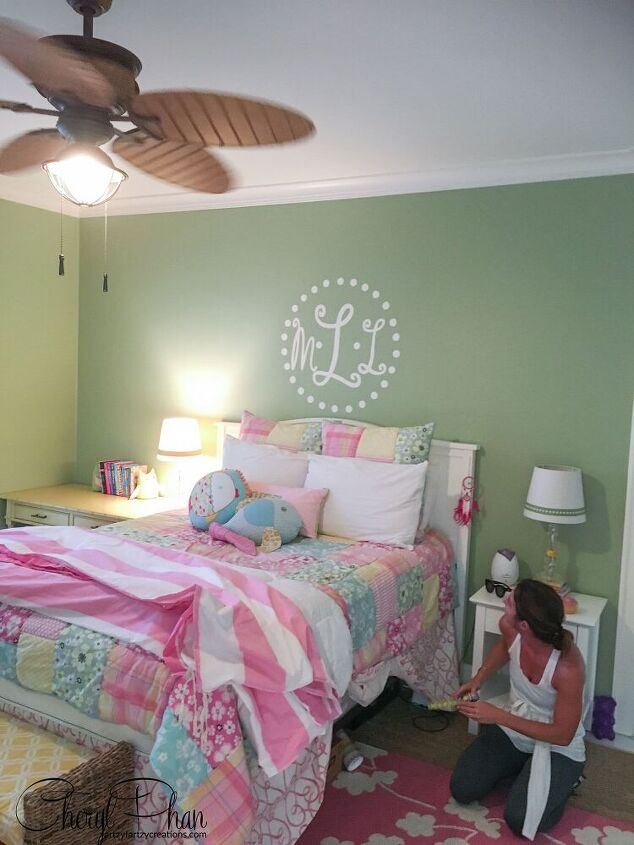
You step it up a notch and do something totally fun and funky, like paint black and white stripes on the ceiling.
And I’ve got 2 simple tricks for a perfect striped ceiling!
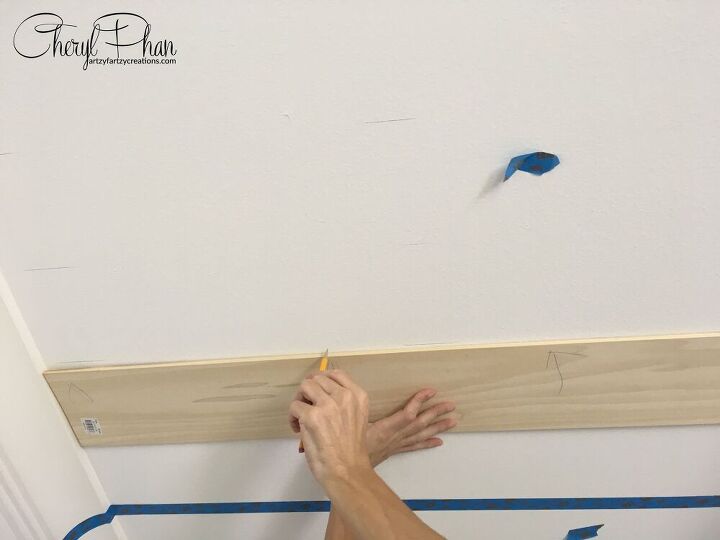
So, I have to tell you, getting the tape to go straight was a bit of a challenge. I tried to use frog tape but it was looking a little wavy; I think the tape had some stretch to it. So, I decided to try something I’ve never done before. I needed to get a straight line so I used a piece of wood I had laying around the studio and to draw a line the width I needed. It worked out great.
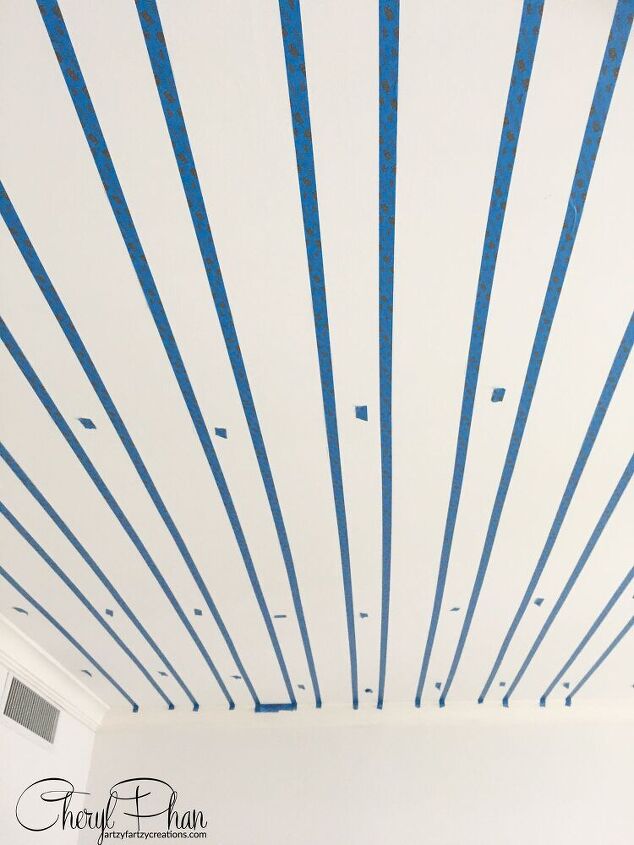
Then I used low tack blue tape and ran it from one end to the other. Make sure you did cover the pencil mark with the tape. When you paint in the stripe you want to cover it up. It’s best if you have someone help you unroll the tape while you apply it to the ceiling. Then step back every few minutes to make sure it’s straight.
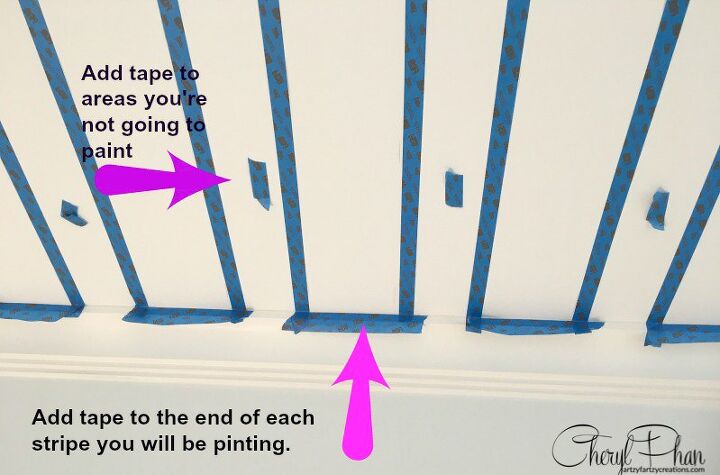
As you can see I added a small piece of tape to every other stripe all the way down the wall. This way you won’t mistakenly paint the wrong stripe. I also added a piece of tape at the end of the stripe was painting so I didn’t get paint on the molding and to help guide me. Believe me, when you’re painting upside down it’s easy to make mistakes.
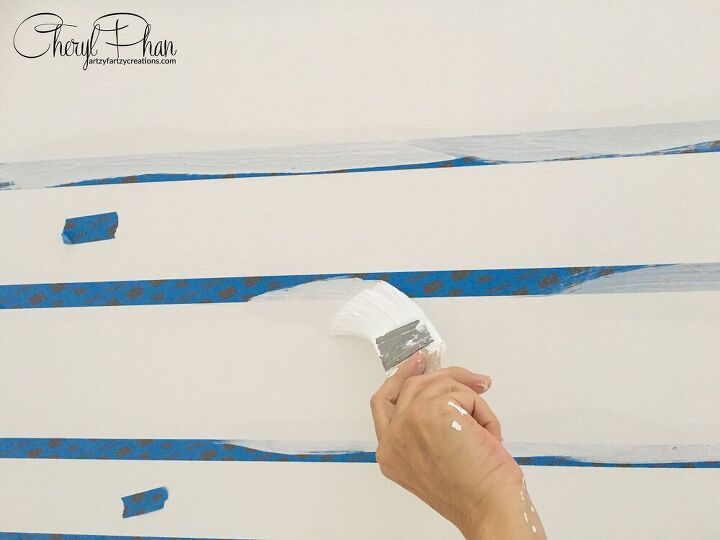
This is the best trick ever. I used the ceiling paint to seal the tape so it wouldn’t bleed through. The last thing you want to do is a ton of touchup especially on the ceiling. Paint the inside seams of the stripes you will be painting. Use just enough paint to create a seal.
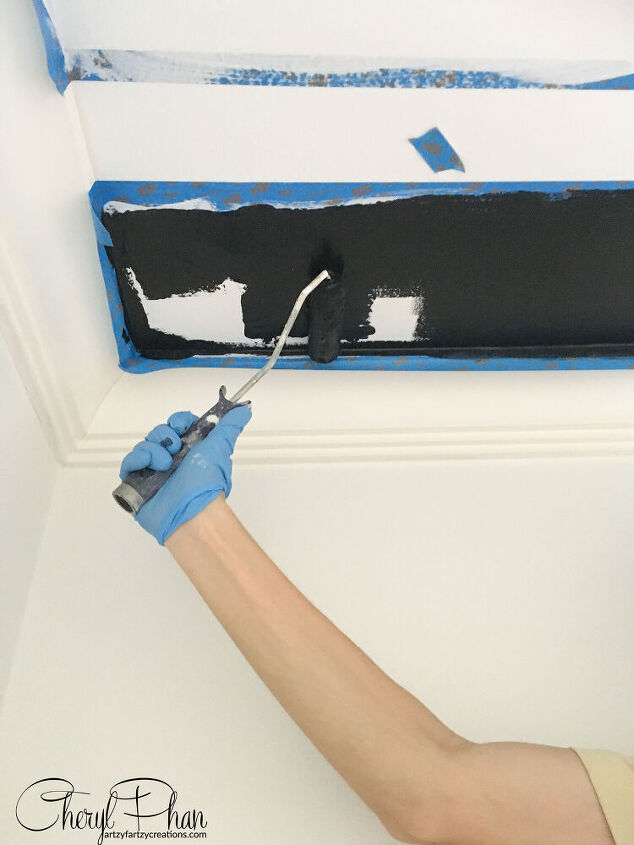
Use a 2-inch Cut-in Stubby paintbrush and cut it in at the end and then roll on your favorite paint color with a hot dog roller. It’s easier to manage
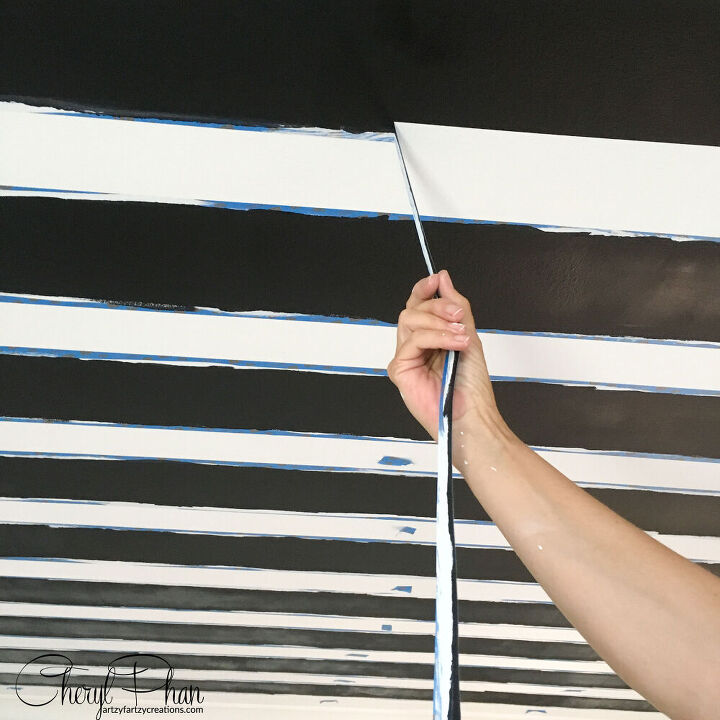
Once the paint is dry to the touch, remove the tape and watch your masterpiece unfold. It’s like the big reveal.
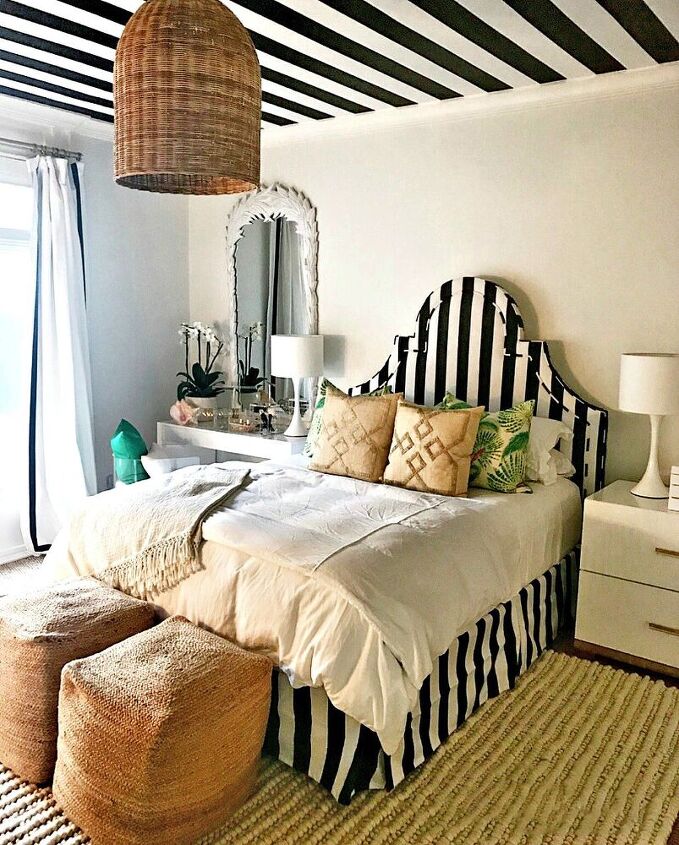
Isn’t it amazing how a little bit of paint and a little creativity can transform a room?? Now, this is a BIG GIRL’S room to show off to your friends.
Want to share some of your favorite finishes? Join ASK CHERYL PHAN and be part of the DIY community.
Interested in turning your hobby into a business? Get my free business tips at https://cherylphan.com
Please subscribe to my weekly blog here for more weekly DIY projects, furniture makeovers, and budget-friendly room design.
HAPPY PAINTING


Please share my Black and White Striped Ceiling pins and visit me on Pinterest for more DIY projects & painting tips! I have a whole board dedicated to gorgeous Painted Ceilings!

Comments
Join the conversation
-
Wow! So interesting to read and see the steps to this fabulous redo! I LOVE the black/white stripes. I don't know that I have the nerve but am thinking about doing this with flat and glossy paint for a subtle sophistication (since I'm very senior but young at heart).

Thanks for sharing & I'm going to check out you other projects!
-
Hi Janice: Thank you so much. It 's a fun room for sure. It is very bold and may be a little too much for some people. It was perfect for this little girl pre-teen room. Here's a link to my blog if you're interested in taking a peak at some of my other finishes. https://www.subscribepage.com/diy-projects
Blessings
Cheryl


Frequently asked questions
Have a question about this project?