


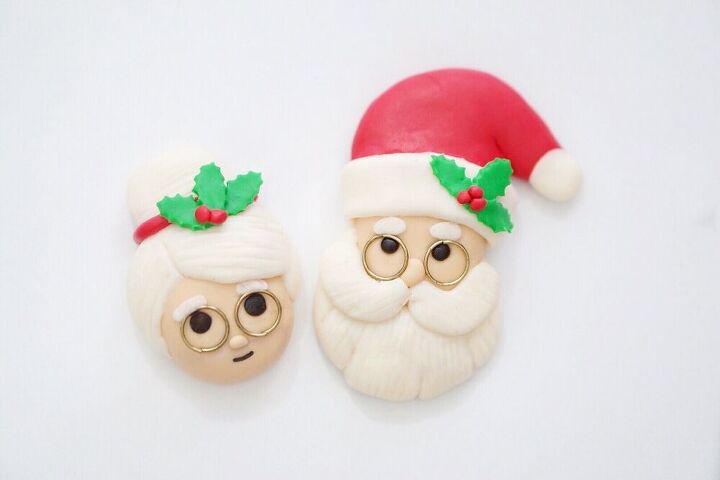
SANTA CLAUS ORNAMENT MADE FROM AIRDRY CLAY

Final stretch of 2020 has come. While this year has not been good to us. Surely there are lot's of things to celebrate. A year round of DIYs and how to projects made the quarantine more tolerable.
Last night a also watched The Christmas Chronicles 2 which made me giddy crafting a Mr. & Mr. Claus Ornament.
Follow along to try the project :)
Before making this craft I suggest that you prepare the clay colors first.
The colors you will need here are:
- white
- red
- green
- pale brown (achieved by mixing white and very small amount of brown acrylic paint or food color)
- black
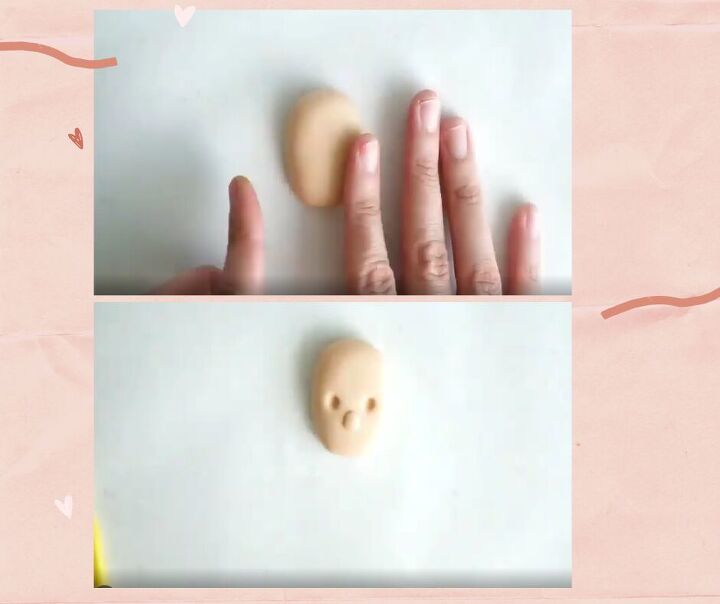
First roll your pale brown clay to create a head shape. Smoothen it and create eyes and nose.
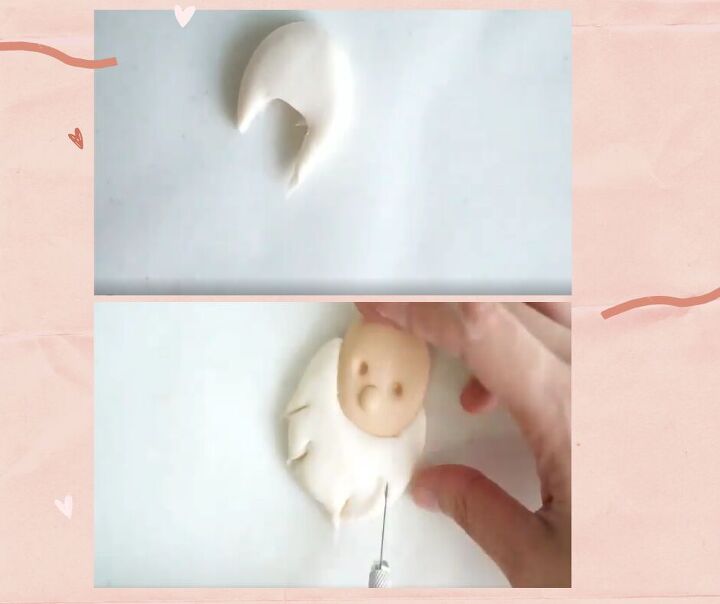
Next, using your xacto knife create a beard shape.
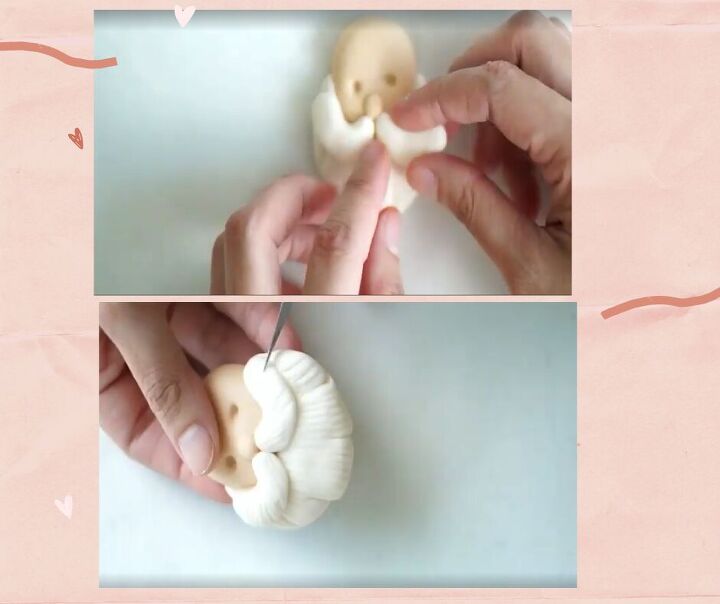
Then roll small white clay to form Santa's mustache and position it above the beard. Using your xacto knife create hair texture by running through it carefully. I use water to make sure that every part is attached safely.
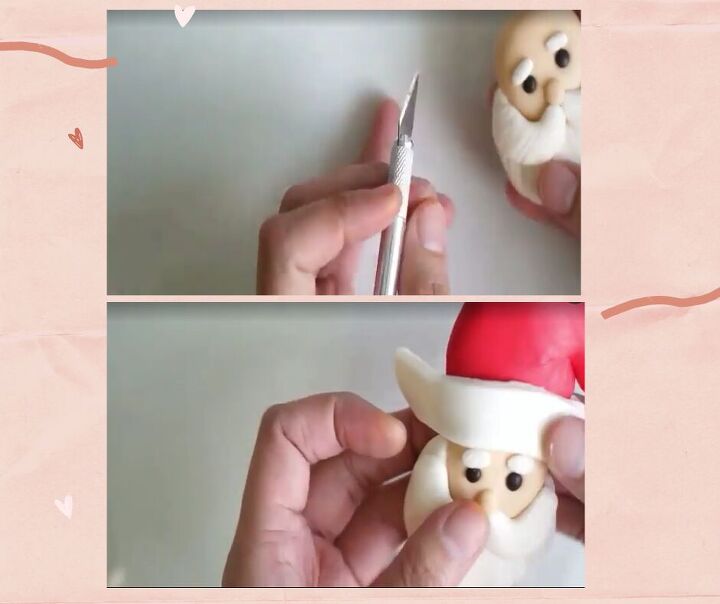
Do the same thing with the eyebrow before adding the hat.And roll small black clay for its eyes .
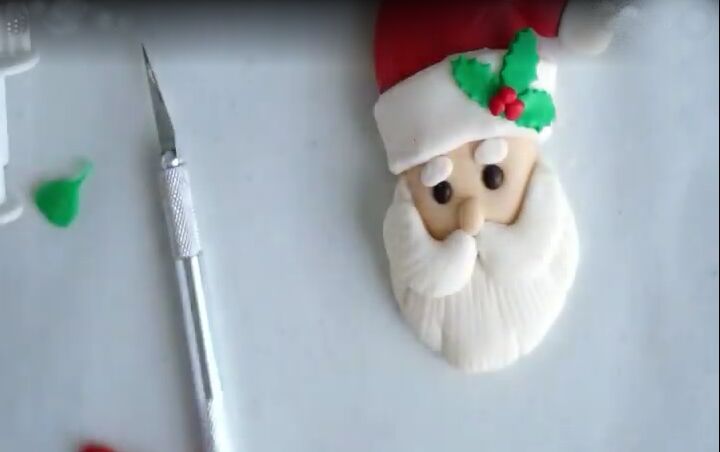
Let it dry for about 5 minutes and then add a holly leaf to complete the look. I'm not quiet good with leaf details so I used a cutter to achieve a perfect shape.
To create the glasses, use jump rings and position it around Santa's eyes and attach using super glue.
I have not included that part here but you can check it on the step by step guide YouTube video I linked below.
I also added a guide on how to make Mrs. Claus. :)
Hope you like this craft and if you have any questions comment down below. Happy December. Stay safe! xoxo


Frequently asked questions
Have a question about this project?