


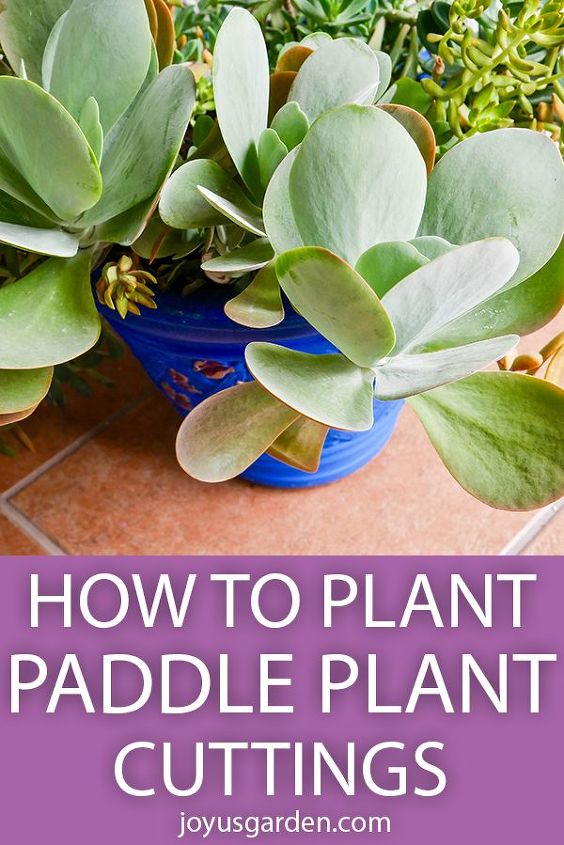
How To Plant Paddle Plant (Flapjacks Kalanchoe) Cuttings
2 Materials
20 Minutes
Easy
This is propagation part 2: how to plant your Paddle Plant or Flapjacks Kalanchoe cuttings once they've healed over. This is a really easy project even if you're a beginning gardener. Here you'll find the materials used & the steps taken to get these succulent cuttings on their way.
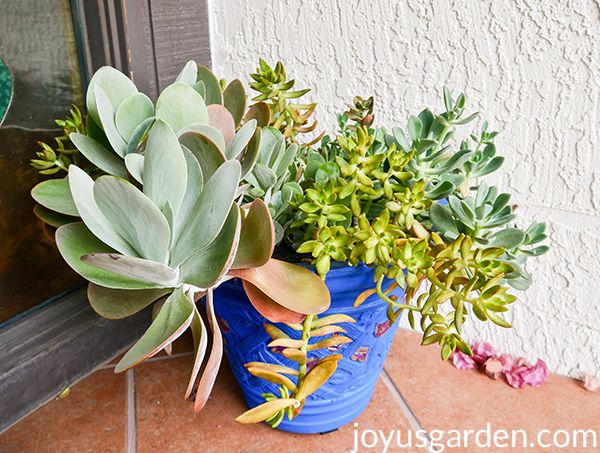
Sometimes your plants become much too happy, which leads to them growing and growing! My gorgeous Paddle Plant was no different. It was overtaking the other succulent beauties in the same pot they were all growing in. It was time for a haircut and thinning out. I had intended to let the 2 cuttings heal over for 2 weeks but it ended up being almost 4 weeks; you know how that goes! It was time to plant those Paddle Plant cuttings and get them on their way to a new start in life.
This process is very simple especially if you’re new to the world of planting succulent cuttings. The materials used and the steps taken are few. My Paddle Plant, aka Flapjacks Plants or Kalanchoe luciae in botanical speak, is tinged with a lot more red in the cooler winter months. In summer when the temps inch well over 100F and the sun becomes even more intense, the leaves are solid green.
Materials Used:
2 – Paddle Plant Cuttings
1 – 6″ grow pot
Succulent & cactus mix. I use 1 which is produced locally here in Tucson & succulents love it. This one is good too. If you’re using a store-bought mix like the 1 in the link, you might consider adding some pumice or perlite to further up the ante on the aeration & lightness factor. When rooting cuttings, you want the mix to be loose, well-drained & light so those roots can easily form.
1 – Chopstick. The taller ones are great for staking up succulent cuttings!
Steps Taken for the Paddle Plant Cuttings:
Here you’ll see how I pruned the mother plant & took these cuttings.
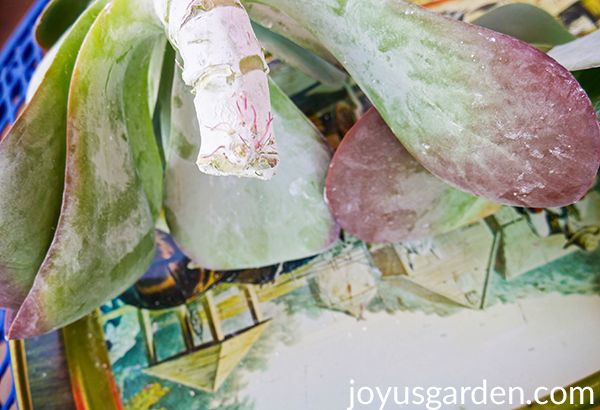
1 This doesn’t have much to do with the planting but I let these cuttings heal over in my utility room which has a skylight so the room is nice & bright. Healing over is important for succulents because their stems & leaves are full of water. You want the bottom to heal (or scab) over to protect the cutting from rotting out & also infection.
2 I removed any drooping lower leaves or those which didn’t look good. This gave me more stem to stick down in the pot because between the leaves & the stems, these cuttings were heavy.
3 I put newspaper over the drain holes of the grow pot. This keeps the loose mix from escaping with the 1st few waterings.
4 Succulent & cactus was added in so the pot was about 1/2 full.

5 I put the cuttings in the pot & had to reposition them a few times as well as take a few lower leaves off to get these 2 “flopsy mopsies” to stand up in the pot. Both of these cuttings had curved stems & were giving me a bit of a hard time. In the end, I won the challenge!
6 The pot was topped off with succulent & cactus mix which I had to pack in a bit to get these heavy stems to stay uprighted. I don’t add compost & worm castings when planting & rooting cuttings because they don’t need it when the roots are forming. I’ll top the pot off with both in a couple of months when the roots are well on their way.
7 These cuttings were moved under the bright shade of the grapefruit tree where they could settle in. I watered them thoroughly after 3 days because the temps are heating up around here.
{
"id": "4826128",
"alt": "",
"title": "",
"video_link": "https://www.youtube.com/embed/P7rTfZ05tpo",
"youtube_video_id": "P7rTfZ05tpo"
}
{
"width": 634,
"height": 357,
"showRelated": true
}


Any price and availability information displayed on [relevant Amazon Site(s), as applicable] at the time of purchase will apply to the purchase of this product.
Hometalk may collect a small share of sales from the links on this page.More info

Want more details about this and other DIY projects? Check out my blog post!
Comments
Join the conversation
2 comments
-
🤗
Kalanchoe is excellent houseplants for those who are busy and do not have much time to maintain a garden daily. They are also preferred indoor winter plants because of their thick evergreen foliage.


Frequently asked questions
Have a question about this project?