


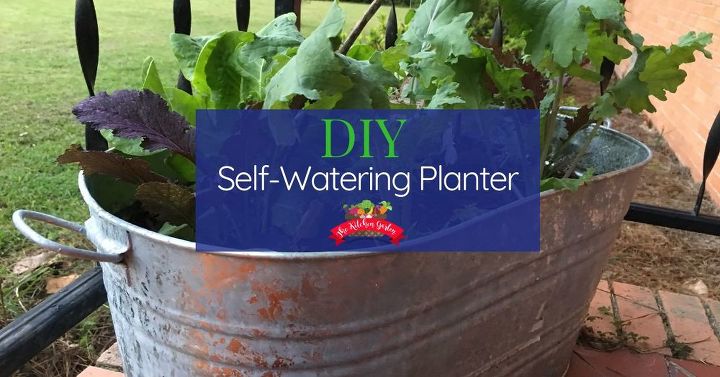
DIY Self-Watering Planter
3 Materials
$20
30 Minutes
Easy
Self-watering planters make gardening a breeze. No more guesswork on how much to water your plants! Now you can make any container a self-watering planter.
{
"id": "5121209",
"alt": "",
"title": "",
"video_link": "https://www.youtube.com/embed/4NHgi5aE9zY",
"youtube_video_id": "4NHgi5aE9zY"
}
{
"width": 634,
"height": 357,
"showRelated": true
}
Step One- Begin with a container you love. My dad built his self-watering planters using rubbermaid tubs following directions he found on Grow A Good Life. They work really well for him, but I wanted a more decorative planter that I could use on the front porch. So feel free to get a large container that may not really be for plants.
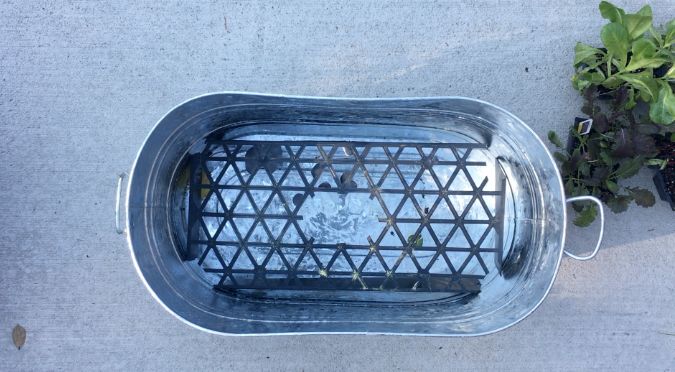
Step Two- Grab a plastic lid or plant flat for your separator between water reservoir and soil. I used a flat that plants come on. I cut the corners, since my container was not a rectangle and placed it in upside down. The existing edges could be used to support the weight of the soil. (If you use a solid piece of plastic for this barrier, be sure to put holes in it.) Next, cut a hole in the middle of your plastic for the wicking container (small flower pot) to go into. And also cut a hole or space in the corner for your watering tube.
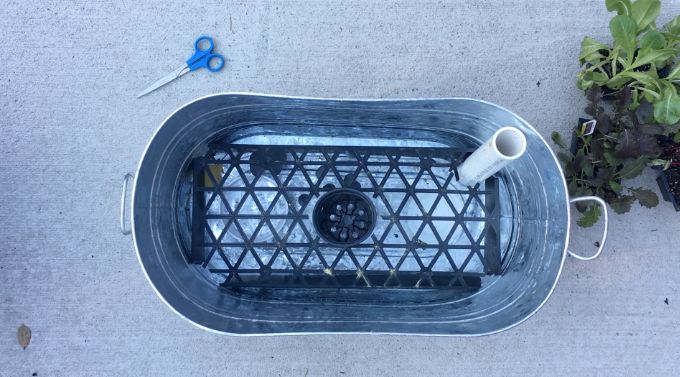
Step Three: Grab your small plastic pot and punch or drill holes in it all around. You want water to be able to come into this pot from the reservoir. Place the pot in the hole you created in the middle of your plant flat. Now add your watering tube. Be sure it does not sit flush on the bottom. Water needs to be able to get into the reservoir. (My container had ridges at the bottom, but you could set your tube at a slight angle, or place something small under the edge of tube to keep it slightly elevated.)
Step Four: NOT PICTURED: Before we go further, you’ll need to grab a drill and make several holes in the side of your container. Use a sharpie to mark on the outside of the container slightly below where your separator is sitting. Drill a few holes side by side in this area. These holes will allow you to know when your water level is high enough. When water comes out of these holes, you’ll know your reservoir is full.
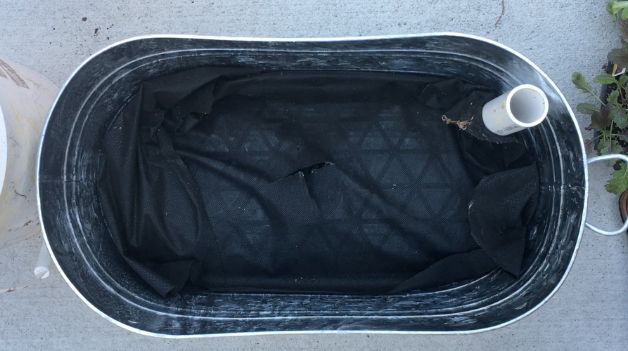
Step Five: If your reservoir separator needs extra support for the weight of the soil, use small plastic containers (think sour cream containers) that are cut to 2 inches high and place them under your separator so there’s no risk of it caving in. Then lay landscape fabric over your separator and cut the fabric so the wicking container isn’t covered.
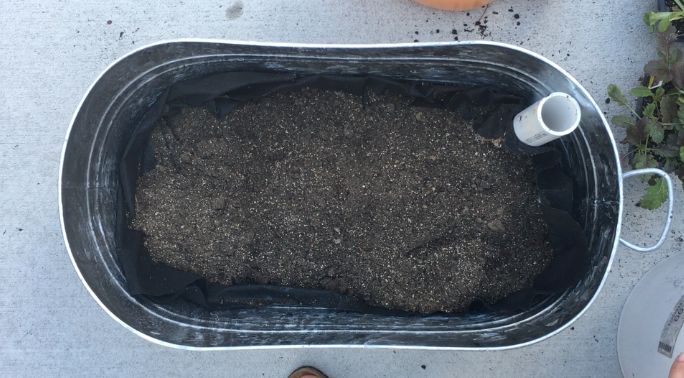
Step Six: Fill your wicking container with MOIST potting soil. You want to pack that potting soil into the container before you fill the entire thing.
Step Seven: Now you are ready to fill your container with potting soil, adding in a fertilizer trench if you’d like, and give your plants a new home! Many self-watering planters include some kind of covering that the plants stick out of, but I just mulch around my plants to keep the moisture in. Here’s my planter three weeks after making it and planting some salad greens. And if you’ve seen my Container Salad Garden post, then you know that these salad greens looked pitiful when I planted them. Yay for self-watering planters!
For the full resource list and instructions, visit my blog!

Want more details about this and other DIY projects? Check out my blog post!


Frequently asked questions
Have a question about this project?
What is the ideal depth for the water reservoir?
Thank you!