


How to Build a New Fence With Old Reclaimed Wood!
There was an area in my backyard I deemed the boneyard where you throw the stuff you don't want anyone to see. Have one too?
Well, enough was enough. At one point blackberries took over, so I decided it was getting gutted. So I cleaned up my side. And that's when Hank my neighbour got involved.
He tore down the old falling down fence between us, then installed new posts. Yay!
But here's the kicker... he was about to plank up my side with new wood too when I asked him if I could plank my own side using the original fence wood instead.
Old wood on a new fence?! You bet! But I took it several steps further as well... grabbing a couple of stencils and my rusty junk garden tool collection, this is what I did...
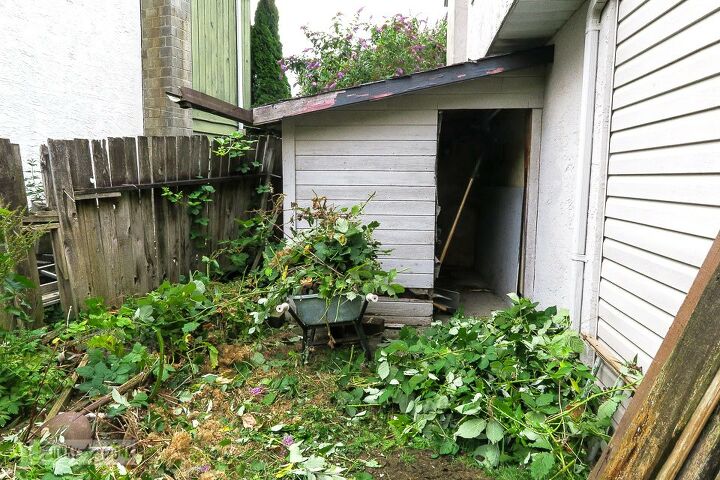
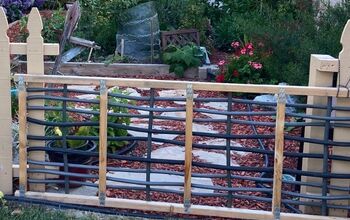
Welcome to the boneyard!
As you can see by the VERY full wheelbarrow, I had already started cleaning up this area of the backyard that was overflowing with blackberries and a fence about to collapse.
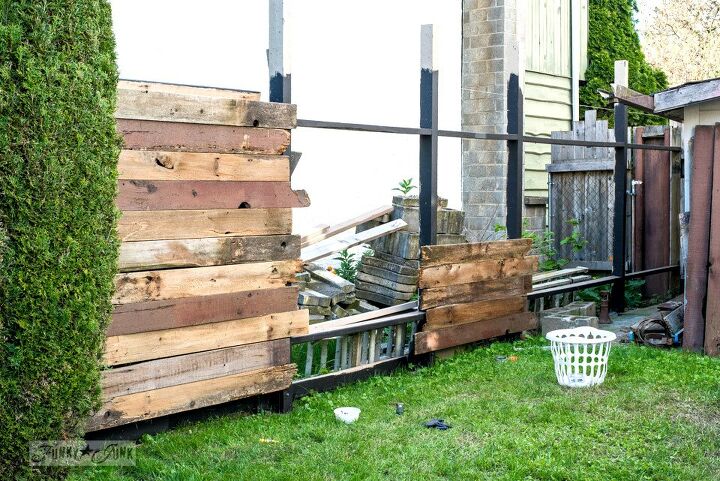
Next, Hank my neighbour tore down the old fence and installed new fence posts. But instead of using new wood, I used the original reclaimed fence planks instead!
How to install:
Working on every other section, each board was attached to two posts with a staggered effect.
The empty sections were then filled in with the same method, attaching the sides of each board to the existing boards.
So easy! And no cutting nor trimming required!
You can see more of the build by clicking the blog post link at the bottom of this post.
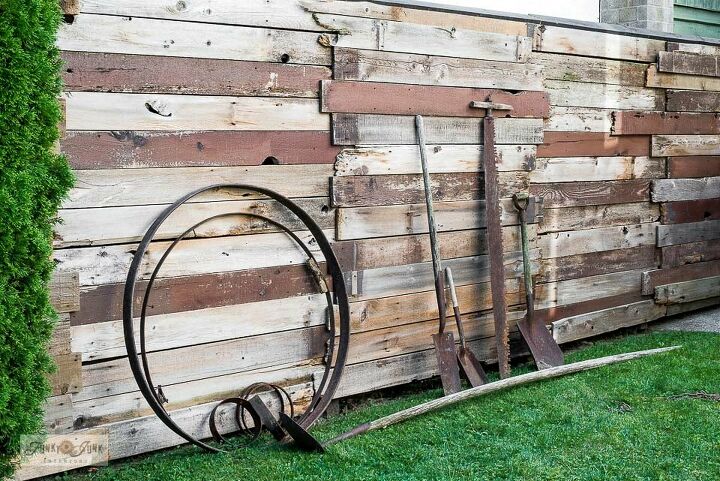
Once the fence was totally finished, Hank added a cap along the top of the fence to finish things off.
Isn't it the coolest fence ever?! But I wasn't done quite yet!
My collection of rusty old garden tools was gathered up, then hung onto the fence.
I loved it! But the wood looked a little plain...
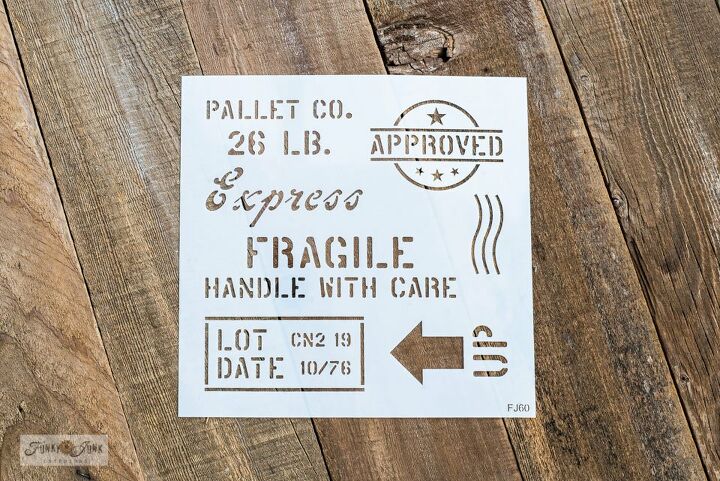
Random crate markings were stenciled on the fence in black using this stencil.
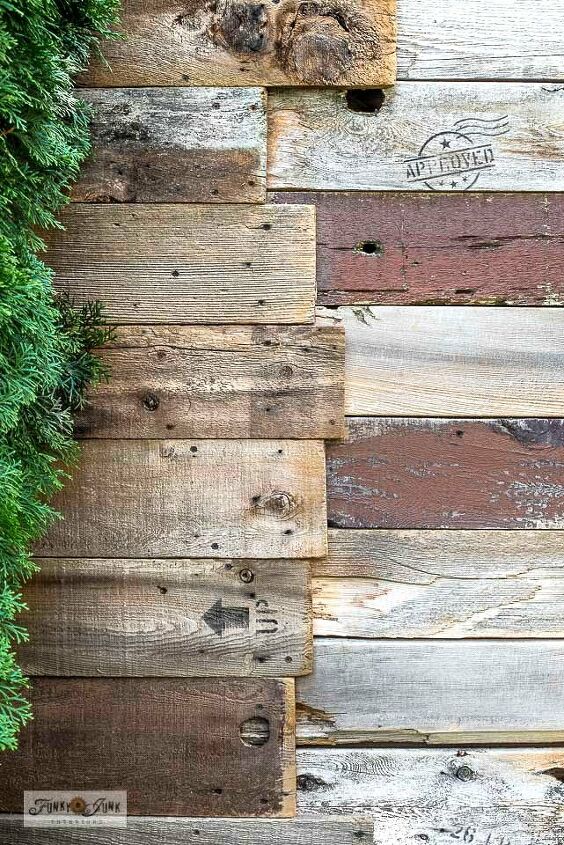
The stamps are subtle, but just enough! They offer unique interest as you walk by and marry the rustic wood perfectly!
It was starting to come to life! But one more thing would seal the deal...
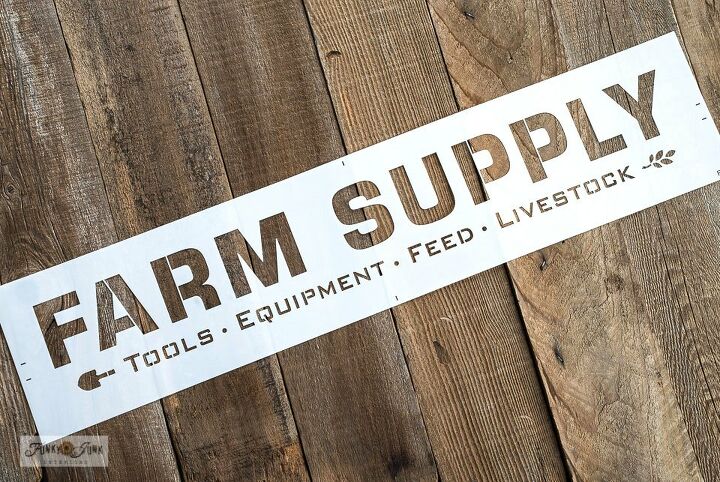
Farm Supply was stenciled in the middle of the fence in black to offer the entire project a story of sorts. What a great theme for all those tools!
View the Farm Supply stencil HERE
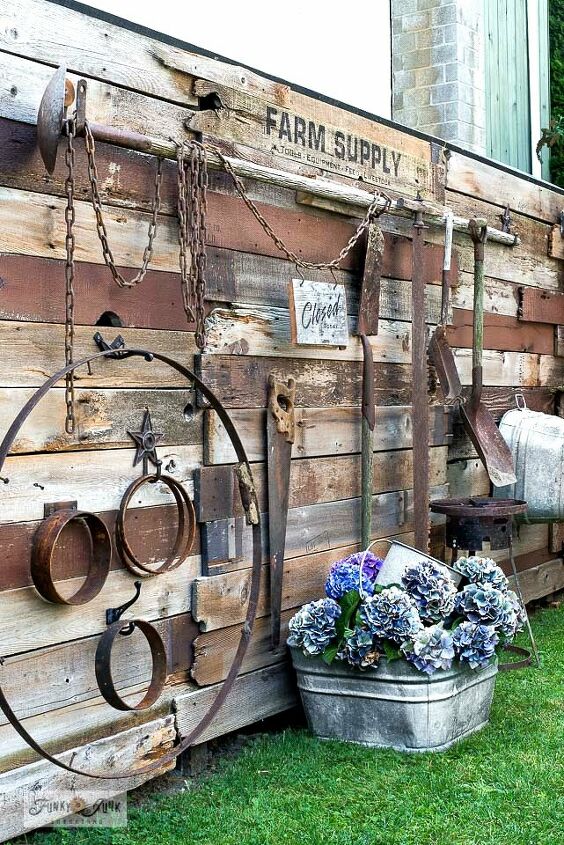
And here is the finished result! What a fun focal point!
While the fence is gorgeous on its own, I absolutely love the fact that my rusty garden tool collection also has an official home where I can fully appreciate them!
Can you imagine all the fun you could have with a fence like this? I think I may change it up every summer!
How would you decorate this fence?
See how the fully finished fence looks in my yard HERE along with the entire series!
Resources for this project:
See all materials


Comments
Join the conversation
-
Oh I love this! The idea of turning the boards around is unique. But when you added the tools and the stamps--WOW! All of our fencing is reused.
-
the fence re-make is beautiful, but it is so sad that the berries are gone. They make good very healthful eating.


Frequently asked questions
Have a question about this project?
How to plant flowers back yard
From a junky boneyard to a rustic boneyard. Very clever. We’re you able complete this to the entire original length of the fence? Did you have enough of the old fence boards for each section? It appears that more planks are needed for the horizontal design versus the vertical design. Maybe you received some additional planks from your good neighbor or someone else? Thank you
how did you attach boards to posts?