How to Use Stair Caps to Update Your Stairs

Many years ago, I created a post where I took the carpet off my stairs and updated them with Retro treads or stair caps. This has been my most popular post to date at over 2 million views. I’ve always wanted to do this project again and never had the opportunity until now. We are getting ready to put our house up for sale and the basement stairs were atrocious.
If you want to see my first post, you can find it here...
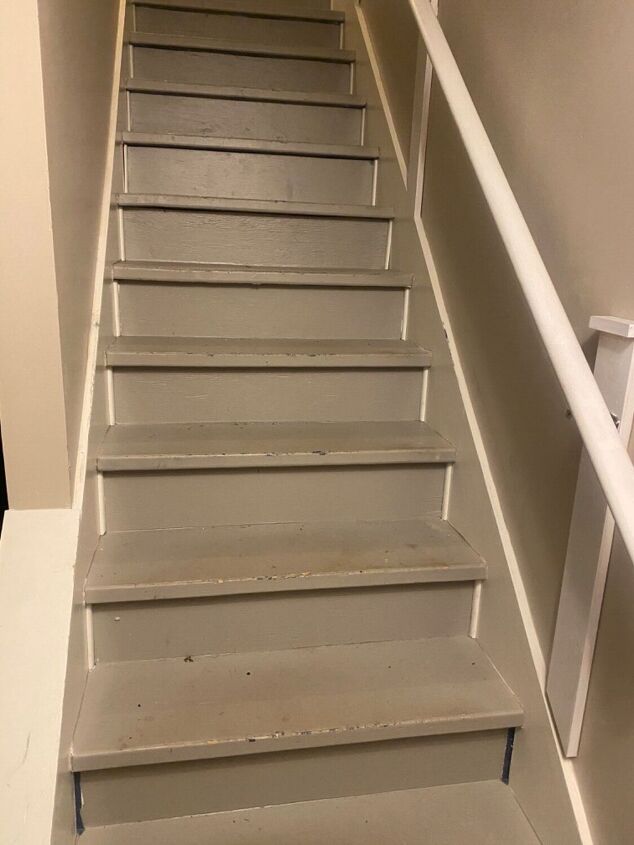
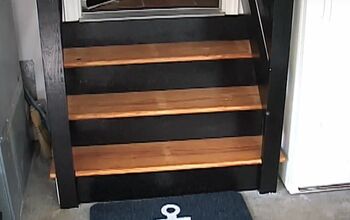
Here are my basement stairs. Wow, have they taken a beating in the three years that we’ve been here.
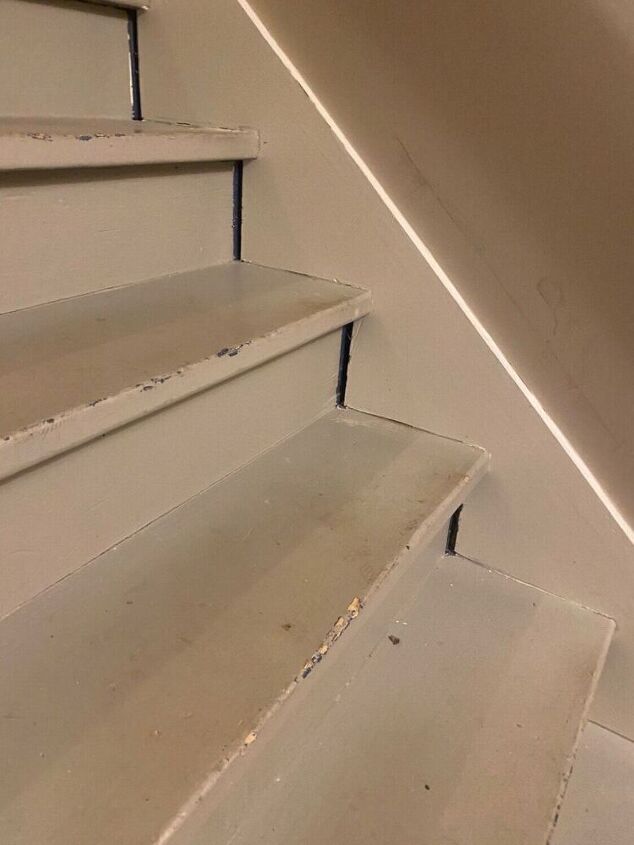
On each riser, there was a small piece of quarter round going vertically on each side. I discovered it was hiding a good size hole behind each piece. I originally planned and bought 1/4 inch plywood to use to face the risers. Given these holes, I had to go back and buy a thicker material to hide these holes. With projects like this, add an amount to your budget for unforeseen circumstances. Anyone have any good unforeseen problems to share with us in the comments?
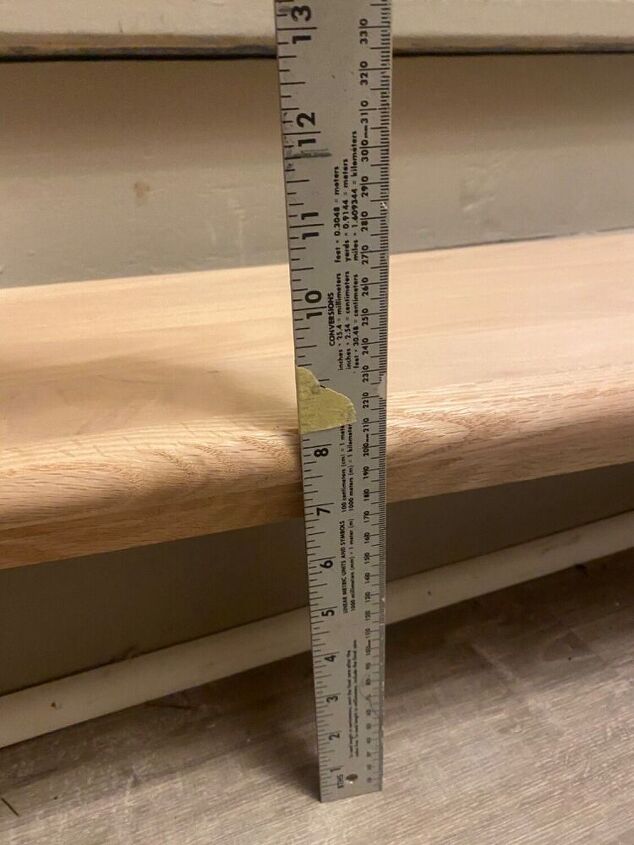
One of the biggest negative comments on my first post was that adding a stair cap would make the stairs too tall per code. So I looked up Virginia stair code and it said 8 1/4 inches. I marked it on my yardstick and popped on a stair cap. It looks good to me. Maybe it wasn’t to code before?
I bought one stair tread cap first, just to see if it would work. Then I ordered 11 more, bought the stain, a stain brush (on a whim), heavy duty adhesive and a finish nailer. I wanted to get Bostitch adhesive but it wasn’t in stock around me but my adhesive worked really well. Those treads aren’t going anywhere.
I used a power miter box to cut down each tread about an inch for my stairs. On the first one it splintered a bit so I put masking tape on the top of the tread and that helped to keep it from splintering.
I cut each tread upside down.
As I cut each, I would dry fit in place. Be sure to tell family members not to use the stairs while you are doing this.
Big improvement already...
A lot of my stairs were slightly different lengths so after everything was dry fitted correctly, I numbered each tread. Oh, and make sure you draw a line under your six! I didn’t and then I was like 6 or 9... I figured it out but you should save yourself some heart ache.
Since it was raining outside, I set up a staining/drying area in my basement.
I’m so confident here, two minutes later
I had a tread Slip out of my hand and down the wall and had stain on my wall, arm, leg and clothes (that I was going to be very careful not to get stain on).
Fun fact, coconut oil will remove stain from your skin, quickly and easily. I keep one in my craft room that is only used for non food activities.
I really liked the brush. Normally, I used rags but the brush is nice.
You will still need lots of rags to take off excess stain.
Here is one with excess removed and one in the process of removing the excess.
The brush was great for getting in the detail areas.
I let them cure for 24 hours.
Now to open my adhesive. Did you know you can cut the top off of your adhesives with most caulking guns? They have a hole in the handle. You just put it in to where you want the cut to be and squeeze the trigger/handle. So much easier than utility knives.
I put a lot of adhesive down. I would put on some blobs and zigzag it around.
I would place the tread on and the stomp all over it before using a finish nailer to secure it in place.
I put three nails across the back and one on each side about an inch from the front nose.
Going up!
Looking better.
And from the top down...
It was this picture that caused me to lose a whole night’s sleep. I had loved the stain color but didn’t realize from this vantage point, I have light floors on the main floor, dark stairs leading down to gray floors. This is something most buyers hate. I think I will end up putting a gray stain on top of my stairs after I consult our realtor. Our light colored floor will most likely be colored differently by the new owners because it is in rough condition.
The risers were mdf thick enough to hide the holes and they went on much like the treads. I used a piece of cardboard under the riser to place each one on. I pulled it out after nailing in place.
A couple of finish nails and some adhesive to hold each one in place.
I think that this weekend project was well worth the time and money.
This project gives some old stairs an amazing facelift. 10/10 Highly recommend!
Enjoyed the project?
Resources for this project:
See all materialsComments
Join the conversation
-
 Mary Russell
on Nov 04, 2021
Beautiful job.Darker than I would have done them, but you did a great job.
-
 Stacy Davis
on Nov 05, 2021
Thank you!
-
-
-
 E
on Nov 06, 2022
I was going to do the same thing after seeing this. My house was built in 1994. I purchased a tread to see if it fit over the front of the old one but it didn’t completely. Do you have any suggestions on what to do?
-
 Stacy Davis
on Nov 11, 2022
I think if I understand correctly, you might have to trim off the existing stair’s lip/overhang so that the cap covers it completely.
-
-
-
 Luis Esteve Sirvent
on Mar 31, 2023
¡Impresionante trabajo Stacy!
Desde España, ¡gracias por mostrárnoslo!
-










Frequently asked questions
Have a question about this project?
If you didnt remove the old treads wouldn't that make the top step a shorter rise to the floor
Why did you use cardboard under the riser?
Where did you get the secret door from?