


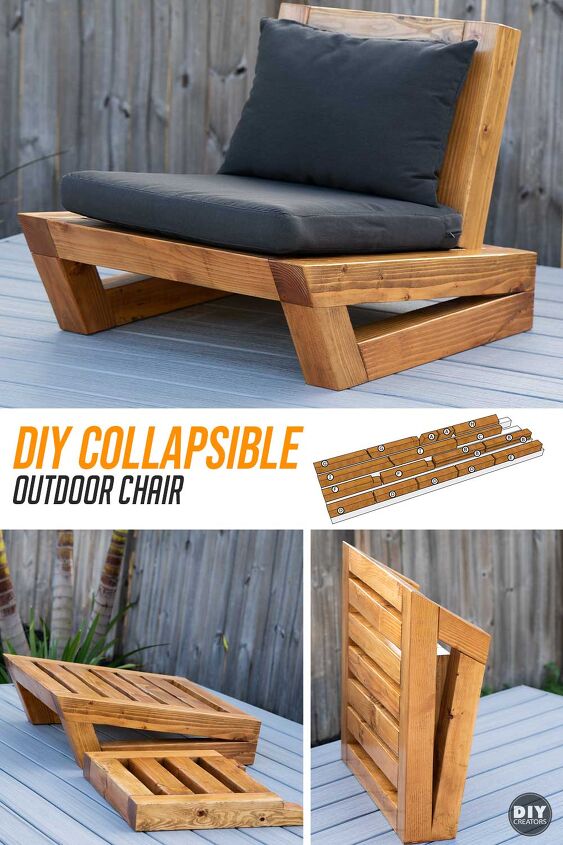
How to Make a Collapsible Outdoor Chair

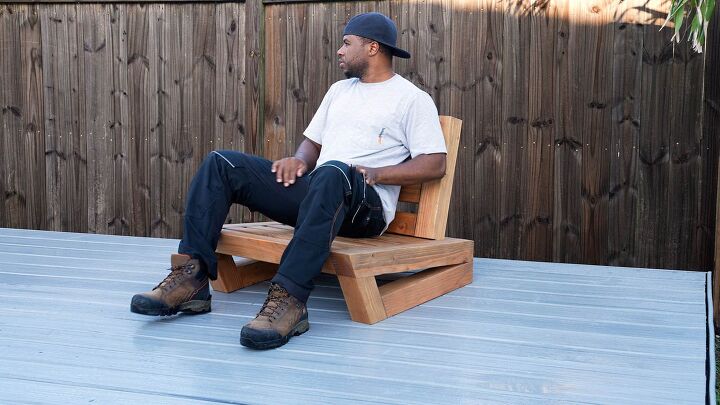
You can’t go wrong with an attractive and sturdy outdoor chair—especially one that is collapsible for storage. Now you can freshen up your patio, deck, or even poolside with a new set of chairs, one you can create on your own.
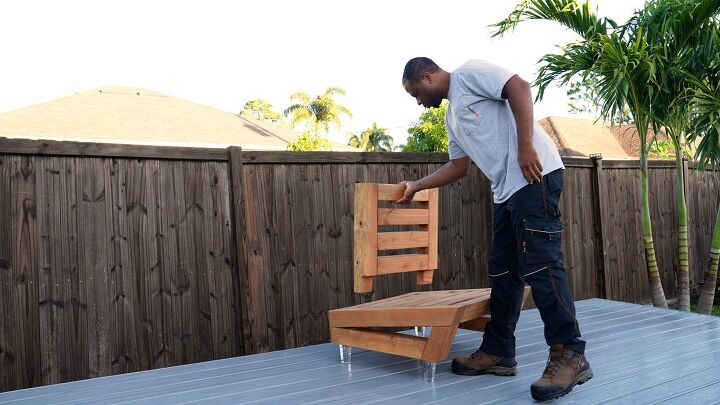
The idea behind this chair serves two purposes mobility add storability. Most of the things I make tend to be pretty heavy. What makes them difficult to transport is that they are usually bulky. Having the back detach from the seat makes it possible to split the weight and carry. I don’t always have a second set of hands to help out. There are times that I would need to pack up the furniture and store it from the harsh elements, storms, or even hurricanes. This chair design allows you to collapse in store.
If this chair interests you, I have a video below that explains this process along with this article and all the measurements you need to build your own.
Tools used
- Miter saw
- Sander
- Drill
- Bandsaw
- Speed Square
- Beadlock Jig
- Hand Plane
- Clamps
Materials List
- ( 4) 4X4 Douglass fir Lumber
- Beadlock tenon 3/8 & 1/2 in tenon stock
- (1) Set of Furniture feet (optional)
- Danish oil
- Wood glue
- 80 grit, 120 grit & 220 grit Sandpaper
4×4 outdoor chair parts and cutting information
Here are the parts laid out on the 4in X4inX8ft lumber. This should give you an idea of how to make the cuts for each piece.
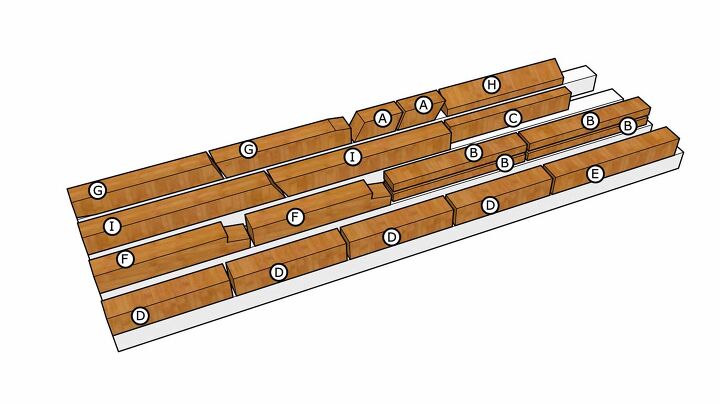
Below, you can see the quantity of the parts.
Quantity LabelsNames Lumber2A Leg fronts4inX4in Douglas Fir 4B Inner seat slats (Split 4 by 4) 4inX4in Douglas Fir 1C Inner seat slat (backrest holder) 4inX4in Douglas Fir 4D Seatback slat (middle)4inX4in Douglas Fir 1E Back of seat4inX4in Douglas Fir 2F Seatback sides4inX4in Douglas Fir 2G Leg bottoms4inX4in Douglas Fir 1H Seat front (angled part) 4inX4in Douglas Fir 2I Seat sides4inX4in Douglas Fir

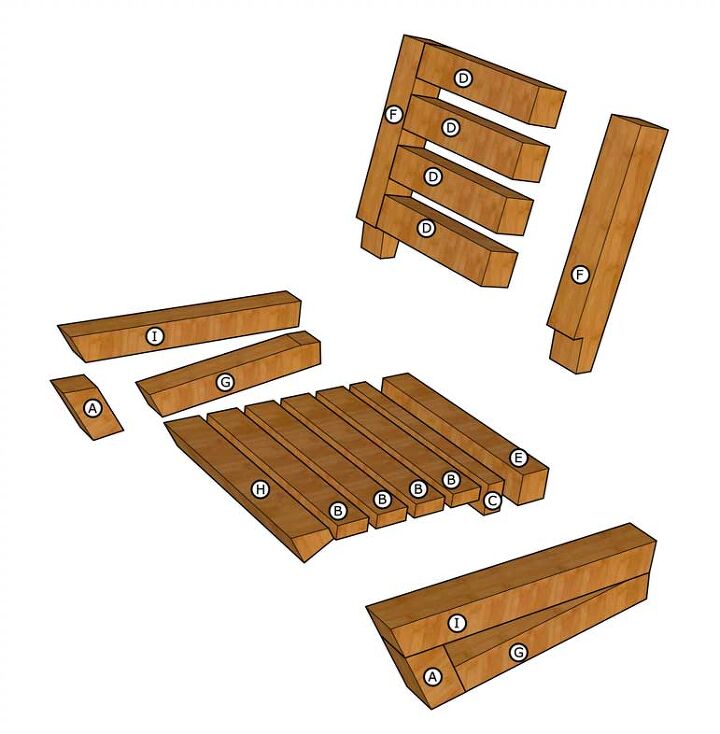
This is an exploded view of the outdoor chair with labels.
Step 1: Cut lumber for the chair
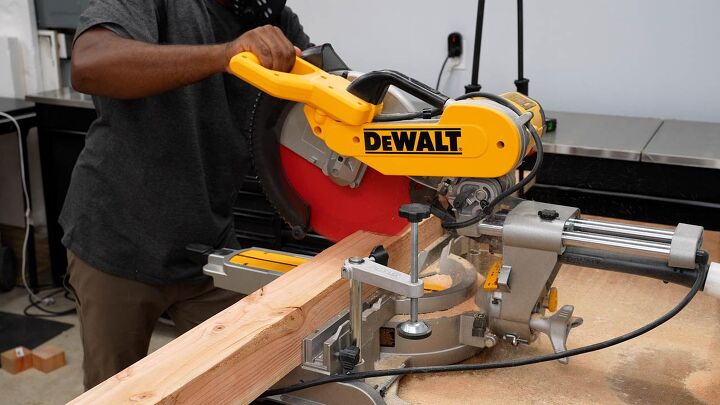
I used 4X4 lumber; you can modify this to use 2X4, but you may not have this chunky look; I will cover 4×4 lumber only in this post. Cedar is a good option; it’s lighter in weight but has a higher price tag. The lumber I’m using for this chair is Douglas Fir. I cut most of the parts down on the miter saw. The majority of the pieces are cut straight, but there are also parts cut at an angle.
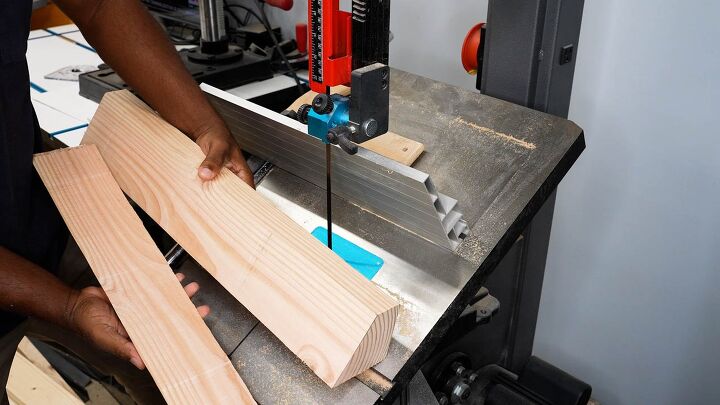
I do not have access to 2X4 Douglass fir, so I split the 4X4 in two. While I use a bandsaw, a table saw could work with some extra effort. What you need to do here is set the table saw to the highest point, then run the 4X4 through the table saw blade. Flip it over, push the 4X4 through, then clean up the saw marks with a sander or hand plane.
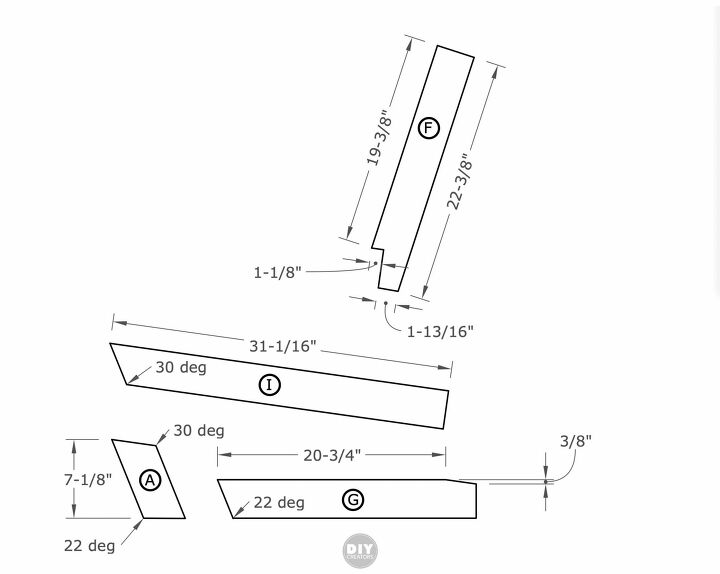
The front section of the chair will be cut at an angle to match the sides.
I tilt the table on the bandsaw until the blade lined up with the line I created on the end grain. A bandsaw may be the best way to cut this, but you can use a hand saw or a reciprocating saw to make this cut.
Step 2: Sand the chair parts and dry fit
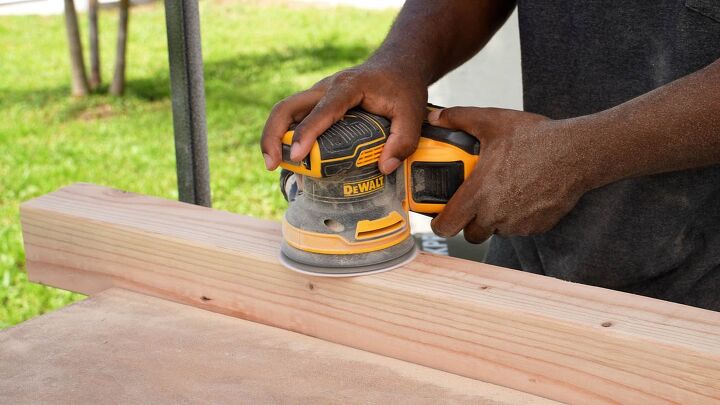
This lumber is rough, now is the best time to sand; while the parts are loose. I passed over it with an 80 grit sandpaper first. Then I made a second pass with 120 grit sandpaper.
For now, I got all the parts cleaned up as much as I could.
Step 3: Drill the Beadlock mortise
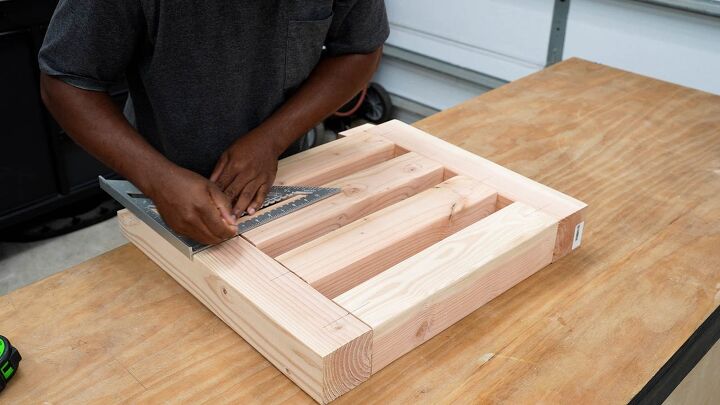
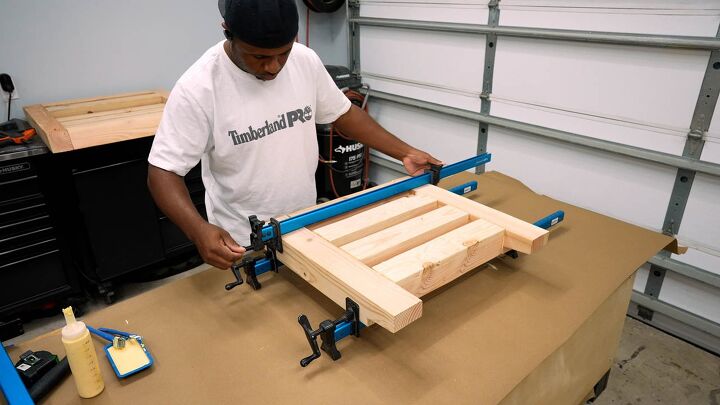
I’ll be using Beadlock jig by Rockler to make up the joints, but keep in mind, you can use any joining method you find more feasible. The Beadlock system is a great way to improve joint strength when using butt joints. With all the parts sanded, I align the parts for the chairback. Then place the two sides down on a flat surface and set the slats in between. Space the parts evenly and place a center mark across the two sides and the middle parts. Do this for all parts.
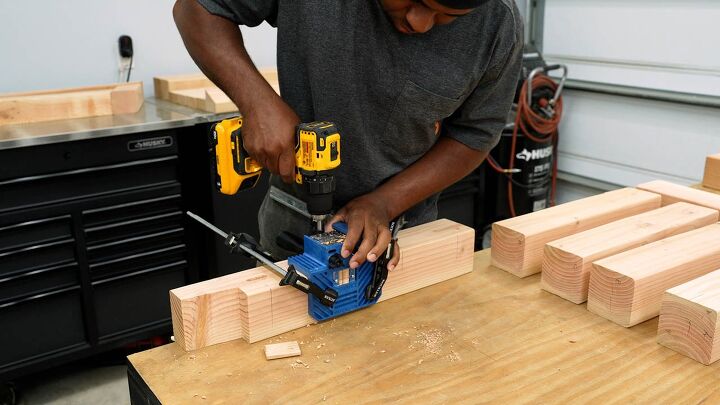
Clamp the jig on and line it up the mark made. Now, if this is your first time seeing this jig, I have a full video explaining how to use this jig, see below. You can check it out on my YouTube channel. For now, let’s power through this. You will need to align the jig to the reference mark and drill the first set of holes in position “A” on the jig. Next. Set the jig to position “B” to remove the jig, clean out the mortise, and drill the rest of the holes.
With so much to drill, I figured it was easier to get these all set up so I can move from one to the next. Once all the reference line has been placed, this should go by quick. As you are drilling dry fit to make sure the parts are aligned properly.

*** Very important, before you mark and drill the slats in the seat set your spacing for Part (C) in the diagram above. Do this to make sure the back will sit properly. The back should not be tight to the point you are forcing it and it should not be lose where it’s flopping all over the place. Fine-tune this before drilling and gluing.
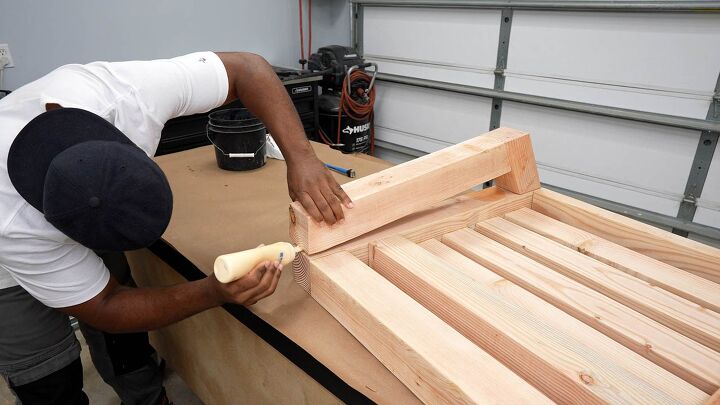
Step 4: Glue the chair parts
Let’s go a step further here; we will need to dry-fit all the parts to make sure they fit nicely. Now take a pencil and label the parts as they are assembled. You can label the parts with letters starting with A, B, C, and so on. This will make for a great reminder when you are going through gluing process, and you need to know which part fits together. After that, repeat the same thing for the seating area.
You will now need to plan the glue-up; you need wood glue, clamps, or straps, a bucket of water, and a rag. Focus on one section at a time. Be sure you have that fitted and glue together properly before moving on. I find it easiest to install the Beadlock tenants in the sides first. So apply wood glue in the mortise, then hammer the tenon. Now glue the parts.
*As a quick tip, set the tenons in the mortise and mark it; this way, you know how deep the tenon should be. Do this during the dry fit. When you drive the tenon in, you know that you have enough of the tenon down into the mortise while gluing.
I focused on assembling the back first then; then I assembled the seat section.
Set the parts off to the side and allow the glue to set up.
Finally, attach the legs using the same method applying wood glue in the mortise, install the tenon and clamp the parts. The back section to the legs is glued only. You can add additional strength by driving in hardware through the bottom.
Step 5: Apply a finish to the chair
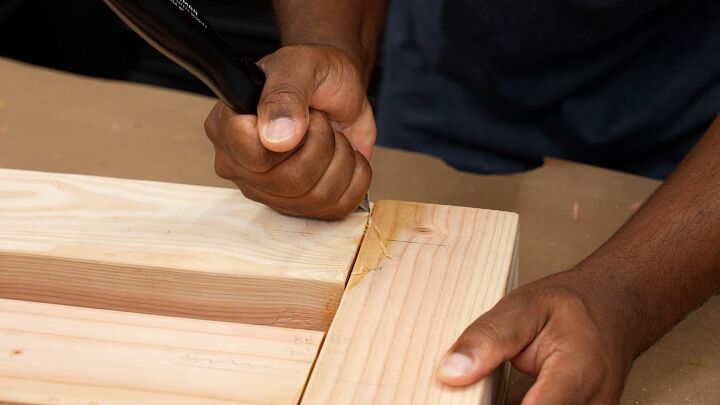
Now that everything is all glued up. I’ll pass over it one more time using a Sander. If any parts shifted or offset during glue-up, now is the time to clean it up. You can do so using a hand plane, a chisel, or an orbital Sander.
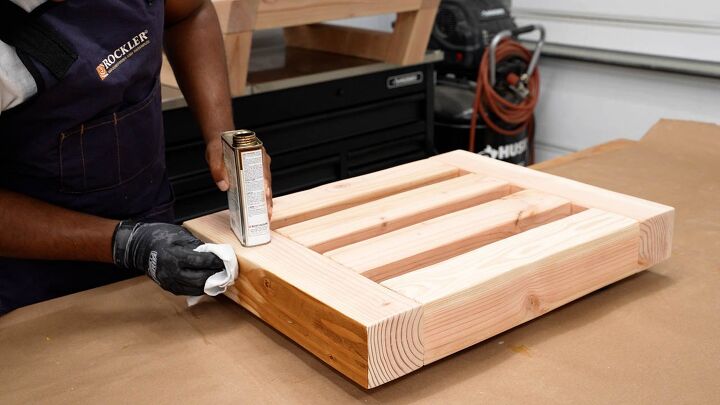
I applied one coat of Danish oil. I could have gone with any finish I want, whether it’s stain, dye, paint, or just a clear coat. I would suggest picking what fits your taste.
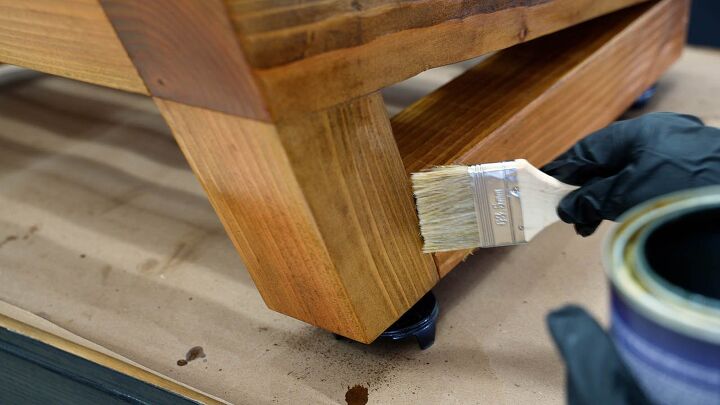
Finally, to top it off, Varnish was applied to seal and protect.
I added feet to the chair, which raised 4 inches, I like the low look better, so I took them off.
Step 6: Enjoy this outdoor
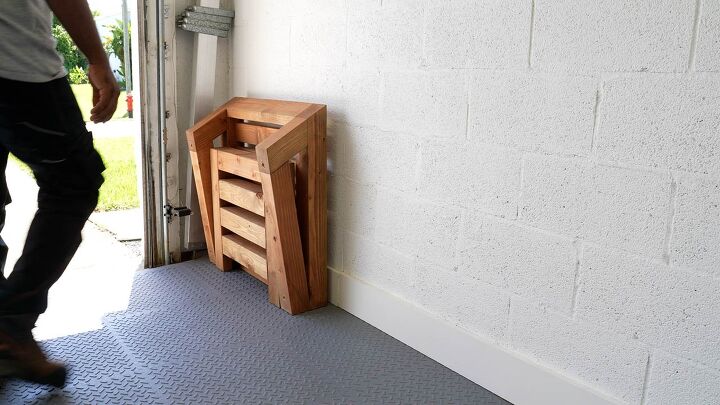
This indoor-outdoor chair could be the perfect solution for quick setup and store away furniture. The best part about this is the storage footprint it requires. You can remove the back and store it within the base of the chair. So, if you have the patience to build these, you can store them horizontally or stack them vertically. We have some great modern looking outdoor chair that is solid and will last for years to come.
I use Douglas fir lumber to build the chair, all of which you can find at your local Home Depot, and It only requires $80 in lumber. As I mentioned, I like the look of the bulkiness in the lumbar, of course. This adds weight. However, with the ability to break it down, it’s easy to transport. Since I live in Florida during hurricane season, we need to store our loose items so they aren’t turned into flying objects.
Enjoy this easy store design for your indoor-outdoor space! Perfect for your patio or even a gift.

Resources for this project:
See all materials


Comments
Join the conversation
-
Kudos!!!
-
This is a great piece and a great post. Call me inspired


Frequently asked questions
Have a question about this project?
This chair is outstanding and that it folds too?! Nice work.