


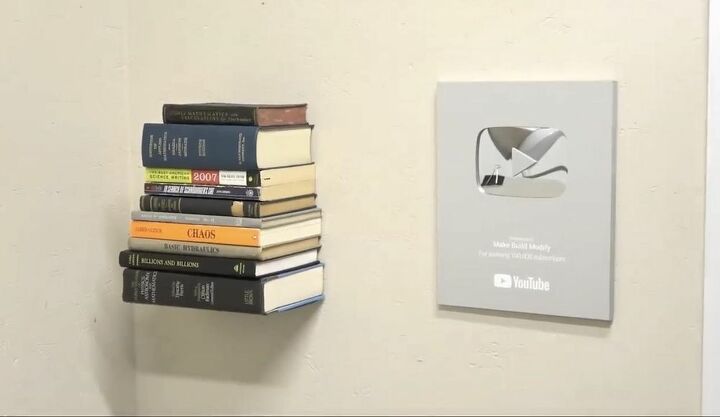
DIY Invisible Bookshelf

Any book lover will attest to the fact that there can never be too many spaces to store books in a home. I wanted a small space to store and display books in my office and designed an invisible bookshelf to create the illusion of floating books on the wall. I used a torch to weld a steel rectangular base and then attached a short metal wall mount for an inexpensive, sturdy, and truly unique floating bookshelf. This DIY project can be customized for any space in the home for a creative conversation piece and imaginative alternative to a bulky bookcase.
You Will Need:
- 30” of 1”x1/8” steel stock
- 10" Disc Sander
- Cordless 18v Grinder
- Bench Mounted Shear
- Clamps and Bench Vise
- Drill
- Countersink Drill Bit
- Center punch set
- Welding Torch
- Welding Magnets
- Welders Gloves
- Spray Paint
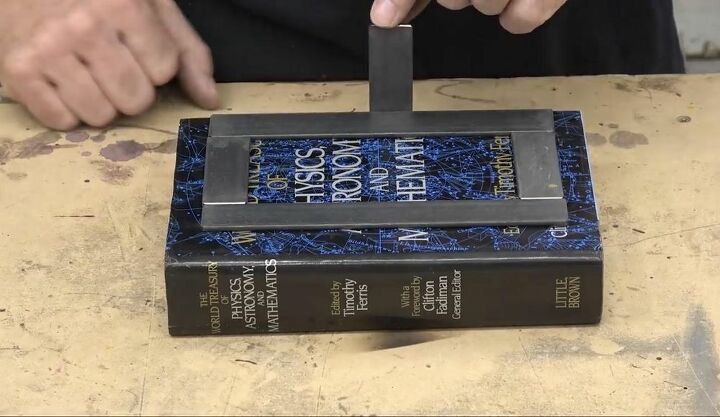
I chose a book to design my invisible bookshelf template from and use it as the base of the bookshelf frame. Choose a book large enough to support the other books you want to store and display and one that you do not plan to pull off the shelf frequently.
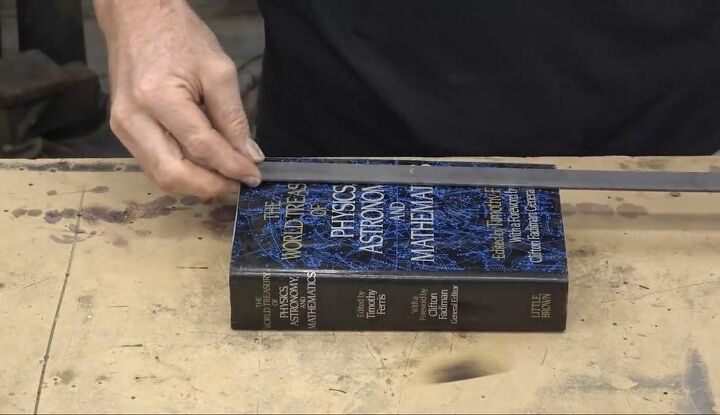
I chose a book to design my invisible bookshelf template from and use it as the base of the bookshelf frame. Choose a book large enough to support the other books you want to store and display and one that you do not plan to pull off the shelf frequently.
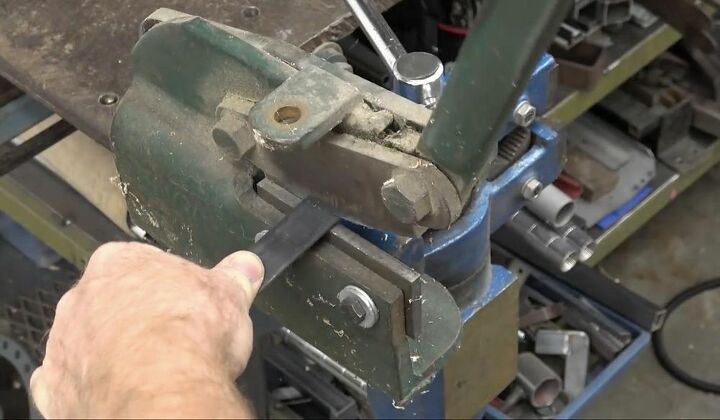
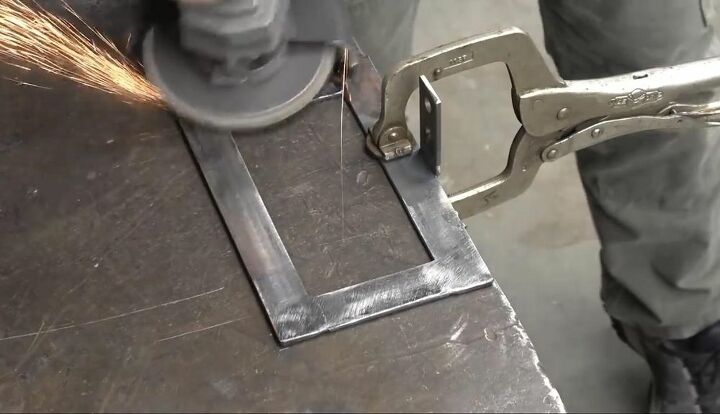
I cut four strips of 1”x1/8” steel stock to create a rectangle inside the dimensions of my book using a bench-mounted metal shear.

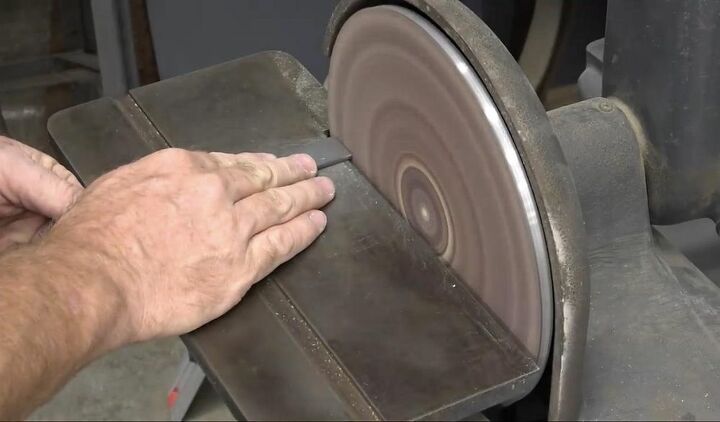
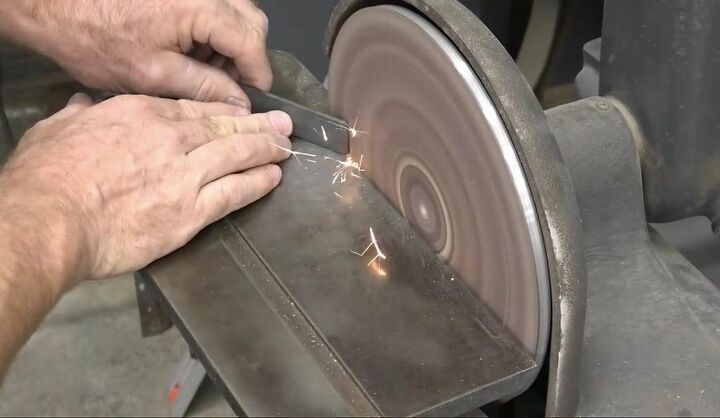
I sanded the cut pieces of the rectangular bookshelf frame to ensure they were smooth and the same length using a bench sander.
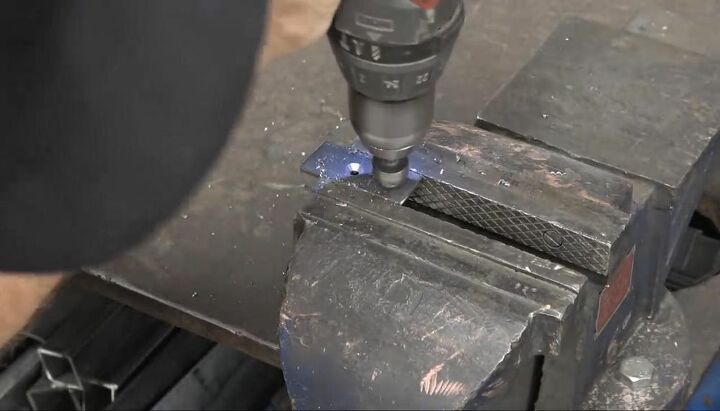
I cut a fifth very short piece of the 1”x1/8” steel stock to create a mounting point for the center of the rectangular bookshelf frame parallel to the wall.
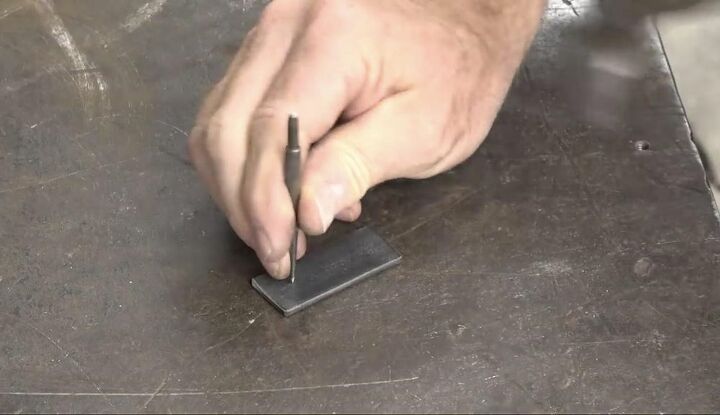
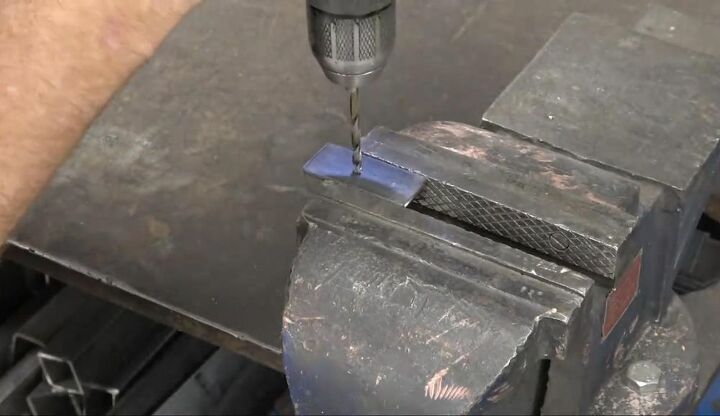
To create the hidden wall mount for my invisible bookshelf, I used a center punch to mark and start the holes then drilled two holes in the short piece of steel stock using a cordless drill and high-speed steel bit. After drilling the holes, I finished them with a drill and a countersink bit.
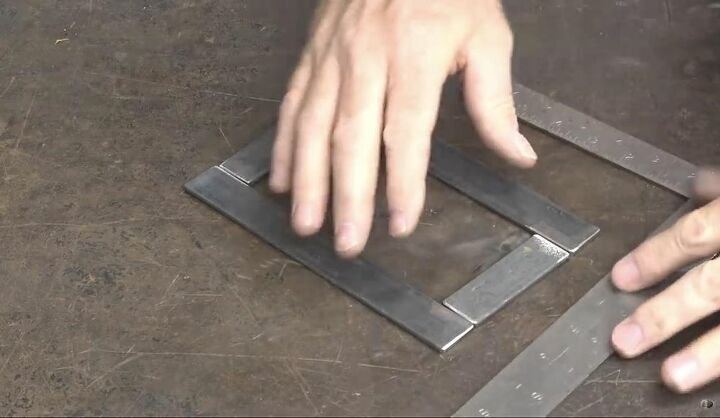
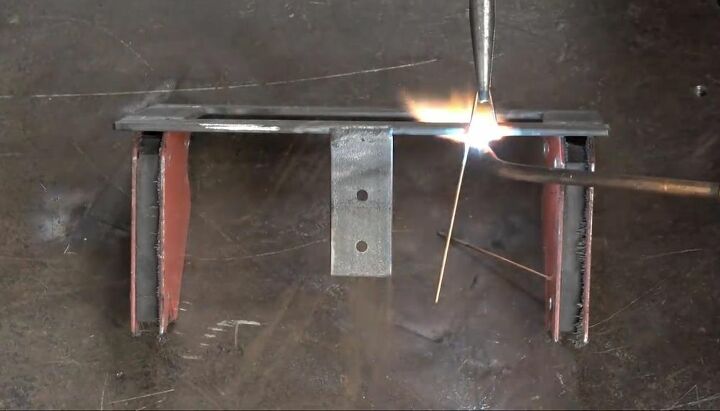
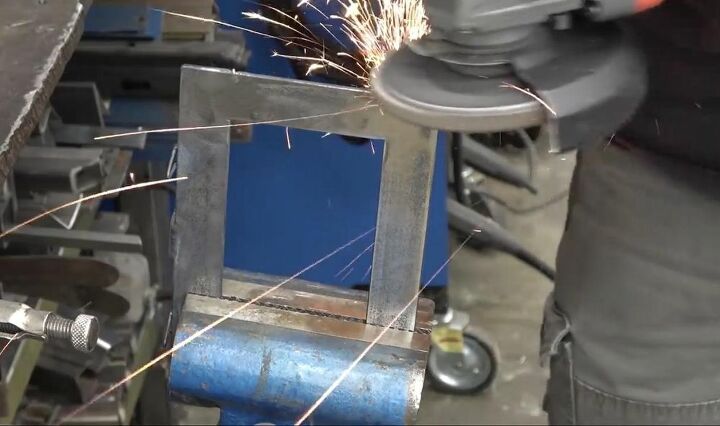
I arranged the four sides of the rectangular bookshelf frame on a welding table and made sure they were square before welding the four seams on both sides.

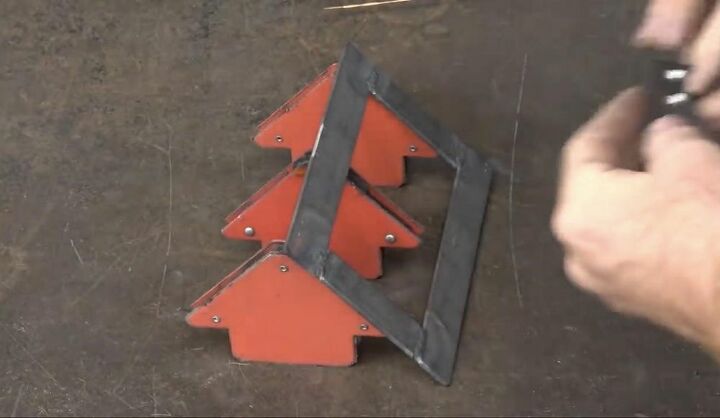
I used welding magnets to stand up and hold the rectangular frame and joined the pre-drilled mounting piece to it at a ninety-degree angle. Weld the wall mounting piece you create to your floating frame base.
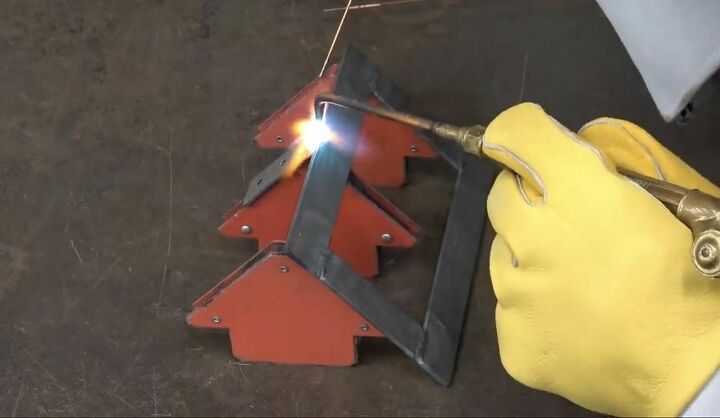

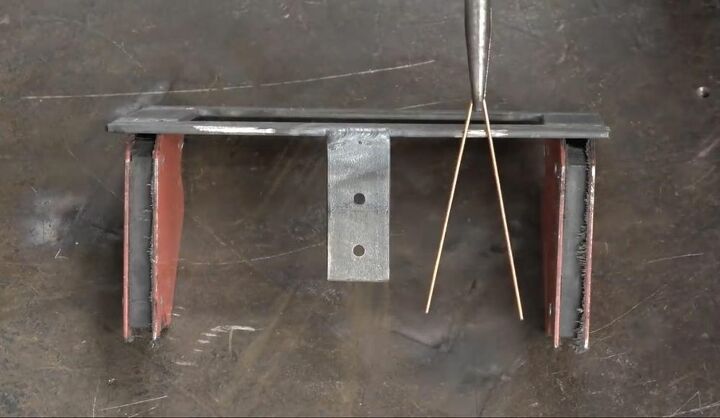
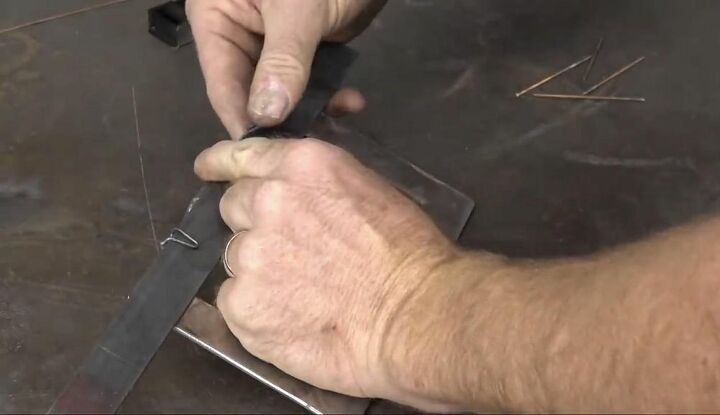
I cut two lengths of narrow gauge rigid wire and bent them into an “A” shape. I welded the two wires to the rectangular bookshelf frame at a ninety-degree angle in the opposite direction of the mounting piece with the holes.
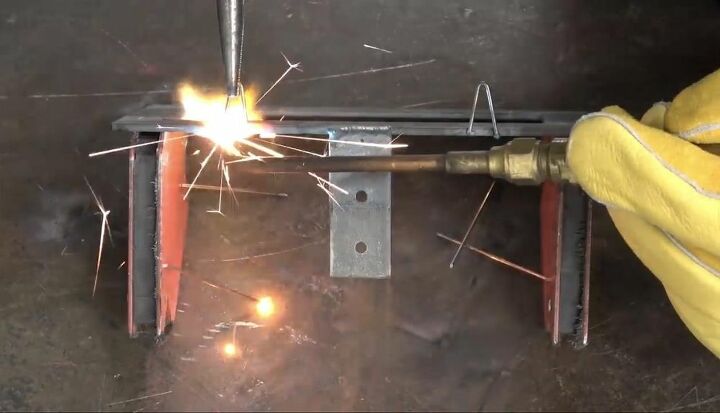
I clamped the bookshelf frame and used a cordless angle grinder to smooth the welds and used a bench vise to hold the frame in order to smooth the corners and outside edges. Remove any burrs or protrusions from the metal.

I bent the two attached wire pieces over a length of ⅛” steel stock to create a space approximately the thickness of a hardback book cover between the rectangular mounting shelf and the wire book holders.
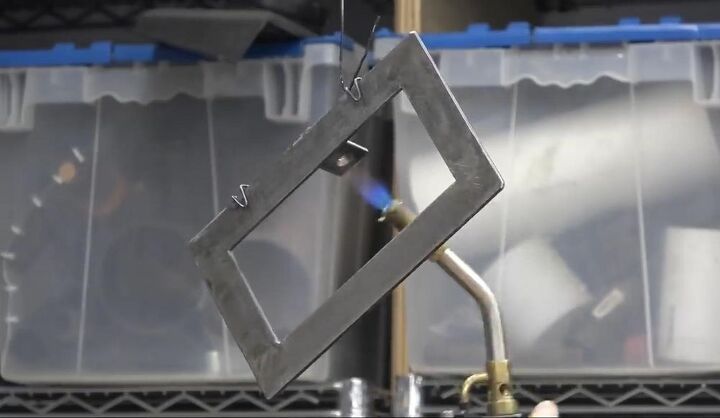
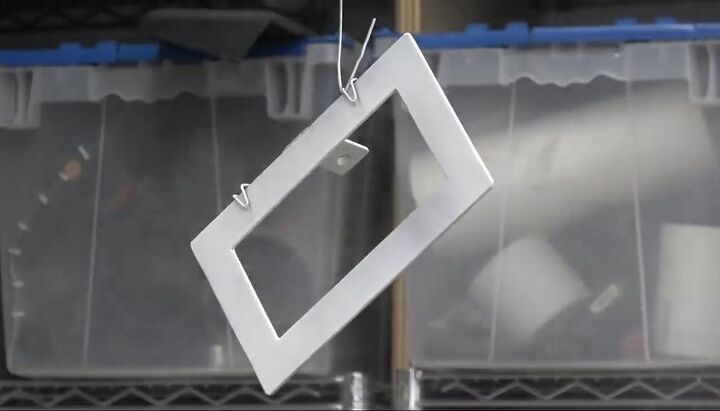
I used my torch to slightly warm the metal frame and then coated it with white spray paint. Heating the metal first helps the paint dry much faster and produces an eggshell-like finish.
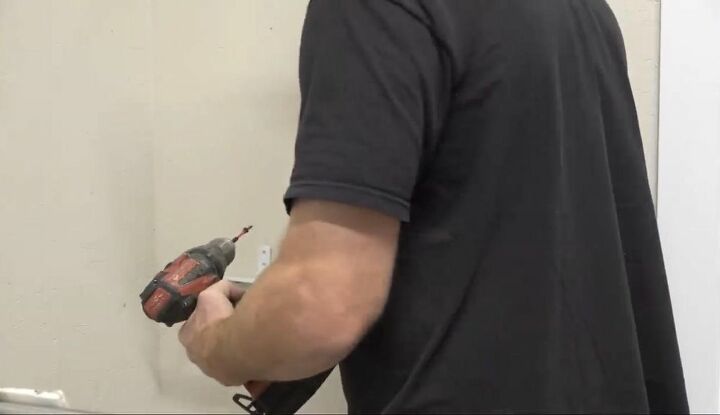
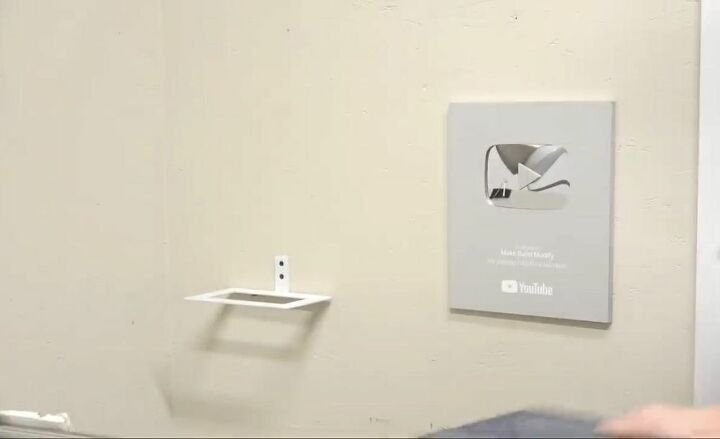
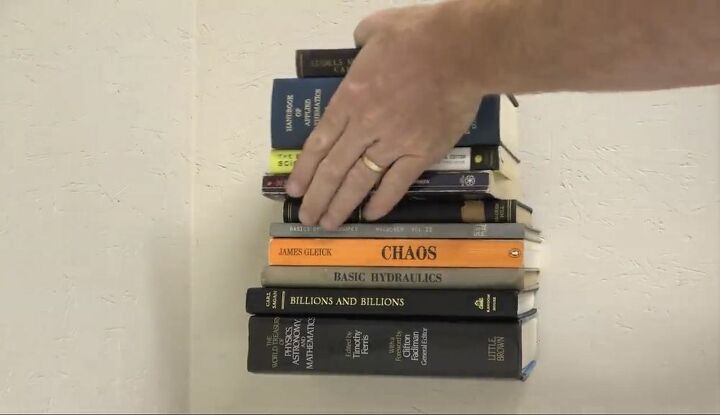
I used my drill to attach the wall mount to the wall in my office and added the base book I used to create the bookshelf to conceal the mount. Add your favorite books on top of the base to complete the invisible bookshelf display.
I’m very pleased with the way my project turned out and how the interesting design improves my office aesthetic. Any book lover and DIY enthusiast will enjoy trying to create their own spin on this invisible bookshelf design. I used a torch for this project but any welder would be fine to create a floating bookshelf in the dimensions you need to best fit your space and style. Take the time and effort to improve the design of your office or reading space and create a conversation piece your book-loving friends will adore.

Have you incorporated a floating bookshelf design in your home or office? Share your tips and photos or find inspiration for more unique DIY projects like this one on Hometalk!
Resources for this project:
See all materials

Comments
Join the conversation
-
Cool idea. Thank you for sharing.
-
You bet!


Frequently asked questions
Have a question about this project?
This is awesome, but how many people looking at this have all the equipment needed to make it? We certainly don't.