Simple Centerpiece Idea For Your Thanksgiving Aesthetic

Looking for centerpiece ideas for your Thanksgiving or Friendsgiving table? Try this super simple centerpiece idea to complete your Thanksgiving aesthetic.
I just love a beautiful centerpiece, don’t you?
It makes a table feel special.
No matter how elaborate or simple a centerpiece is, it is a necessary component of any dining table.
Whether you buy or DIY a centerpiece, don’t skip this step when decorating a table.
And if you are attending Thanksgiving or Friendsgiving at a friend or family’s home, offer to bring the centerpiece.
It’s a nice touch!
If you’ve been following me for a while, you know how much I LOVE making centerpieces.
And fall is one of my favorite times of year to make them too.
It’s so fun to change up autumn color palettes and fall flowers in different arrangements like THIS one and THIS one.
Whether I cut flowers from the garden, pick them up from the market or go totally faux, centerpieces are my jam!
And have I got a super easy one for you for this year’s Thanksgiving aesthetic!
How to Make a Flower Centerpiece in a Pumpkin
I’ve made this type of centerpiece a few times and always love how it turns out.
You can make them super simple or elaborate depending on what type of flowers you use.
For this table, I’m going with a less-is-more approach.
But you can do so much more with cut flowers either from your garden or the market.
A little back story about my first pumpkin and flowers centerpiece…
Several years ago, I made a gorgeous centerpiece for my Thanksgiving aesthetic and it was a huge hit.
I spent almost ALL DAY making it the day before Thanksgiving that year.
Because I picked up the pumpkins so late in the season, the nursery gave them to me for free.
And I purchased fresh cut flowers from the market.
Now I realize this picture does my arrangement no justice because it is so old, but trust me…it looked so amazing!
So I hosted Thanksgiving the next day and my guests loved it.
Anyway, we were leaving the next day for Vermont to get an early ski weekend with some friends and their kids.
Chris and I packed the family up and we left first thing Friday morning.
When we returned on Monday, the house SMELLED SO BAD!!!!
Like…really bad.
And when I say it was bad, you couldn’t even breathe it in bad because you’d get physically ill.
I immediately ran to the dining room and discovered the pumpkins rotted over the weekend, leaked and totally ruined my wood farmhouse table.
UGH!!!! It was such a mess!
I learned a BIG lesson from this first one.
Always, always, ALWAYS protect the surface underneath if using fresh pumpkins.
Because trust me when I tell you, rotting pumpkins are NOT worth the risk.
So if you make this pumpkin and flowers centerpiece, be sure to protect the table beneath and keep and eye on it after the event.
But I digress.
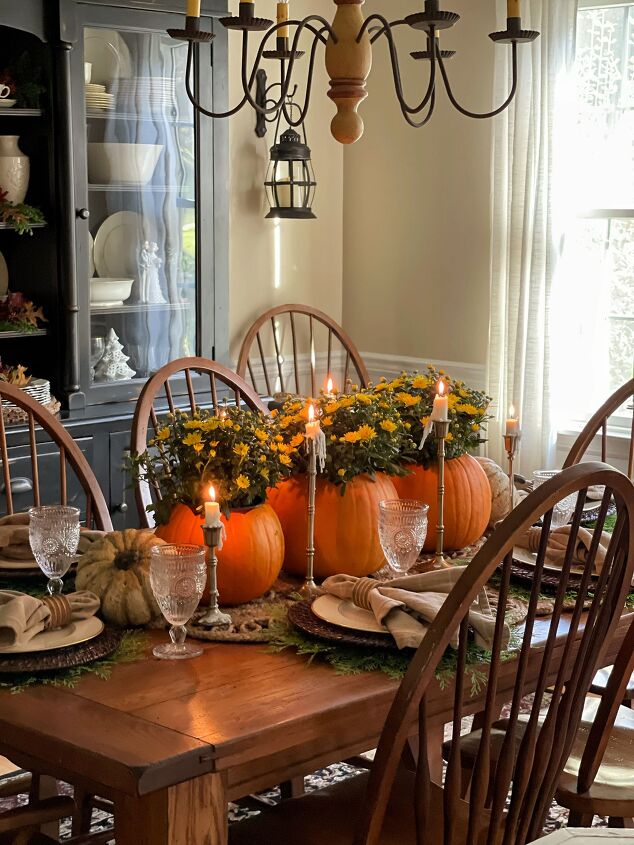
Let’s make a simple pumpkin and flowers centerpiece for the dining table.
Complete Your Thanksgiving Aesthetic With This Simple Pumpkin and Flowers Centerpiece
So it’s been a while since I’ve made one of these and thought it was a good time to share it again.
It’s not only perfect for a fall dinner party, but it is even more festive for Thanksgiving or a Friendsgiving dinner.
Supplies Needed
- Pumpkins
- Mums
- Plant Tray
How to Make a Simple Pumpkin and Flowers Centerpiece
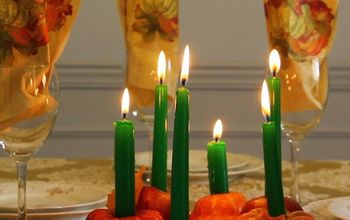
For my table, I decided to go with 3 mid-sized pumpkins.
I was between doing 1 large pumpkin centerpiece vs the 3, but the mums I found weren’t large enough so I went with the three.
See what works best for you and your table.
- Clean off the pumpkins.
- Carefully cut a circle in the top to remove the stem as if you are carving the pumpkin, then set aside.
- Clean out the insides.
- Determine the right height for your mums or other flowers. Raise it up if you need to.
- Water the mums well before tucking inside the pumpkins.
- Set the water tray inside the pumpkins, then set the mums on the tray.
- Water the mums as needed. You can tell if it needs it using THIS method.
A few notes to keep in mind…
If you opt to do an arrangement, instead of mums like I did here, you can use floral foam like I did in THIS arrangement or you can use a vase, glass jar or something.
But it really depends on the size of your pumpkin and what type of arrangement you decide to do.
If you want a more neutral looking tablescape, consider white pumpkins and gourds or painting the pumpkins to coordinate with your Thanksgiving aesthetic.
Thanks so much for dropping by!
For more rustic decorating ideas, CLICK HERE.
I hope you enjoy a wonderful Friendsgiving and Thanksgiving Day!
Subscribe to the blog and gain access not readily available to the public.
Thanks so much for following along.
Enjoy a beautiful day! xo
If you like this post, please follow me @bricksnblooms on Pinterest, Facebook, Instagram, and Tik Tok. Subscribe to my YouTube Channel. Or join my Facebook Group.
Enjoyed the project?

Comments
Join the conversation
-
 Stacy Ling | Bricks 'n Blooms
on Nov 04, 2022
You could but they tend to look kind of plastic and you lose the fresh scent of pumpkin. It’s a personal preference.
-
-








Frequently asked questions
Have a question about this project?