


How to Make DIY Velvet Ornaments in a Few Easy Steps

I'm going to show you how to create stunning DIY velvet ornaments inspired by the sold-out Studio McGee collection. Trust me; it's easier than you think, and the results are absolutely magical. Let's dive into the step-by-step tutorial.
Tools and materials
- Round ornaments
- Velvet flocking powder (various colors available on Etsy)
- Skewers
- Paint in a similar color to the flocking powder
- Ornament lollipops
- Box for drying
- Glue
- Gold Rub and Buff
- Velvet ribbon

How to make DIY velvet ornaments
Step 1: Gather Your Materials
Before we start crafting, ensure you have all the materials listed above. You can easily find round ornaments at your local craft store.
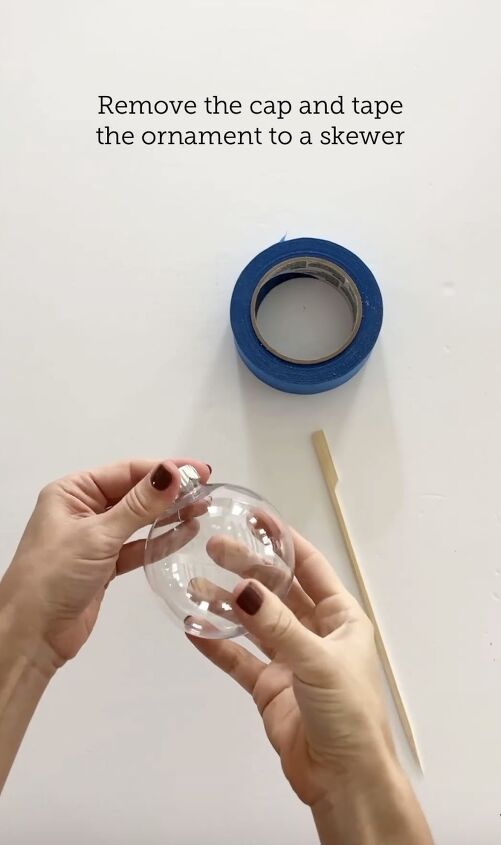
Step 2: Prep Your Ornament
Start with any round ornament of your choice.
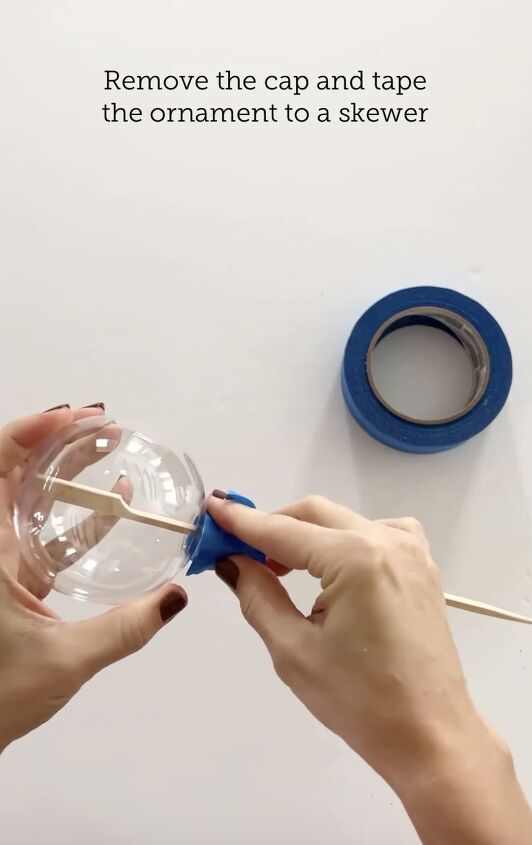
Remove the cap and tape the bottom to a skewer. This will make the painting and drying process much more manageable.
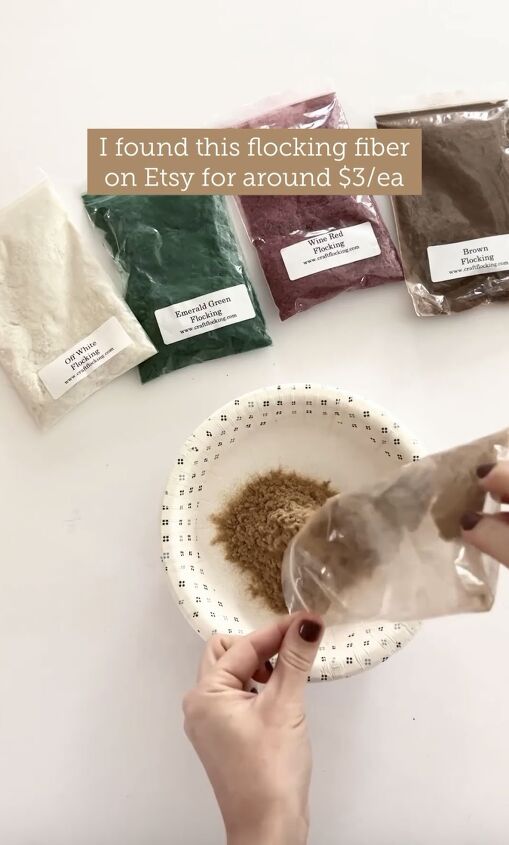
Step 3: Choose Your Flocking Powder
Head to Etsy and grab some velvet flocking powder. The variety of colors available will let you customize your ornaments to match your decor. Plus, it won't break the bank!
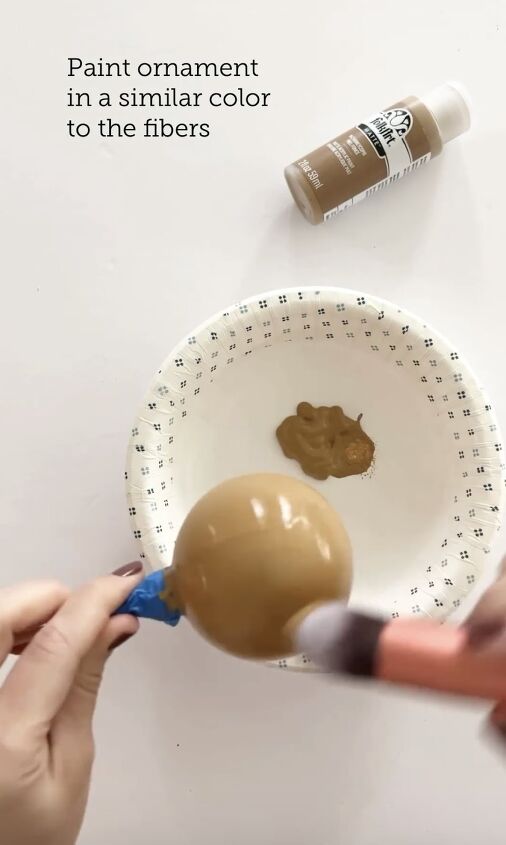
Step 4: Paint Your Ornament
Select a paint color that matches your chosen flocking powder. Apply a smooth coat of paint to your ornament, covering it entirely. This will serve as the base for the velvet flocking.
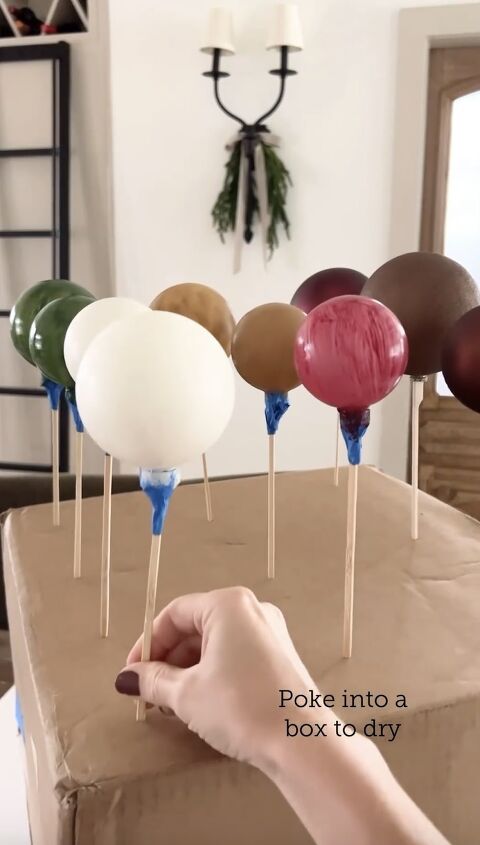
Step 5: Dry as Ornament Lollipops
Poke the ornament lollipops into a stiff cardboard box and allow them to dry. This ensures an even coat and prevents any smudging while the paint sets.
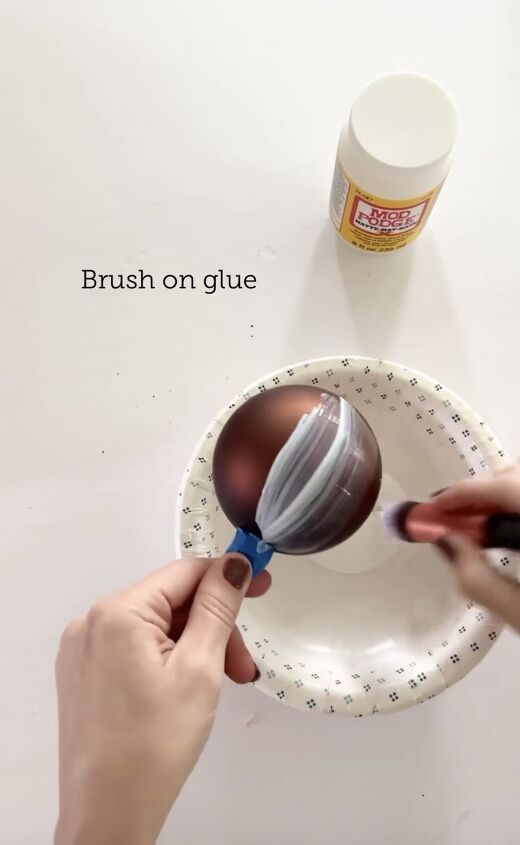
Step 6: Glue and Flock
Brush a generous amount of glue onto the dried ornament.
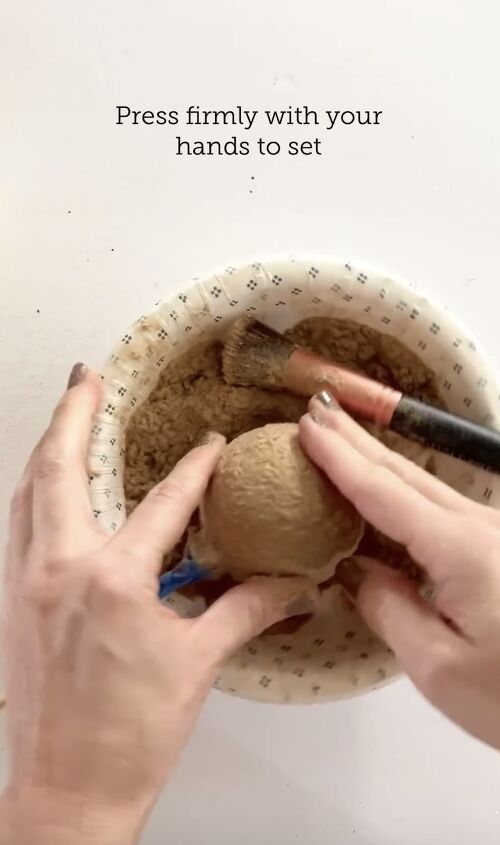
Immediately cover the ornament with the velvet flocking powder and press the powder firmly with your hands to ensure it sticks well.
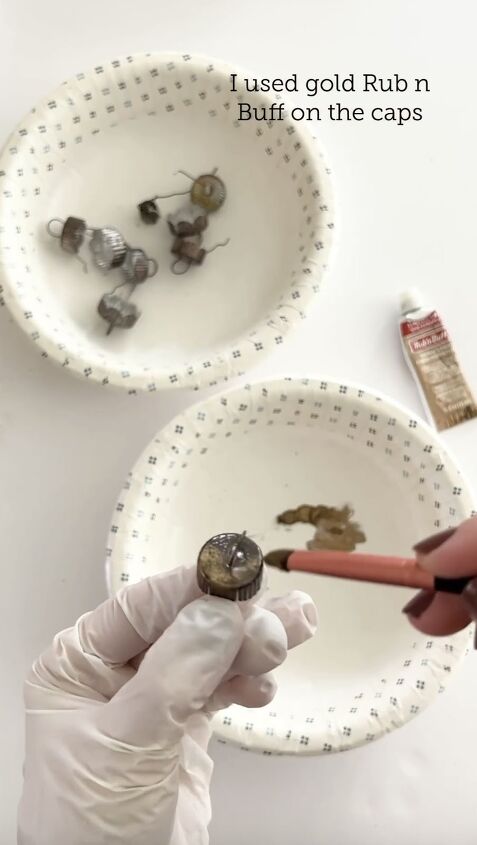
Step 7: Add a Touch of Gold
For that extra touch of elegance, brush some gold Rub 'n Buff onto the caps of your ornaments. This step adds a beautiful metallic accent.

Step 8: Finish with Velvet Ribbon
Complete your masterpiece by adding a touch of velvet ribbon to the top. This not only enhances the aesthetic but also provides a practical way to hang your ornaments.
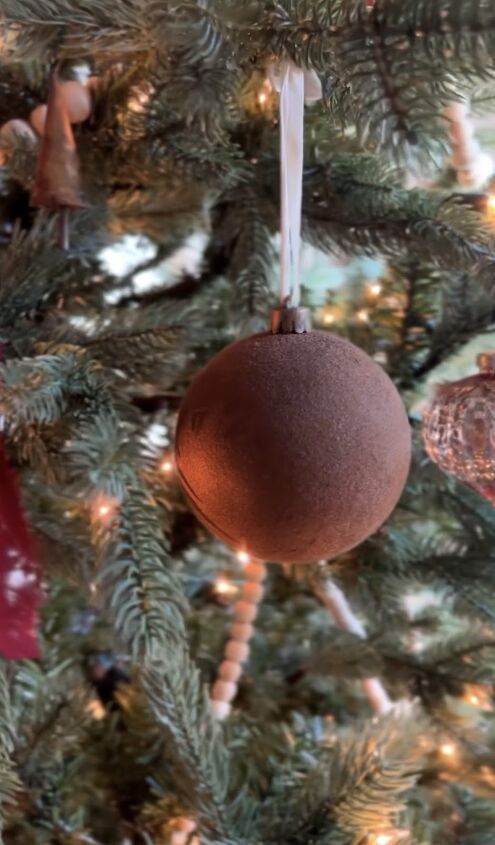
DIY velvet ornaments
Stand back and admire your gorgeous DIY velvet ornaments. These beauties are sure to add a touch of luxury to your holiday decor. If you've followed along and created your version of the Studio McGee-inspired ornaments, share your success in the comments!
Follow @jennasuedesign on Instagram for more DIY ideas.


Frequently asked questions
Have a question about this project?