


How to Make a Gingerbread Wreath in Just 4 Simple Steps
Get ready to make a special wreath that brings holiday joy to your doorstep. I'll guide you through each step on how to make a gingerbread wreath without using hot glue or tape - all you need are a few supplies.
You'll end up with a lovely DIY gingerbread wreath, perfect for a Candyland Christmas theme. Let's get started on this DIY gingerbread Christmas decor project!
This post was transcribed by a member of the Hometalk editorial team from the original HometalkTV episode.
Tools and materials
- Flocked wreath
- Gingerbread men ornaments
- Peppermint sprays
- Pipe cleaner
- Wired ribbon
- Scissors
Hometalk may receive a small affiliate commission from purchases made via Amazon links in this article but at no cost to you.
How to make a gingerbread wreath
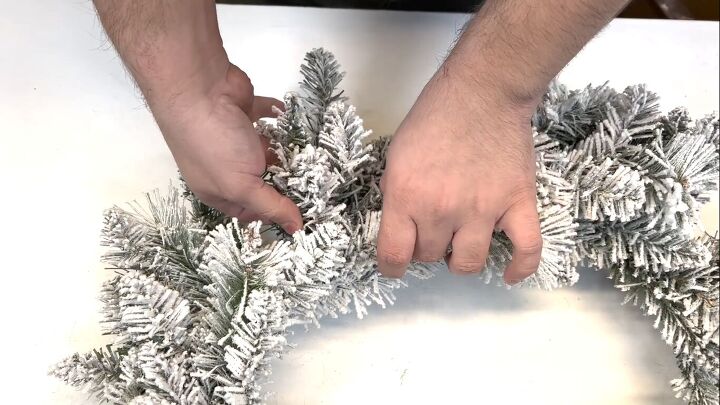
1. Fluff the wreath
I grabbed a flocked wreath and the first thing that we've got to do is we've got to fluff it.
Fuffing is one of the most important steps and it's something that I recommend you do to each and every wreath base. The reason for that is that it really takes it to the next level.
As you can see, this one looks really kind of wonky. By pulling apart each and every individual pine stem, you're able to shape it and get it to look like a perfect circle, which is definitely what we want.
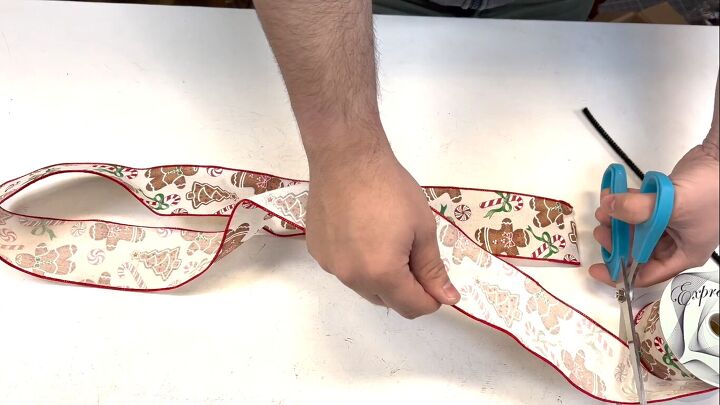
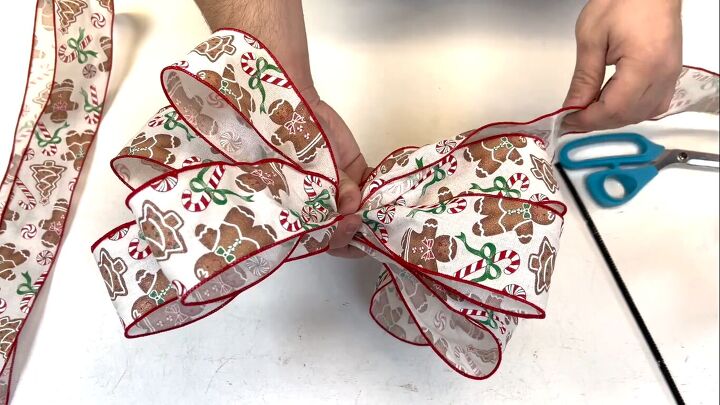
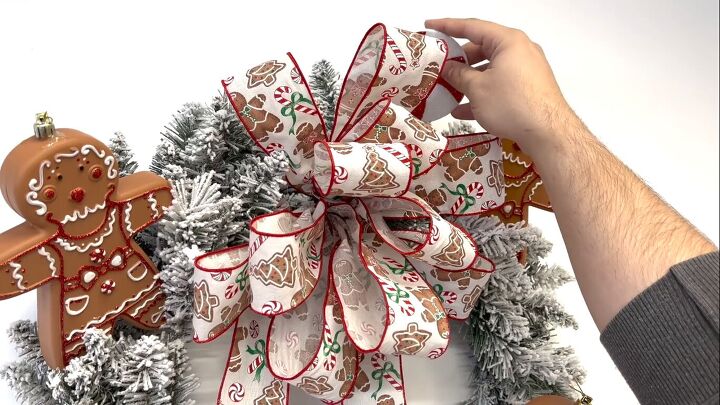
2. Make the bow
Now we're going to create a bow using this adorable gingerbread ribbon. This has gingerbread, candy canes, and cookies, and it's also covered in a really, really tiny glitter, which makes it look kind of sugar-coated, like the cookies.
Cut the tails
We're going to start by cutting a length for our tails about 28 inches long. With tails, feel free to cut them however long you decide. The longer the better, in my opinion, because it really makes an impact.
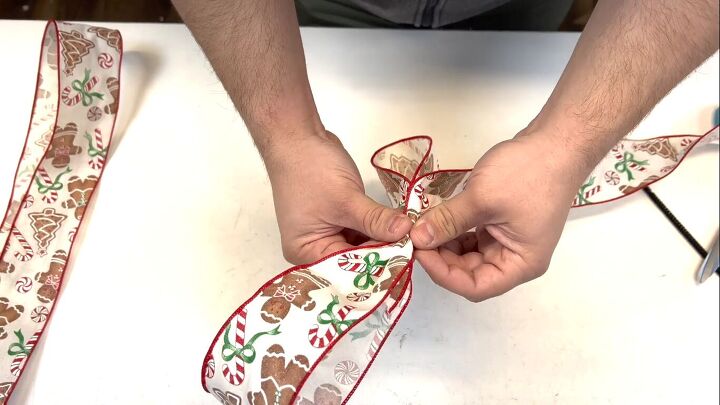
Create loops
We're going to do a traditional bow technique. So we're going to just create loops that are about six to eight inches long.
Since we're not going to be adding tons of products to this wreath to deflect away from the gingerbread men, we do want to make sure that we have enough loops and that our bow is large enough for that kind of wow factor.
I've done lots of bow tutorials in the past, but this one is probably the easiest. All you're going to do is create two loops, pinch, reverse the ribbon, and create your next loop.
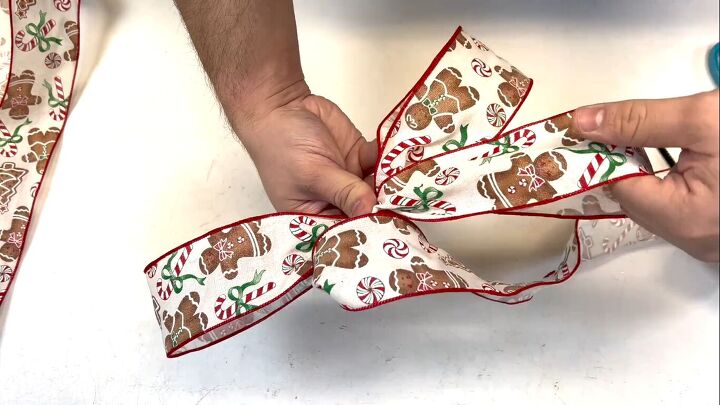
Repeat the loops
Repeat that process over and over again until you have your desired amount of loops. I recommend between five and seven loops on each side.
Tip: Your loops don't have to be the same size. As long as they're somewhere in that ballpark of five inches or so, you're good to go.
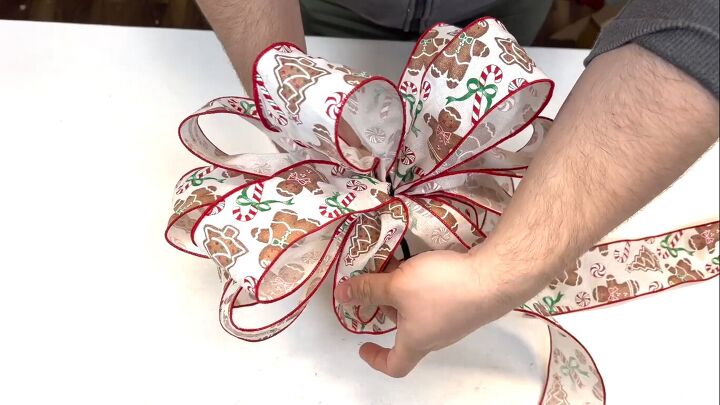
Attach the tails with a pipe cleaner
Take your scissors and snip off your ribbon. Take your tails, place them underneath, grab a pipe cleaner, and secure it. Make sure to twist it several times to ensure that it doesn't fall apart.
Attach the bow to the wreath
Now we're going to take our bow and just secure it right to the metal frame. Using a pipe cleaner makes it extremely easy to secure your bows. Tie it from behind, really tight, and there you have a really pretty gingerbread bow.

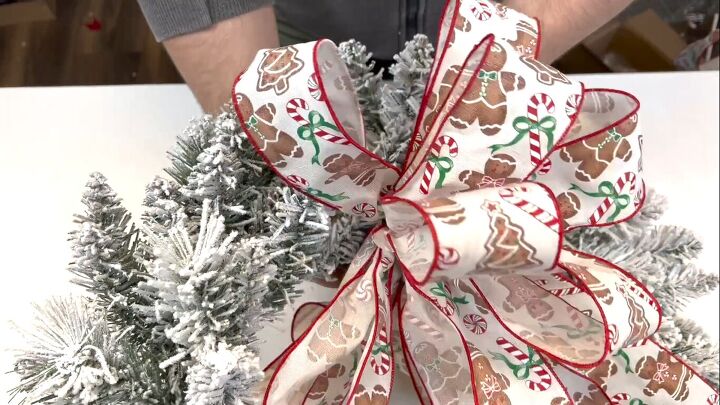
Curl the ends of the ribbon
I've shown you guys in the past how to dovetail your tails, but in today's case, what I think will look really nice is just taking the tail and curling it over itself.
This ribbon is wired, so it holds its shape beautifully and it'll stay with that beautiful curl. And it's just adding more texture and creates an interesting look for the ends of your ribbon
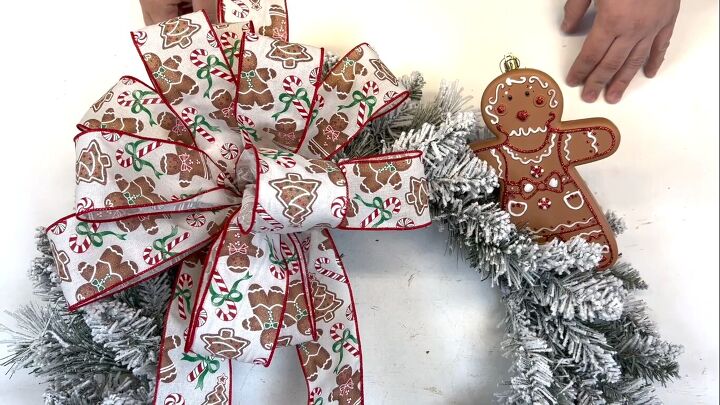
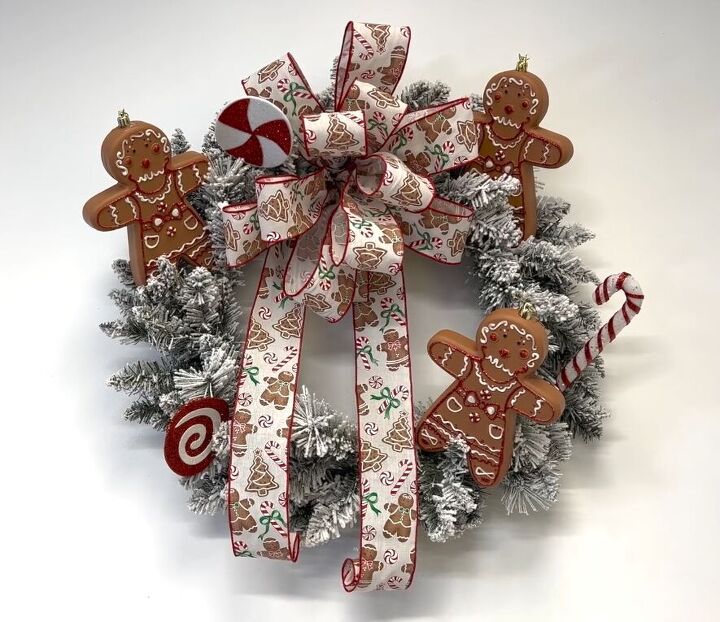
3. Add gingerbread men
Now we have these absolutely adorable gingerbread men ornaments, which are plastic and really sturdy. They match the ribbon, as you can tell, perfectly.
For these, you can hot glue them in place or you can wire them using the tops (the tops are actually glued on, so they're really secure).
If you want an interchangeable wreath and you're placing this somewhere where it's not going to be hit by the elements, then the sprays and your picks can hold them in place.
4. Add peppermint sprays
Here we have this adorable peppermint spray, and I thought this would be the perfect finishing touch. If you look at the ribbon, you'll see some peppermints, peppermint swirls, and candy canes.
We're going to work in one or two sprays worth. All you have to do is just take the sprays, poke them right in, and you can remove them later. They have long enough stems that they'll stay exactly where you put them.
How to make a gingerbread wreath
Here is how our super easy gingerbread wreath turned out. I absolutely love it. We have this perfect ribbon that matches the gingerbread men and it looks so cute.
This would be a great addition if you're going for Candyland Christmas-themed decor.
What do you think of this DIY Christmas wreath? Let me know in the comments below.


Frequently asked questions
Have a question about this project?