


DIY Mini Wood Lantern

Hello everyone! I'm so excited to share this mini wood lantern craft with you all. I recently bought a box of the wood tumbling blocks from Dollar Tree, and I really wasn't sure what I was going to create with them. I decided since I also had some wood craft popsicle sticks on hand that I would use those with the blocks, and create a mini wood lantern. This project took around 30 minutes, but I promise you, you will just love how it all comes together with just a few materials. If you're ready, I'd love if you created with me!
Be sure to connect with me on social media!
YouTube channel-- https://www.youtube.com/channel/UCQVrBPaSoCFqR9rHHuBSlzQ
Blog-- https://stephcreatesthingsdiyhomeandcrafts.blogspot.com/
Instagram-- https://www.instagram.com/stephcreatesdiyhomeandcrafts/
Pinterest-- https://www.pinterest.com/Stephcreatesdiyhomeandcrafts/
Video tutorial
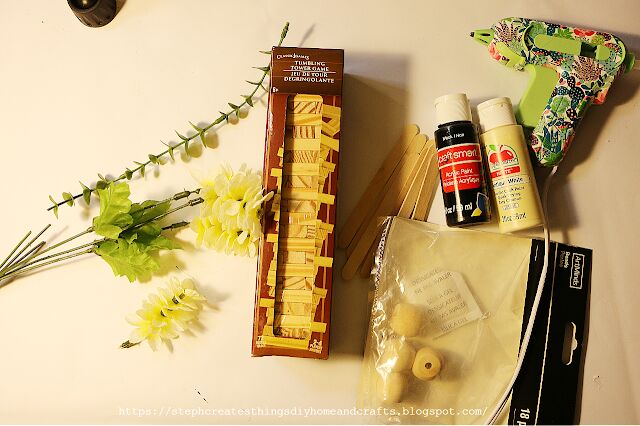
Materials
One pack of wood tumbling blocks I purchased mine at my local Dollar Tree
Ten wood craft popsicle sticks
Paint I'm using black paint, I also had some antique white paint on hand, but I went with black paint
Hot glue
Twine
Faux floral, and greenery
One medium size bead
One battery operated candle
Scissors
Floral snips
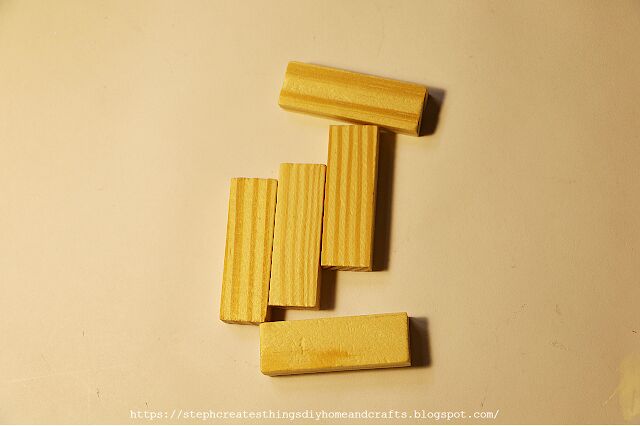
Start by taking five of your tumbling blocks. Using your hot glue glue them together.

You will glue three together in the middle, and take the last two blocks, and all them onto the sides of the three blocks in the middle. Repeat this step when you create working on the second set of your blocks.
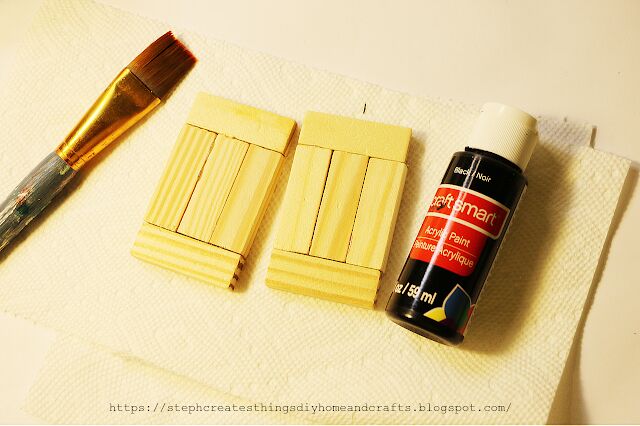
Next, begin to add your black paint to your blocks. I added around two coats of paint.
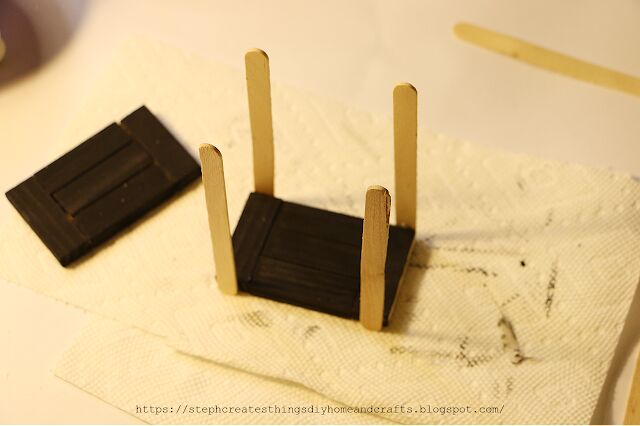
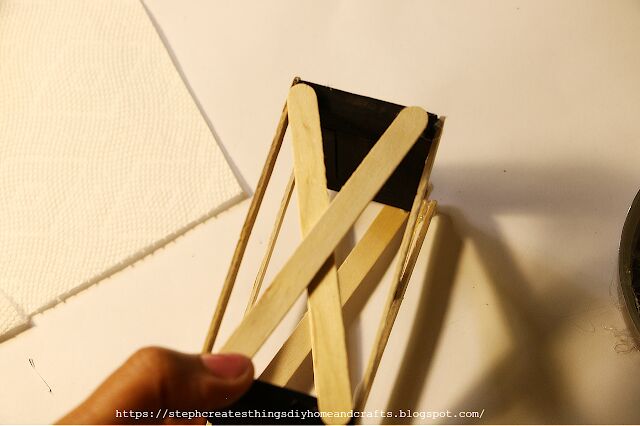
You are now ready to add your craft popsicle sticks. Start by taking your hot glue, and adding just a little on the end of each popsicle stick. Once you have done this, add the sticks to your painted wood section. Glue two sticks onto one side of your glued blocks, and take another two sticks and add them on the opposite side.
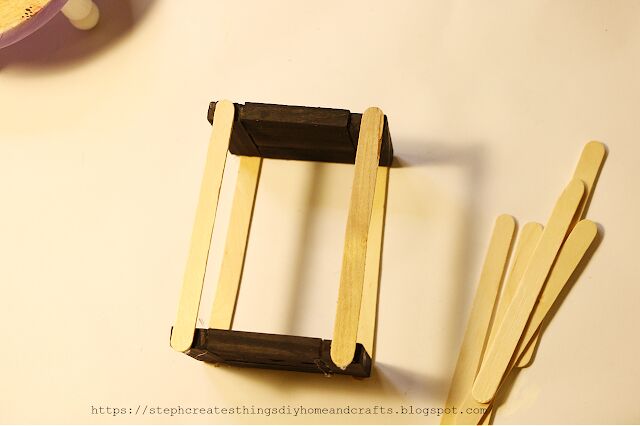
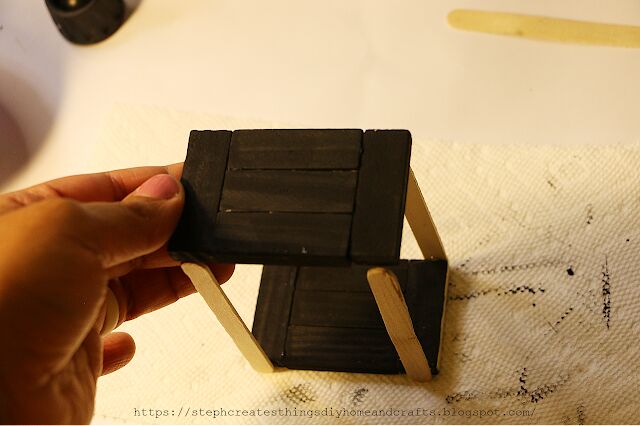
Take your second painted glued block section, and using hot glue add that between the popsicle sticks on the top.
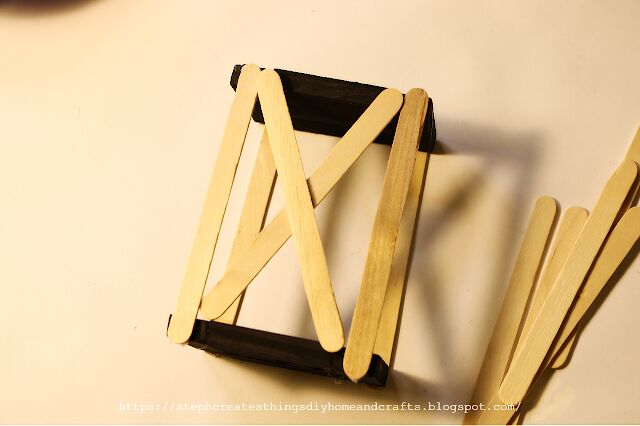
Next, take your wood craft sticks, and add them. You will create an X when you add them. Add them onto the back, and two sides of your lantern. You will want to keep an opening in the front for when you add your battery operated candle.

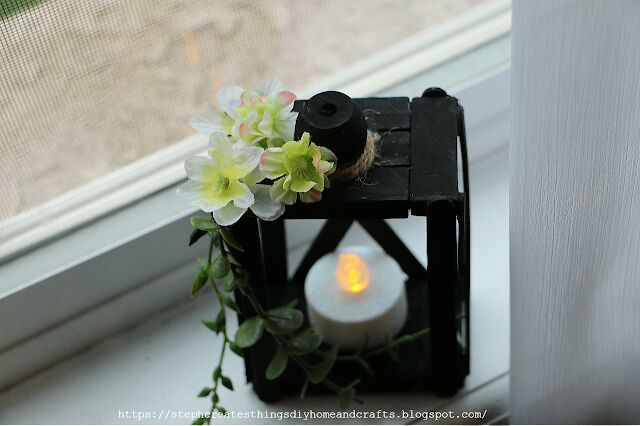
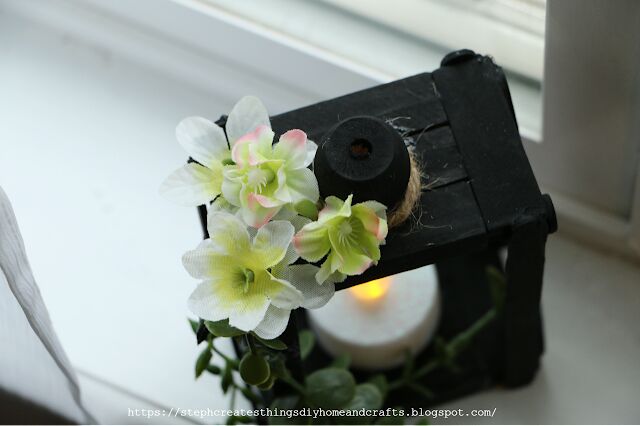
After applying your wood craft sticks, take some hot glue and your medium size bead and add it to the top of your glued wood blocks.
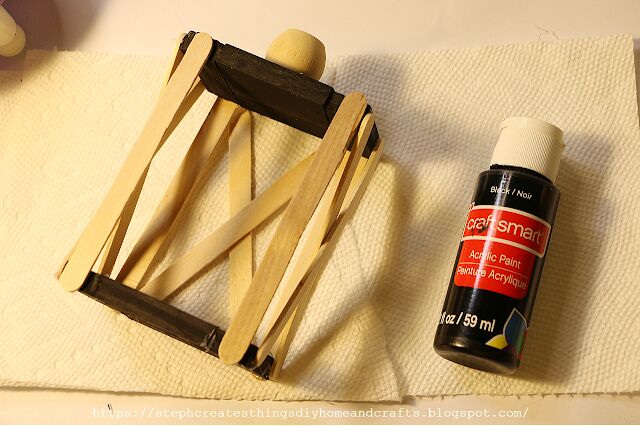
Next, apply paint to your craft sticks, and wood bead.
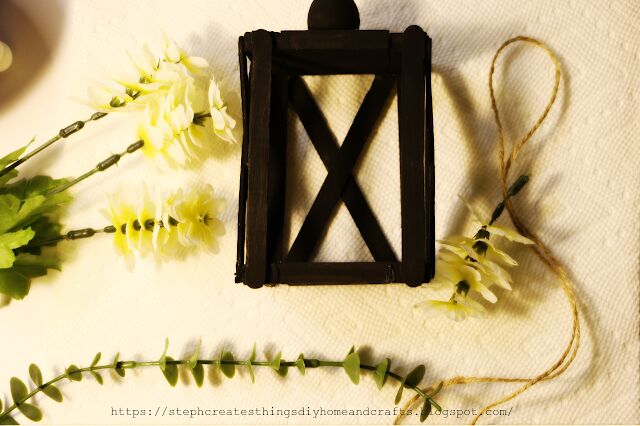
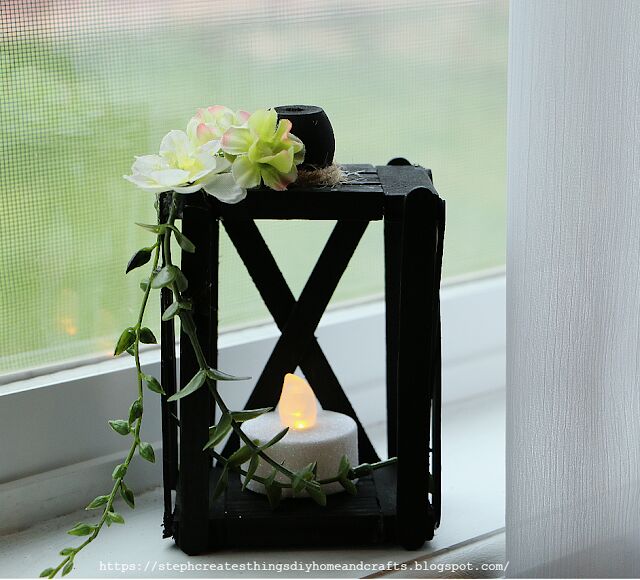
You are now ready to add on your floral, greenery, and twine.
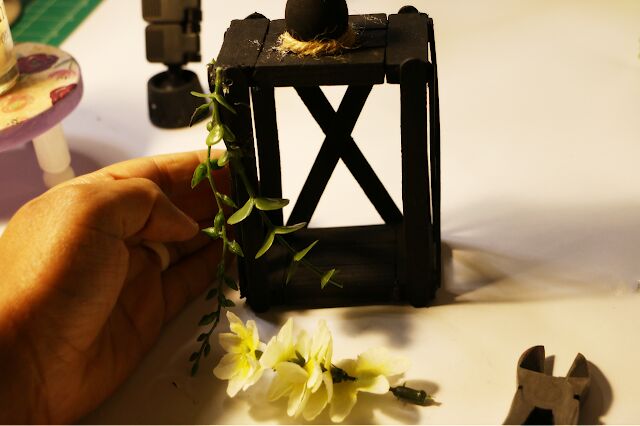
Take a strand of twine, and tie it around your bead on top. I folded my twine in half, and then tied it around my bead. I used some hot glue to glue down any remaining twine once I had cut the ends off.Take your floral, and greenery and add them to your lantern. I added my floral on the top section of my lantern, and my vines on the front of my lantern.
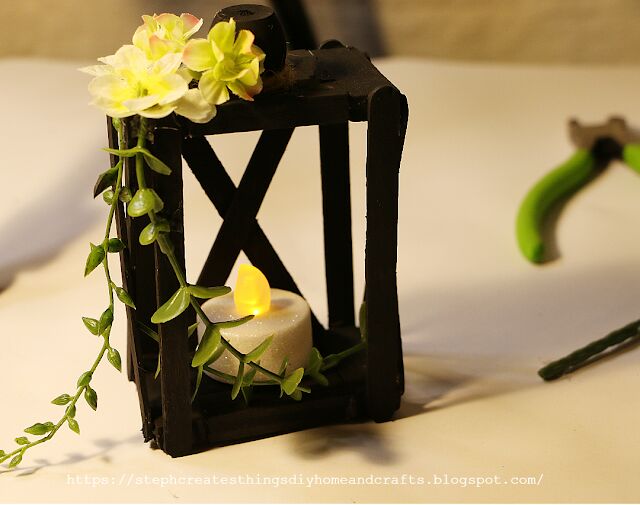
All that is left is to take your battery operated candle, and add that on the inside of your lantern. Once you had added that in, take any remaining greenery, and add it on the inside of your lantern. I went ahead and placed a piece of vine on the inside of my lantern.
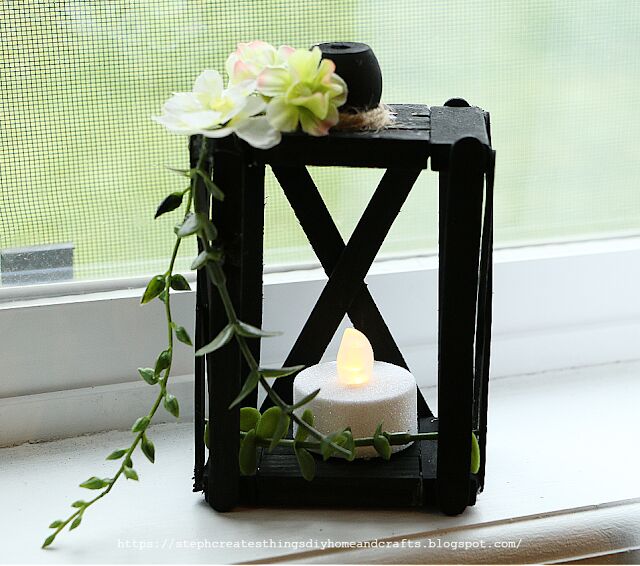
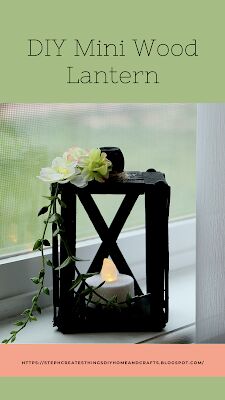
Your mini wood lantern is now complete! I absolutely love how this project turned out. This is perfect displayed in any space. I hope you enjoyed this DIY mini wood lantern. Be sure to let me know if you decide to create one too! I'll see you soon.
Comments
Join the conversation
-
Love this project, and now I am thing Christmas ornaments. Thanks so much for a good simple idea.
-
this is really cute. very smart idea and simple to make. thanks for sharing


Frequently asked questions
Have a question about this project?
What size is the finished project and what size popsicle stick did you use? Thank you. I love it