


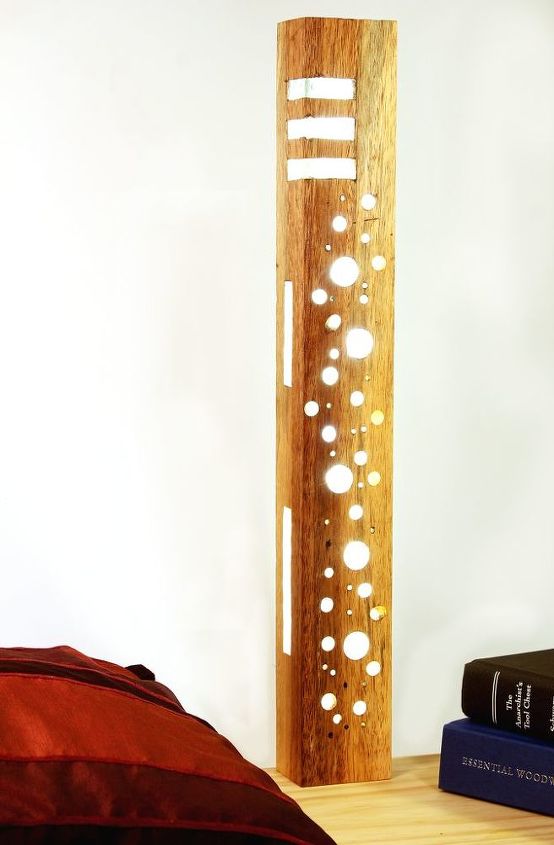
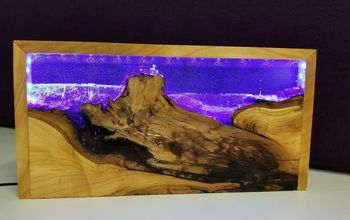
Make a Resin, Wood and LED Lamp

With only a few hand tools, scrap wood, LEDs, resin and tape you can make this cool lamp. It's a really good project for beginner woodworkers. I've also made a video to get an idea what's involved.
What the build video. If you like it please consider subscribing to my channel: https://www.youtube.com/user/andii1701
Tools needed:
- sharp chisel
- mallet
- drill and different size drill bits
- knife
- set square
- 4 small wood screws
- marking gauge (optional)
- hand plane (optional)
- counter sink bit (optional)
- spirit level (optional)
Consumables needed:
- clear casting resin and catalyst
- good quality blue painters tape
- good quality duct tape
- sand paper
Items needed to use resin:
- 500mL measuring cup
- disposable plastic cup to mix resin in
- mixing stick (I used scrap wood)
- 5mL syringe to measure the catalyst
- disposable gloves
- eye protection.
LEDs used:5m Warm White Silicone Coated Led Strip Light, 300 LEDs, 1000 lumens.
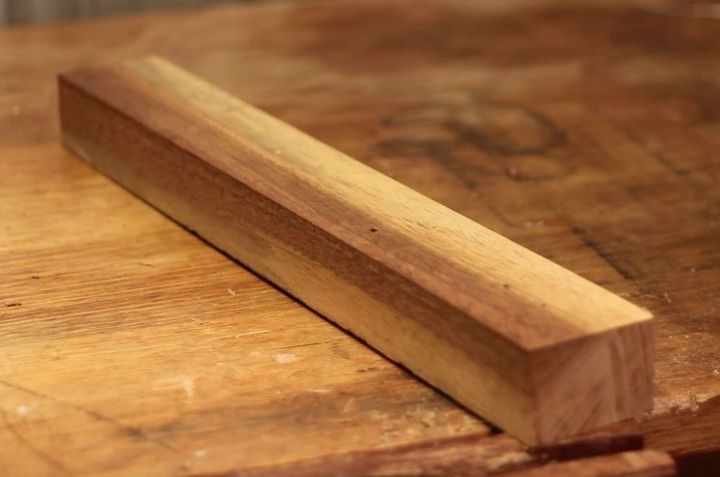
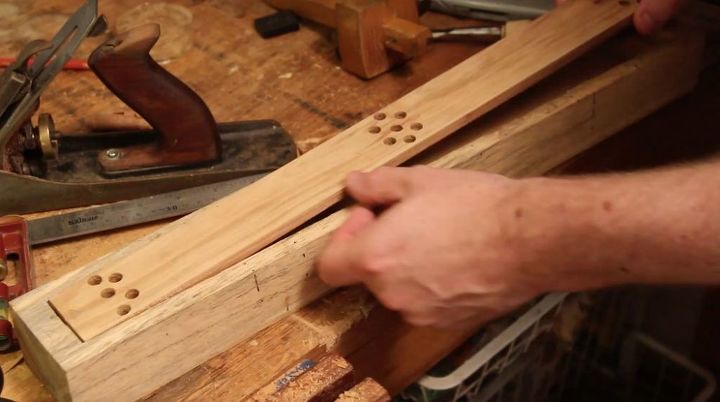
I used reclaimed pallet wood which had tonnes of character. It measured 51.5cm x 7cm x 5cm (20.28" x 2.8" x 2"). The type of wood is spotted gum (Australian hard wood), any hard wood of similar size will work. I'd avoid using softwood like pine because it's more porous and will absorb some of the resin. You could easily scale the project up for a big statement piece for the hallway or scale it down for a small accent light. If you are using undressed, reclaimed wood, smooth it down with a hand plane. See this video about preparing wood. As this is a standalone piece, not used for joinery, it doesn't need to be perfectly square. Don't worry if you're planing skills are a bit lacking, this is the perfect project to practice ? You also need a piece of scrap wood measuring 4.5cm x 0.6cm x 46.5cm (1.8" x 1/4" x 18.3") for the back plate.
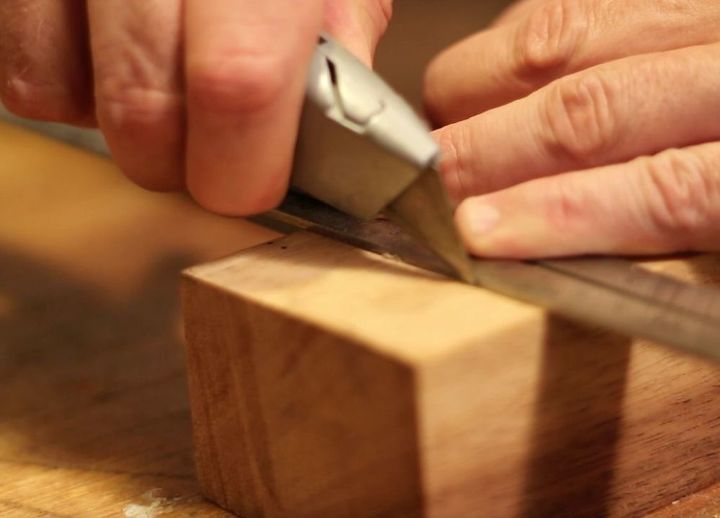
Using the square and knife, mark out the back area that you're going to chisel out. I placed the lines 1" from each end, and 1/4" from each side.
About chisel safety
You could shave with a sharp chisel, hence safety is important. In fact, shaving the back of your hand is a chisel sharpness test! My rule is to always keep your hands behind the blade, never in front. About chisel sharpingTo chisel out the trench for the LEDs you need a sharp chisel. Don't expect to use the chisel you've been opening paint cans with (: Don't stress! You can restore and sharpen with sand paper and a flat surface. Watch Paul Sellers videos on sharpening chisels. If you want to get serious about sharpening get a set of diamond lapping plates.
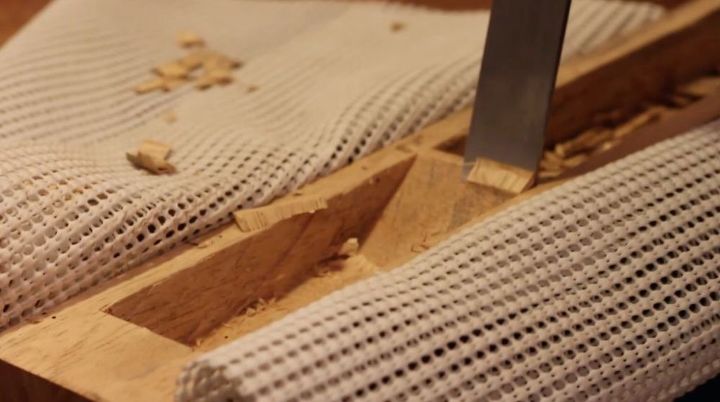
Chiseling the tench
Set the chisel about 3mm from the mark line at an angle, chiseling out a shallow groove along the length of the mark line. Remember to only use hand pressure or light taps with a mallet. Traversing the same line, lightly tap out a deeper groove by holding the chisel perpendicular to the wood. Along the same line, place the chisel 6mm from the mark line and make a deeper groove. Repeat these steps until you have a groove measuring about 1/4" deep and 1/4" from the mark line. From this point you can switch to heavier mallet blows, starting to really remove wood along the length of the piece. Be careful to remain within marked area and continually check the trench depth. I left 1/2" of wood at the bottom of the tench. When you get close to other side, rotate the wood and repeat the process of making a groove of increasing depth. You will eventually meet in the middle.
For more detail on this type of chiseling watch Paul Sellers video on dada cutting. To be honest, it'll take about 2 hours and require the chisel to be sharpened 2 or 3 times during the process. Put on a good podcast or audio book, the time will fly past!If you have a hand router, smooth out the bottom of the trench. This is not necessary as this area is not visible. If you don't have a hand router just do the best job you can with the chisel, try to remove any free wood fibers as these might interfere with the resin pour.
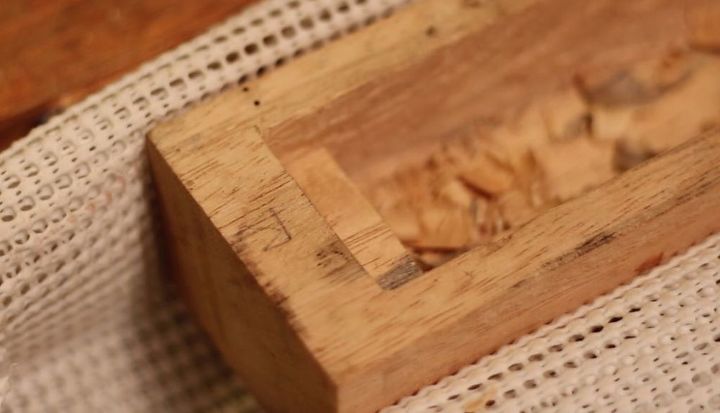
Now the trench is done, you can make the back plate. Start by chiseling a 1/4" by 1/4" shelf on either end of the tench, pictured above for the back plate to rest on.
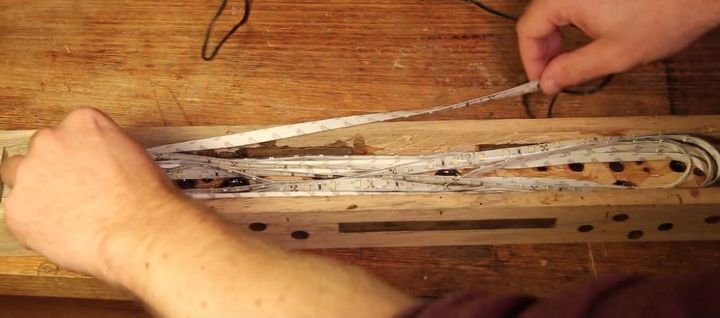
Use the back space to space for measuring, mine ended up measuring 4.5cm x 0.6cm x 46.5cm (1.8" x 1/4" x 18.3") so I planed a piece of scrap cypress pine fence picket to this size. LEDs get warm so drill some holes for ventilation. I'd recommend drilling the holes before planing for thickness, it will be less likely to split. One of the vent holes in the side can be used for the LED power cord by cutting an additional slit in the side of the plate. Once you have the back plate fitted, drill and counter sink (optional) holes in each corner. You can then use these holes for wood screws.
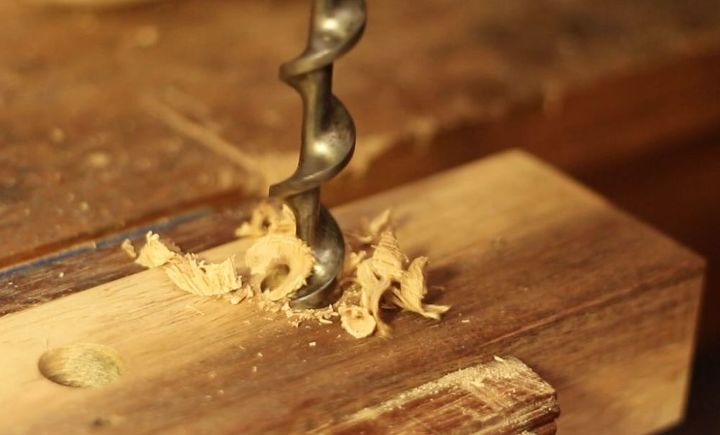
It's time to drill the holes. I wanted nice clean holes with minimal tear out. A bit and brace is perfect for this and can be found in antique shops, but if you buy second hand bits make sure the bits are sharp. You could also use forstner bits, regular or flat drill bits with an electric drill. If you use regular or flat bits place some painters tape, or clamp a thin piece of wood, on top of the hole. This will minimize tear out. Try to balance the placement of holes. Use lots of small holes, less medium holes and a few large holes. Eye ball the placement of the holes to what looks good.
To cut slits, use the same technique used carving the trench. Just make sure when you get close to the trench you use light taps with the mallet. This will avoid large amounts of damage to the piece. Once you're happy with the holes and slits, it's time to pour the resin. Resin is very fiddly. I highly recommend drilling some holes in a piece of scrap and practice with a small amount of resin first. When you're comfortable you can then use it on the main piece. I had three practice attempts before I was confident. On the first attempt, I got the catalyst mix wrong and it did not set. On the second I used low quality tape and it leaked. On the 3rd attempt I used duct tape and the thread set in the resin! Follow the instructions on the resin tin. Make sure you use clear casting resin not fiberglass resin as is will not set clear.
Some safety tips when working with resin
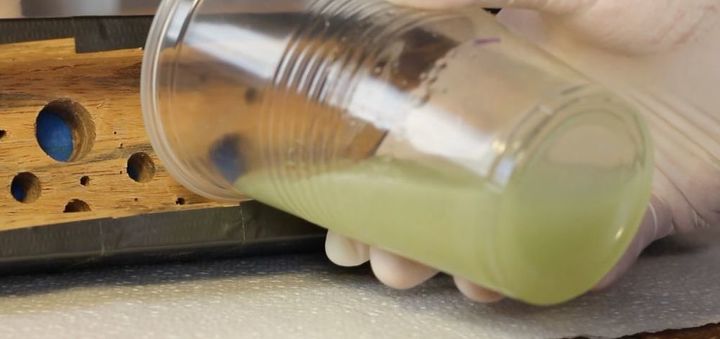
Resin stinks, so always use it in a well ventilated area. It's also very sticky, so always handle it with disposable gloves. Always wear safety glasses incase it splashes. Follow the safety directions on the container for more information.
Resin is very fiddly. I highly recommend drilling some holes in a piece of scrap and practice with a small amount of resin first. When you're comfortable you can then use it on the main piece. I had three practice attempts before I was confident. On the first attempt, I got the catalyst mix wrong and it did not set. On the second I used low quality tape and it leaked. On the 3rd attempt I used duct tape and the thread set in the resin! Follow the instructions on the resin tin. Make sure you use clear casting resin not fiberglass resin as is will not set clear. Some safety tips when working with resinResin stinks, so always use it in a well ventilated area. It's also very sticky, so always handle it with disposable gloves. Always wear safety glasses incase it splashes. Follow the safety directions on the container for more information.
Once you're comfortable using resin, cover the holes with blue painters tape. Take your time making sure the tape makes a good seal. Use more tape than necessary. Trust me, it will leak out of any gaps. I covered the painters tape with duct tape to ensure a good seal. For this project you will need to do three separate pours and wait 24 hours between each. I started by placing the piece on its side and mixing up 100mL of resin. I spent a full three minutes stirring the catalyst for a good mix, but this resulted in lots of bubbles. After using a spirt level to check the piece was level. Then I poured the resin slowly into the holes and slots. Straight after the pour I used a hair dryer to make the bubbles rise to the surface and pop. Leave for 20 minutes, then check for leaks. If there are leaks, patch them with tape. Leave for 24 hours. After 24 hours you can turn the piece to the next side, mix up another batch of resin, do another pour. Leave a further 24 hours and repeat this for the third side.
Cover the holes with blue painters tape. Take your time making sure the tape makes a good seal. Use more tape than necessary. Trust me, it will leak out of any gaps. I covered the painters tape with duct tape to ensure a good seal. For this project you will need to do three separate pours and wait 24 hours between each. I started by placing the piece on its side and mixing up 100mL of resin. I spent a full three minutes stirring the catalyst for a good mix, but this resulted in lots of bubbles. After using a spirt level to check the piece was level. Then I poured the resin slowly into the holes and slots. Straight after the pour I used a hair dryer to make the bubbles rise to the surface and pop. Leave for 20 minutes, then check for leaks. If there are leaks, patch them with tape. Leave for 24 hours. After 24 hours you can turn the piece to the next side, mix up another batch of resin, do another pour. Leave a further 24 hours and repeat this for the third side.
Conclusion
Thanks for reading this! This is the perfect project for a novice woodworker as you don't have to get dimensions exact but you will get lots of chiseling practice and a really unique lamp. If you liked the video please check out my other woodworking videos! https://www.youtube.com/user/andii1701/videos Thanks again!
Me:
Instagram: @andrew_r_jones
Youtube: @andii1701
Twitter: @andii1701
DIY home decor using reclaimed wood


Comments
Join the conversation
-
Fantastic project. I'm not, in any way, able or qualified to work with a piece of wood and have it come out so beautiful. God has given you a talent and I appreciate your imagination. Great Job!!
-
I love it , it is beautiful. Not much light but i STILL love it.


Frequently asked questions
Have a question about this project?
Beautiful!!