


Painted Furnture - Antique Cabinet Makeover
2 Materials
$50
6 Hours
Medium
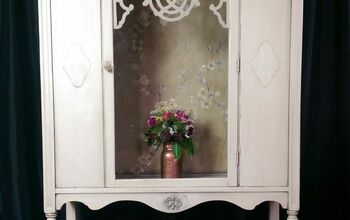
I picked this cabinet up at a garage sale for just $40. It was tired and old and in major need of some TLC. It was also one of those things where I didn’t need a cabinet in this shape or size but it just spoke to me and said “Colleen, please take me home and make me pretty again”. Fortunately, I love painted furniture so I listened.
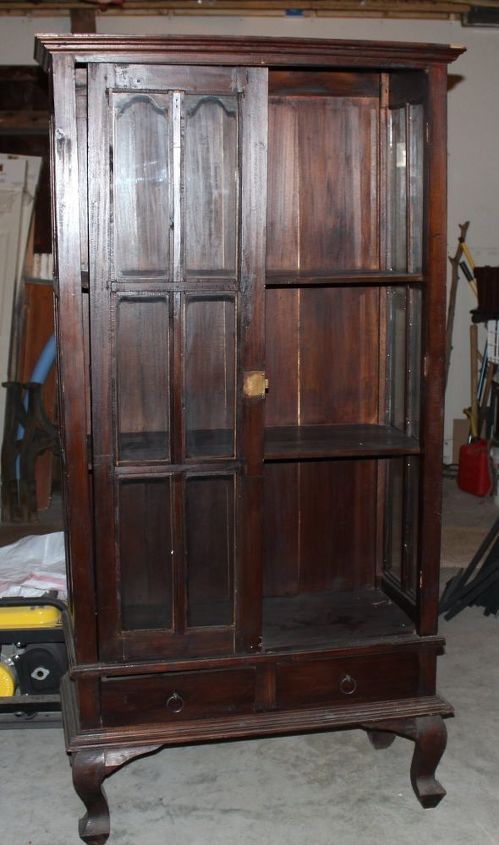
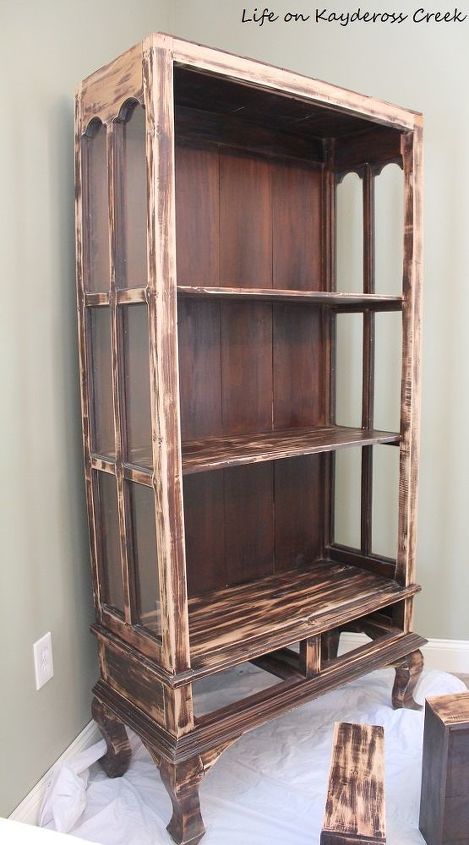
I fell in love with the curves of the legs and the glass doors and side panels. Unfortunately, the doors were falling off a bit and the trim at the top was broken and needed to be replaced. We removed the doors (to be saved for another project) and the broken trim, gave it a good cleaning and sanded it down.
I had seen Country Chic Paint on some of my favorite blogs and on line (I love their tutorials on paint techniques) so I decided to give it a try along with their wax. I’m so glad I did.
This was my first time using the Country Chic Paint so I wasn’t familiar with how it would cover, (plus, I wasn’t sure how the dark stain left on the piece would darken the paint color) so I primed it first. Call me old school.

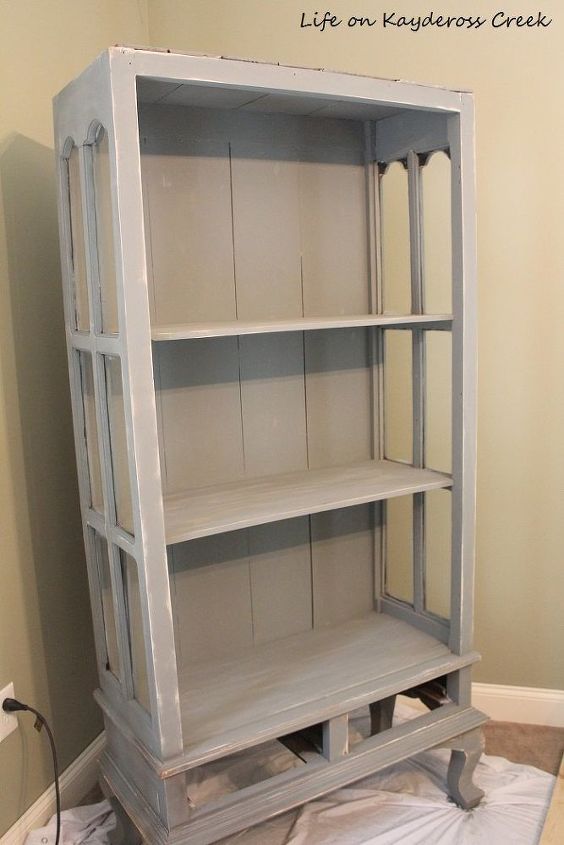
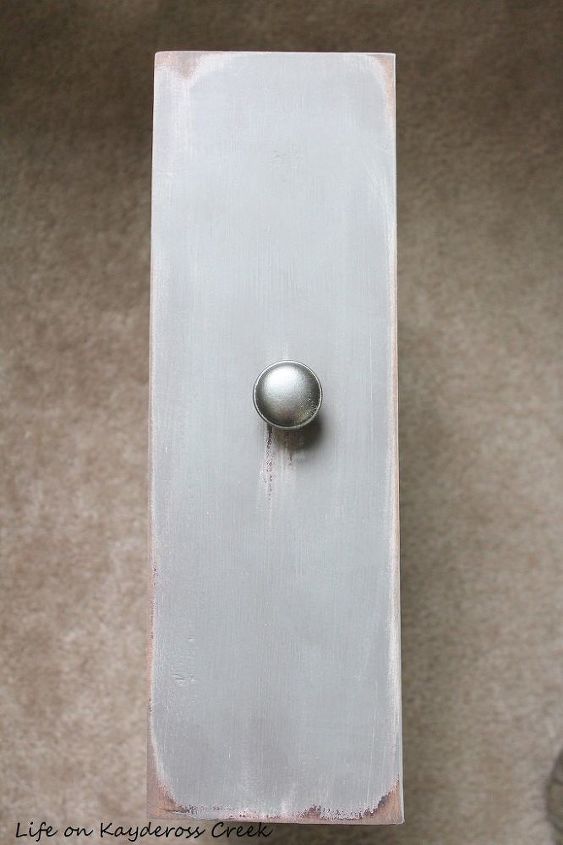
So different already! Then I gave it a coat of the Country Chic Paint in the color Cobblestone. They have a ton of colors to choose from.
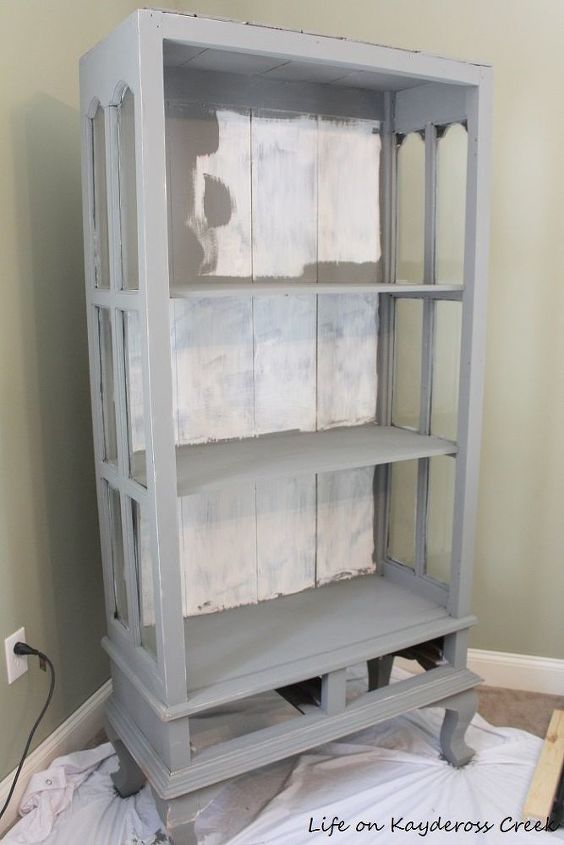
The paint went on really easily and dried so quickly in a nice soft finish. I left the back white initially because I had thought about applying shelf liner or wall paper for a different look. Then I decided that the antique look I was going for didn’t really go with that so I painted the whole thing. I had to touch up here and there but I was really surprised that the container covered the entire piece.
After it had dried completely, I broke out the palm sander and went over the edges to “rough it up” a bit.
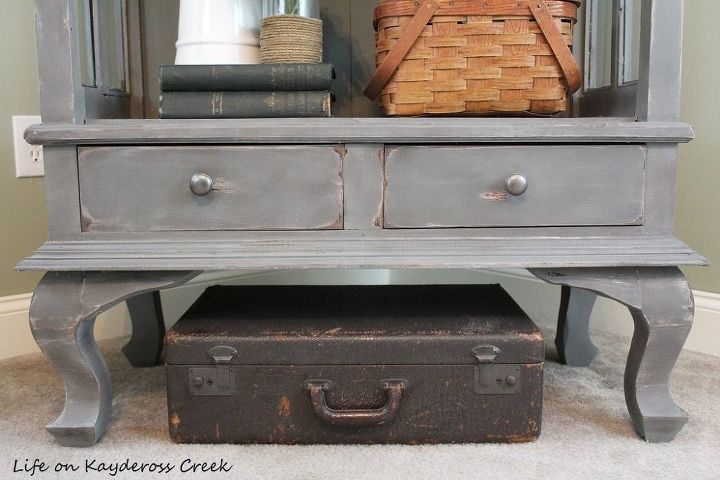
You can see where the sander opened up the wood and brought the white paint out a bit too . By sanding the piece, the wax gets worked into the grooves of the raw wood on the painted furniture, brings out the dark tone and “ages” the piece. It’s really noticeable in the details and the trim. Yummy, rustic, farmhouse, aged goodness.
We also added a piece of trim to the top. Here's the finished product...
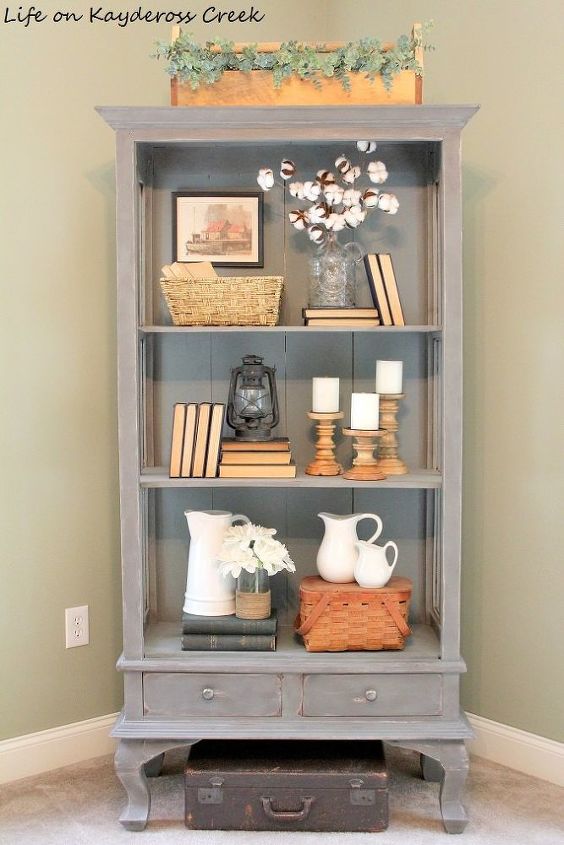
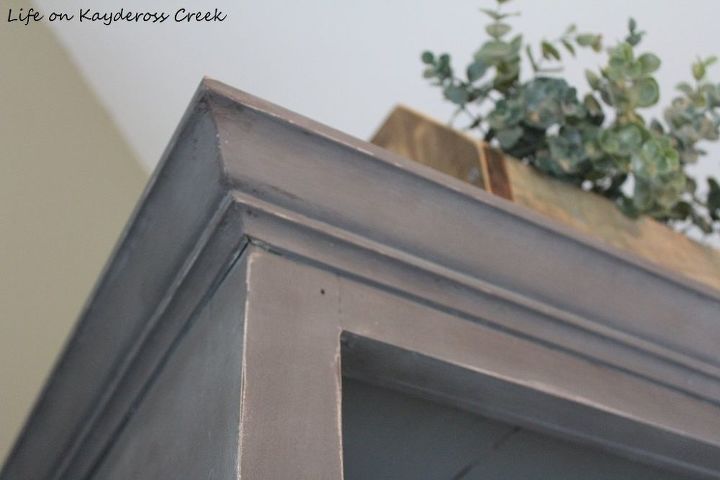
I love the way the Antiquing wax brings out the detail of the piece. For more information on this and other projects, please visit my blog at http://mylifeonkayderosscreek.com or on facebook at https://www.facebook.com/lifeonkayderosscreek/.

Want more details about this and other DIY projects? Check out my blog post!
Comments
Join the conversation
3 of 8 comments
-
I can't decide which I like more the cleaned and sanded or the finished project. The finished project would look great in my house. The cleaned and sanded would look great at the lake cottage. Wish I had two cabinets I could do this to, what to do.
-
so glad you saved this piece, very nice


Frequently asked questions
Have a question about this project?
Very Nice!!!!!!!!! By the way.... What did you do with the doors?