


How to Make an Indoor Fairy Garden
If you fall in love with the imagination, you understand that it is a free spirit. It will go anywhere, and it can do anything. ~ Alice Walker
When I was young I used to sit out by our ponds and dream of underworld kingdoms where they wore elegant flowing clothes and rode seahorses. I had such a vivid imagination. I wished Tinkerbell was real and would come and fetch me at night and take me on exciting adventures.
By the time I graduated from high school, I was known as the grad class “dreamer”. Perhaps that would be an insult to some, but I loved my dream life – it was my escape and still is.
Speaking of imaginary worlds, fairy gardens are another escape I like to get lost in. I have them throughout my garden. You just have to be on the look out for them because I try to keep them somewhat hidden so that they surprise my family and guests.
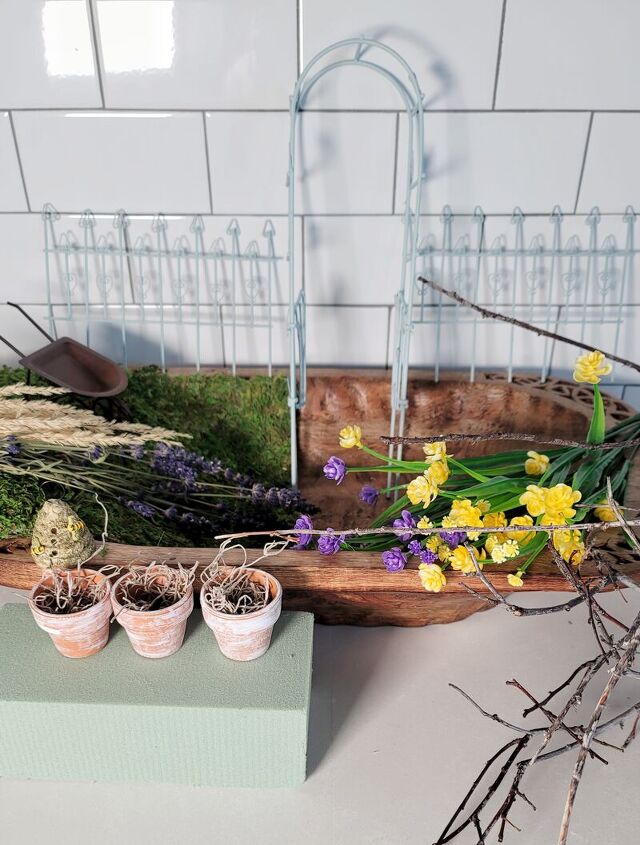
Today’s project is an indoor fairy garden set in a wooden dough bowl which I thought would be a fun spring time diy. For more information on this particular project and who it is for, you will have to read to the end.
Materials
Materials needed:
- wooden base such as a dough bowl
- oasis
- sheet moss
- fairy garden arbor, picket fence
- branches that are shaped like trees
- small flowers
- lavender stalks
- wheat stalks or dried grass
- fairy garden accessories like a beehive and a wheel barrel
- four beads and thick wire for lanterns
- flat small rocks to represent a stone path
- fairy lights (two sets)
- knife for cutting oasis
- glue gun & glue sticks
- wire cutters
- sharp small knife
For links to these items please check out my blog by using this link.
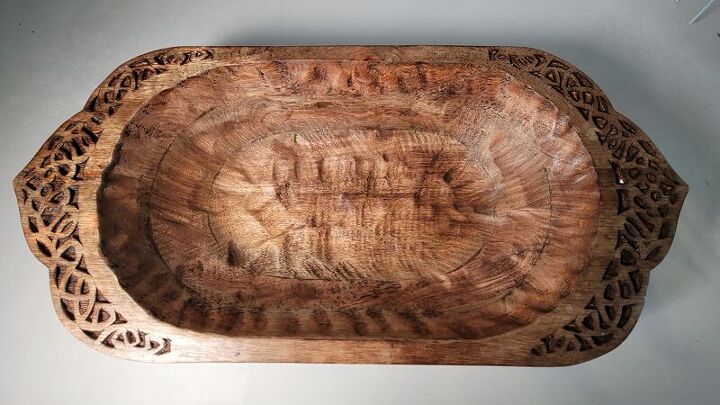
Choosing the right dough bowl
An indoor fairy garden will require a fairly large dough bowl that is not only long enough to fit the arbor and fences but also deep enough to hold full size pieces of oasis to provide enough support for the branches and arbor, etc.
The dough bowl below is sturdy and well balanced. It is 26″ long, 12″ wide and 4″ deep. Here is a link in case you would like more information on it.
Disclaimer: should you decide to purchase the dough bowl through my link, I will receive a small commission at no extra charge to you.
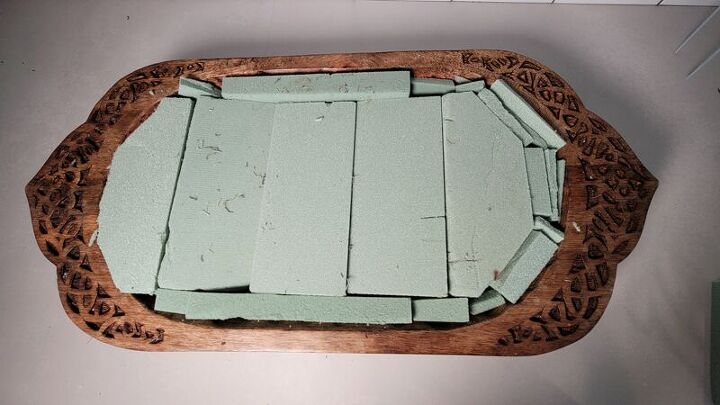
Fitting oasis
Start with the full pieces of oasis and place in the middle and work out from the mid point. As you work outwards you will need to trim edges and the depth of the oasis so it fits the curve of the bowl. Keep the trimmings as they work well to fill the edges.
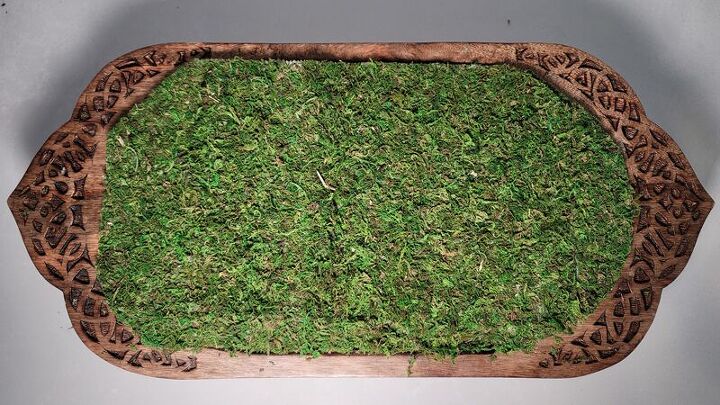
Sizing the sheet moss
Lay the sheet moss over top of the oasis and then trim away the excess so that it covers all of the oasis.
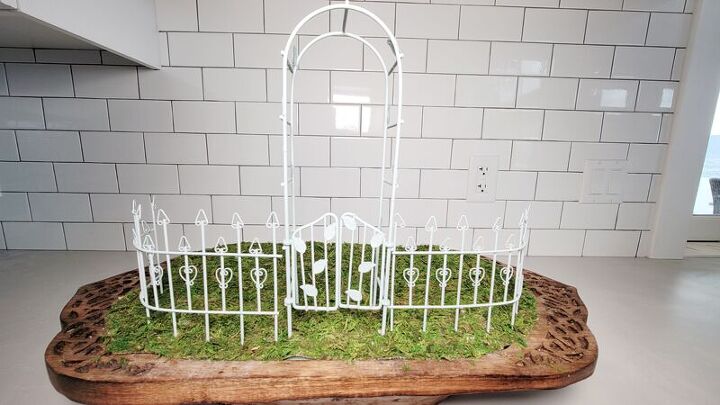
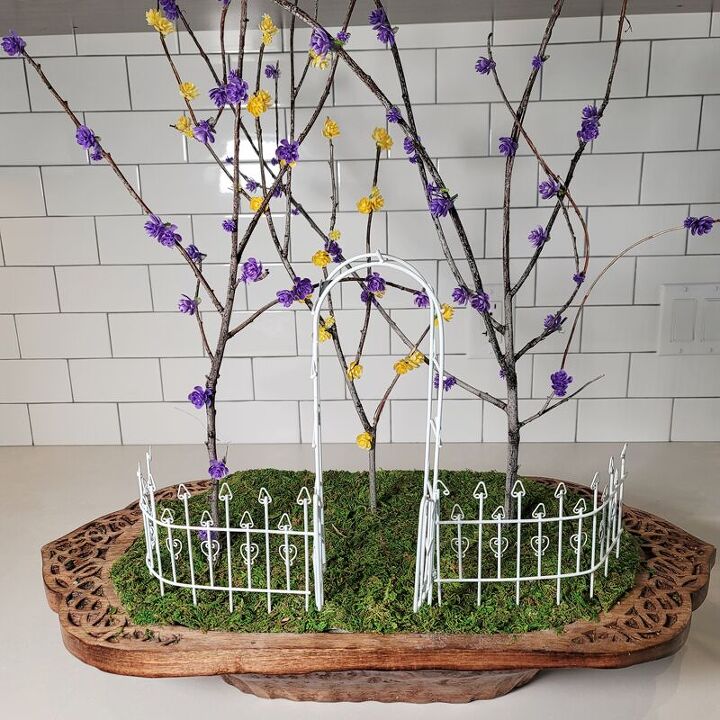
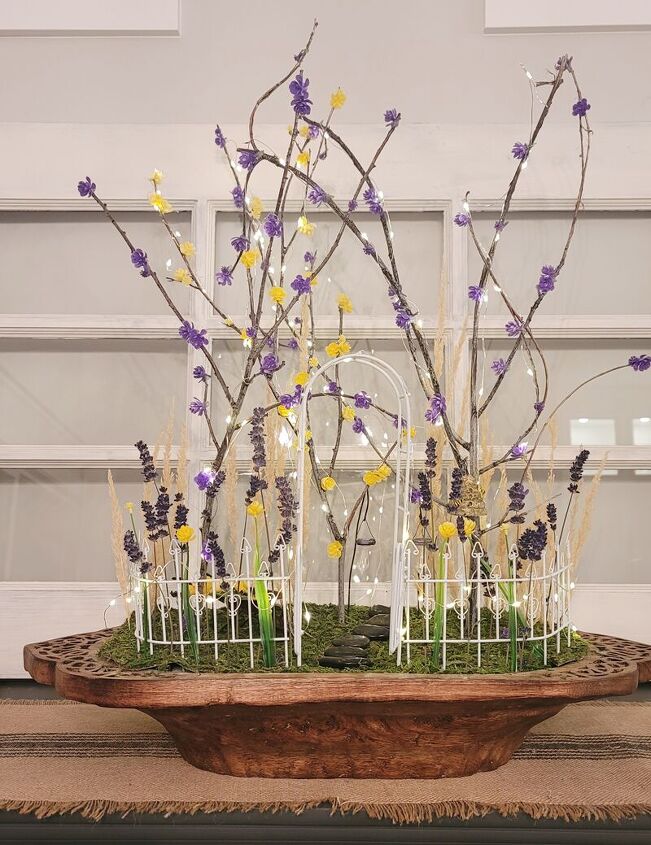
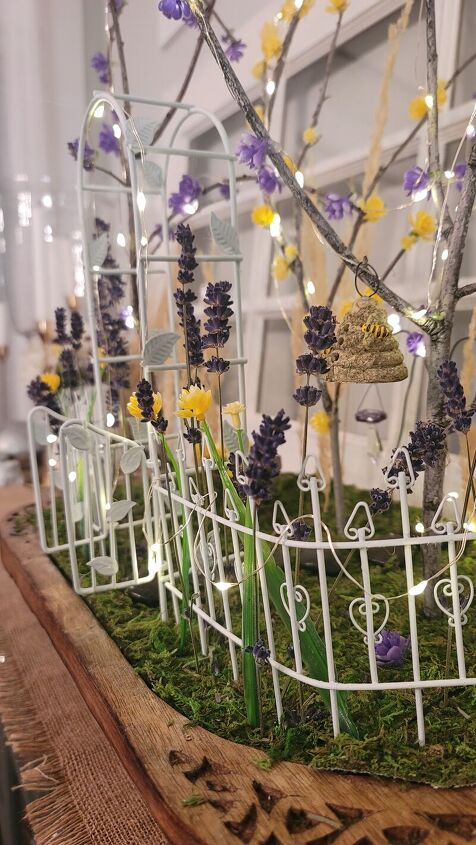
Laying out large pieces
Center the arbor in the middle of the dough bowl and at the front edge. Lay the fences on either side to determine where you will need to bend the fences to follow the curve of the bowl.
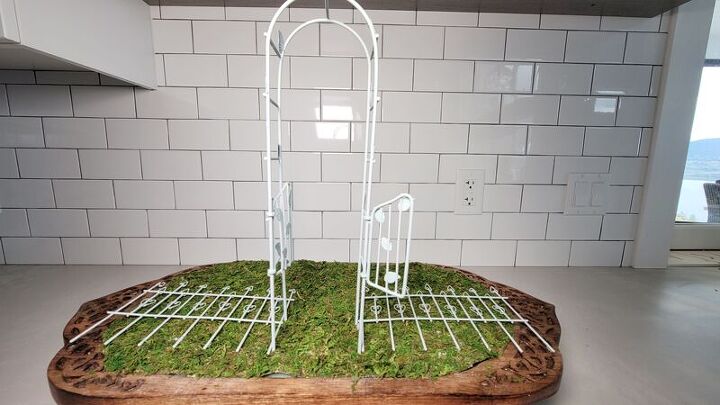
Use a sharp knife to make holes into the sheet moss so that you can easily insert the arbor fences.
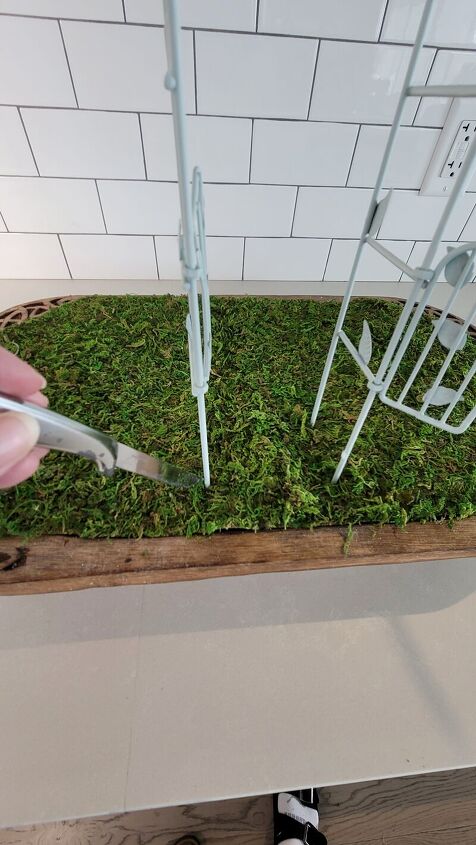
Push the arbor and fences deep into the oasis for stability.
Preparing trees
Cut the flowers off the stems and leave a 1/4″ stem on each of the flowers.
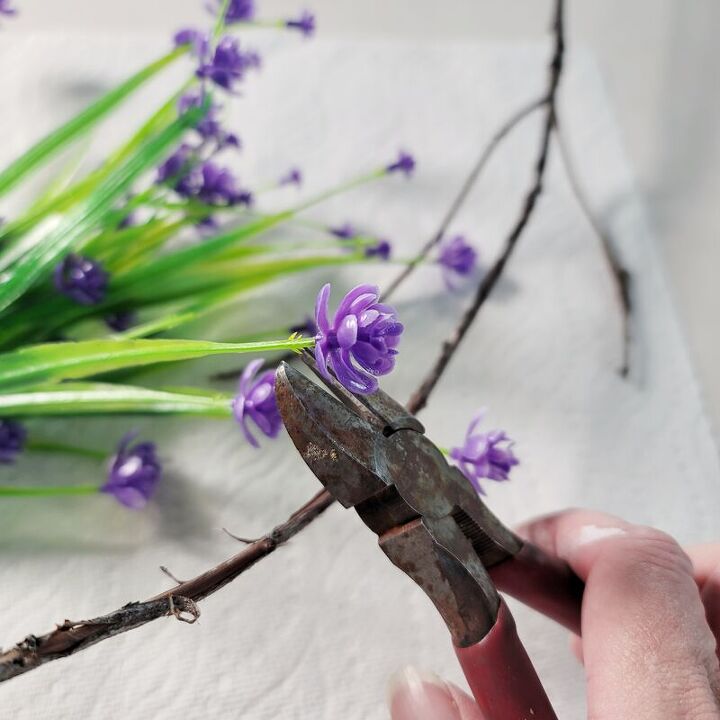
Hot glue the flowers onto the branches. Group some of the flowers into groups of 2 or 3 flowers for interest.

I also used yellow flowers as they would bring some brightness to the arrangement.
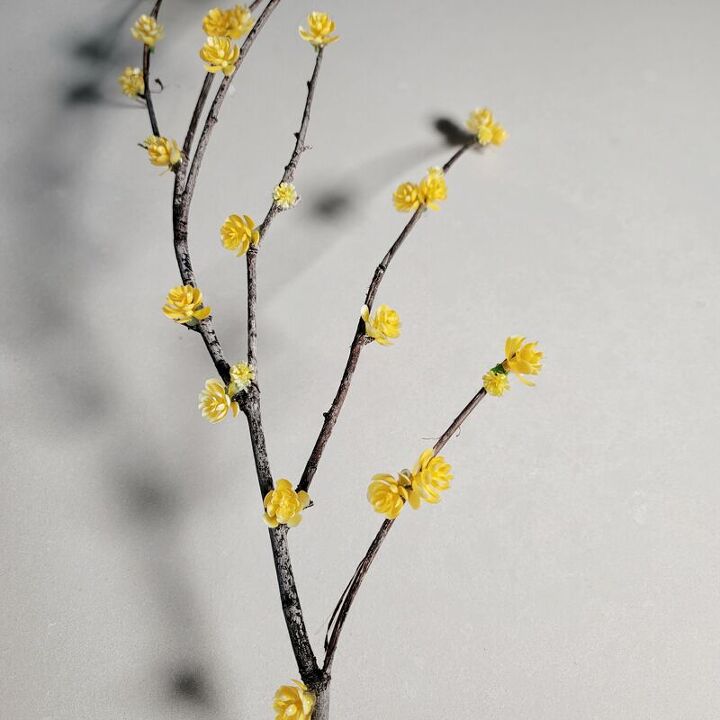
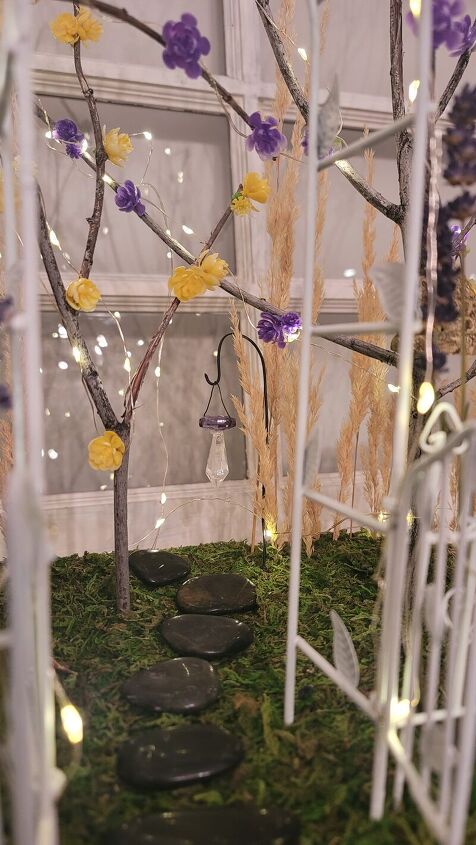
Insert the branches near the back of the dough bowl, about 2 inches from the back.
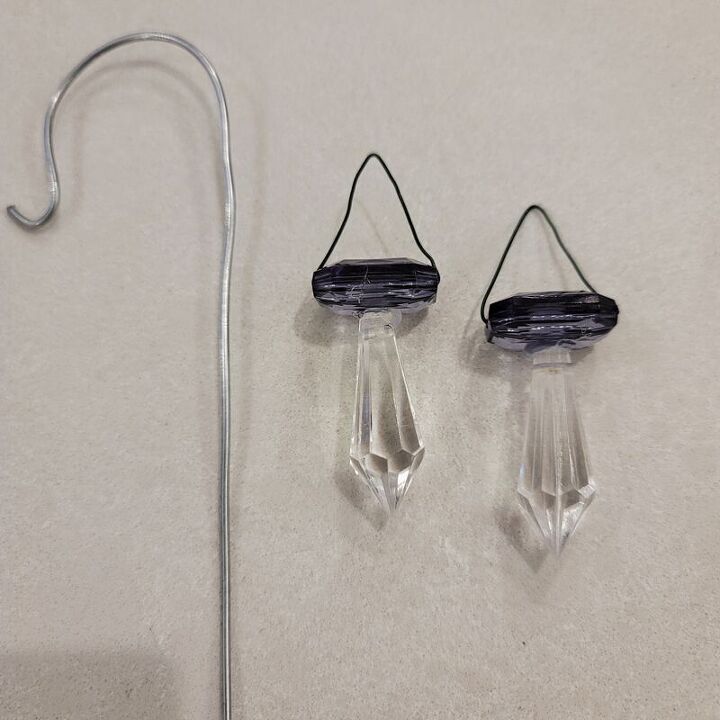
Creating fairy garden lanterns
This is your chance to get creative. I looked through my bead collection and found two that I felt could represent lanterns.
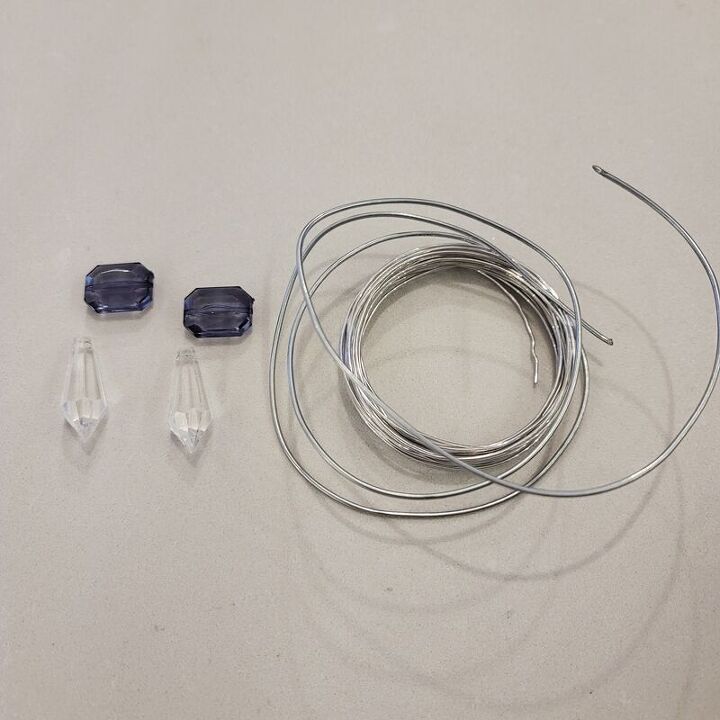
Glue the black bead on top of the long hanging bead.
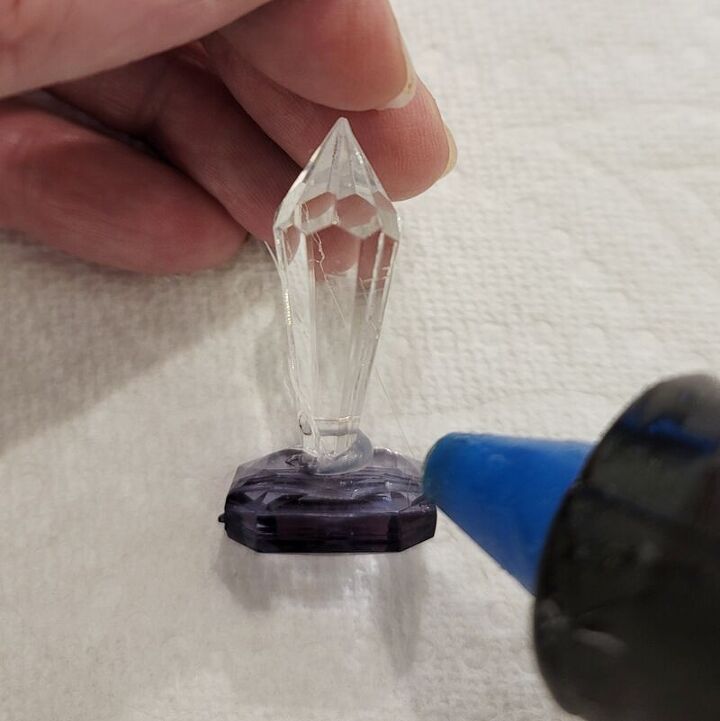
Mold the wire into the shape of a shepherds hook. Add wire to the top bead so that it can hang from the hook. If you like, spray paint the wire shepherds hook black. I felt that would make them look large garden hooks to hold lanterns.
Creating the stone pathway
Lay your flat rocks from the arbor to the back to represent a path. Insert the lanterns with hooks on either side of the path.
Add flowers to the garden
Get creative and design the type of garden you would want to have. I took lavender stems I had and put them near the fence as I felt they looked like tall delphiniums. I also added a couple of the yellow flowers and left them on their long stems just to give some pops of color.
The back was looking bare so I added varying heights of dried grasses to kind of close the garden in,
Add twinkle lights
I wrapped the branches in twinkle lights randomly here and there, As well, I looped the twinkle lights through the fence and arbor.
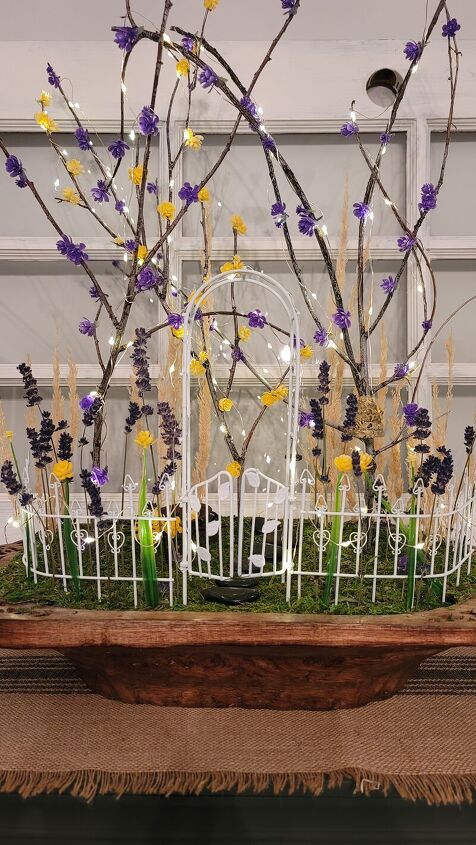
Add decorative accessories
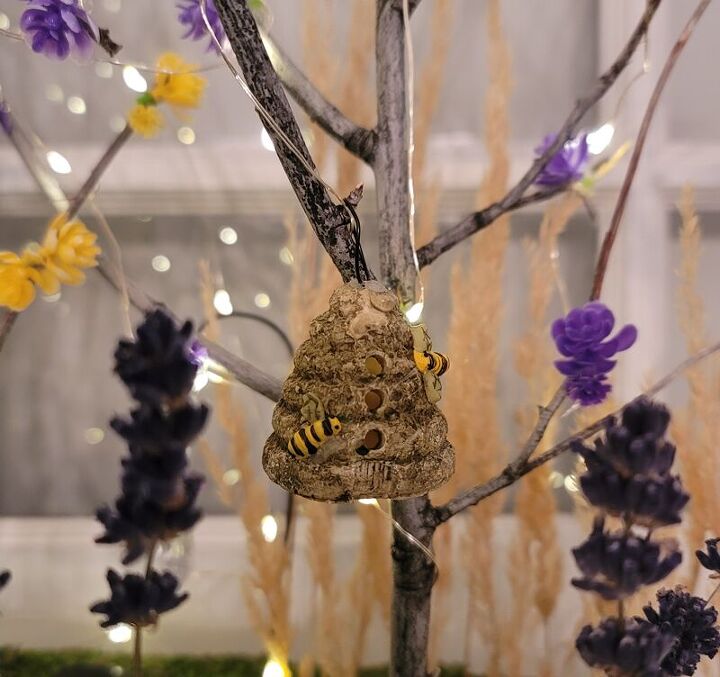
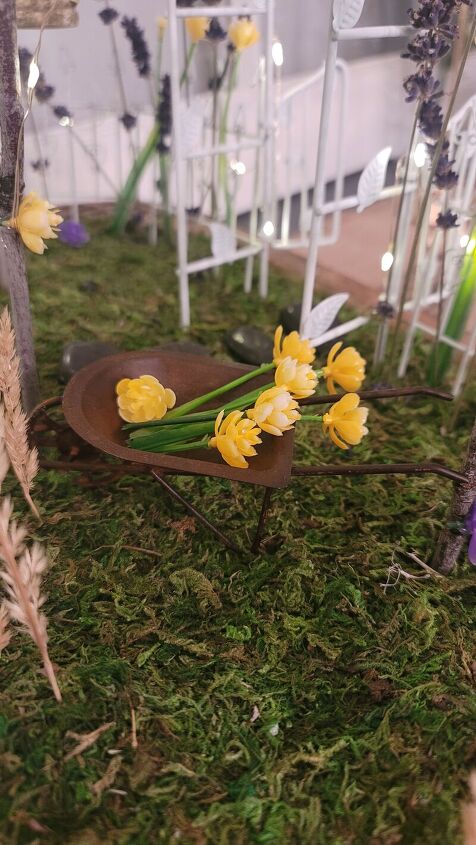
I searched through my craft supply drawers and found a cute little bee hive and an old wheel barrel. Other options would be an old ladder leaned up against a tree, a rake, small terra cotta pots filled with flowers, etc.
Why aren’t there any fairies?
I created this fairy garden for a mother’s day dough bowl challenge. My mom loves fairy gardens. Over the years, I added new pieces every Mother’s day to her collection.
One thing she doesn’t want though are fairy figurines because she doesn’t want any REAL fairies to think the garden is occupied so that they will come to play and frolic in the garden she has created for them. Now I am sure you know who I got my imagination from!
Well I better run, I have so much to do in the garden and I cannot wait to share all of it with you!
Wishing you a beautiful day and week ahead!
XOXO

Resources for this project:
See all materials


Comments
Join the conversation
-
Truly beautiful and inspiring. Thank you for the wonderful instructions.
-
Am gathering supplies needed! This is the best directional I have ever seen! Thank you so much for your remarkable instructions.


Frequently asked questions
Have a question about this project?
how do i get rid of tiny ants in my kitchen?