


Turn Your Soft Furnishings Into Art With This Super Simple DIY!

by
Fiona Debell
5 Materials
$20
3 Hours
Medium
I literally turned a chair into a piece of art! Just look!
A couple of weeks ago I was lucky enough to find not 1, but 3, of these fabric chairs on the sidewalk - big garbage day in the 'hood!
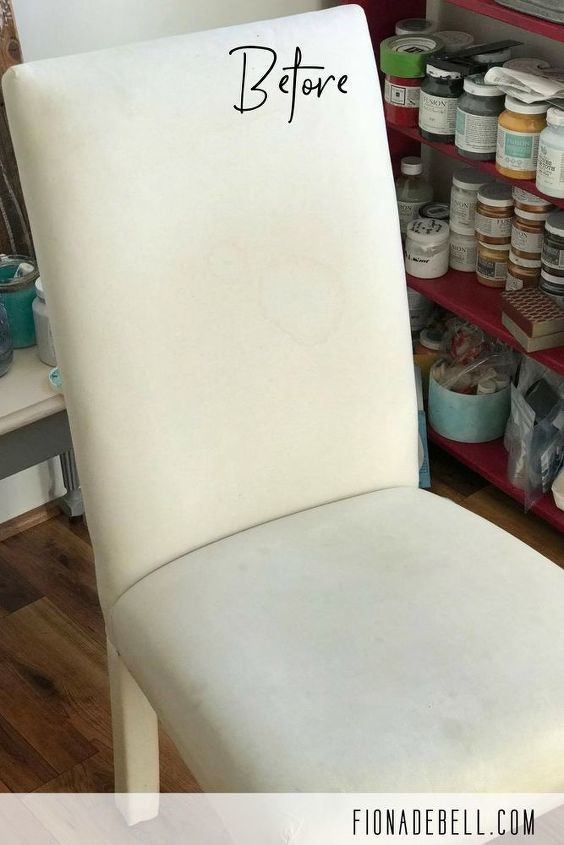
Plain Fabric Chair
Step 1. I flipped my chair on its front and added painters tape.
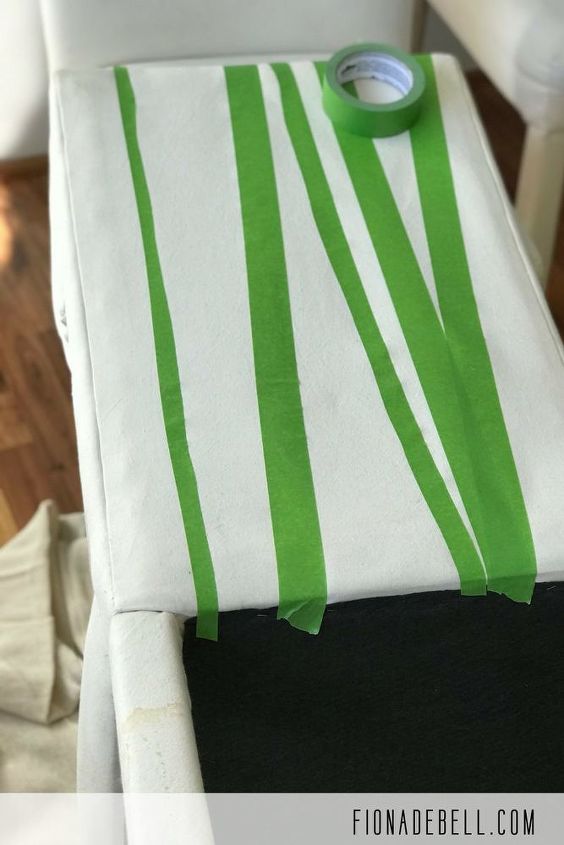
Add Painters tape randomly
Step 2. Spray your fabric with a light mist of water. Take a variety of paint colours. I chose woodland themed colours.
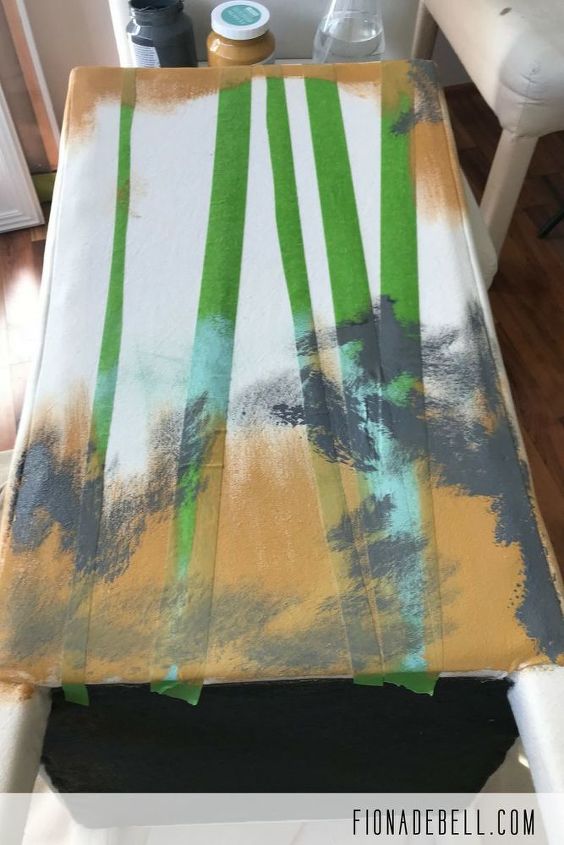
Use the colours of a fall forest
Step 3. Be liberal with a paintbrush, randomly splodging the paint down! Whilst the paint is still wet, use a rag to dab paint across the fabric, creating a 'leaf' type effect.
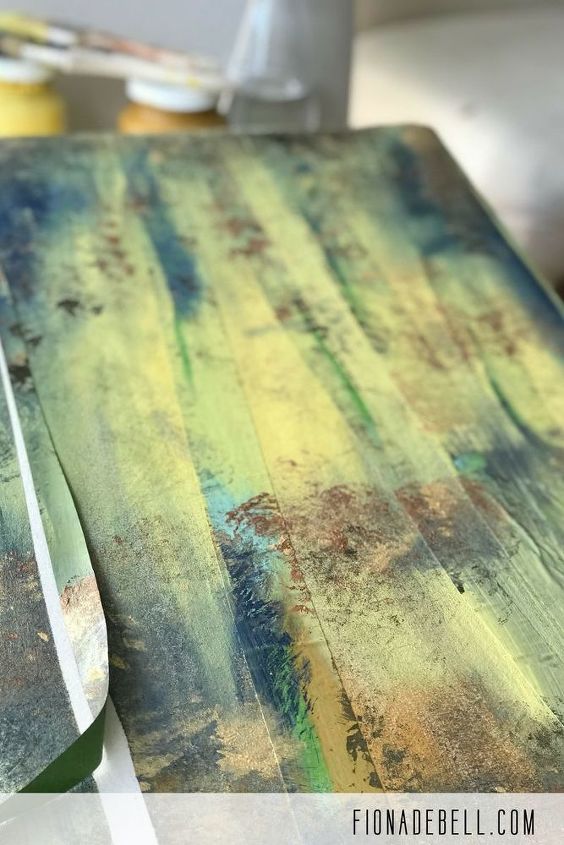
Remove the tape
Step 4. Remove the tape - now comes the fun part!

Once the tape is removed it looks like this
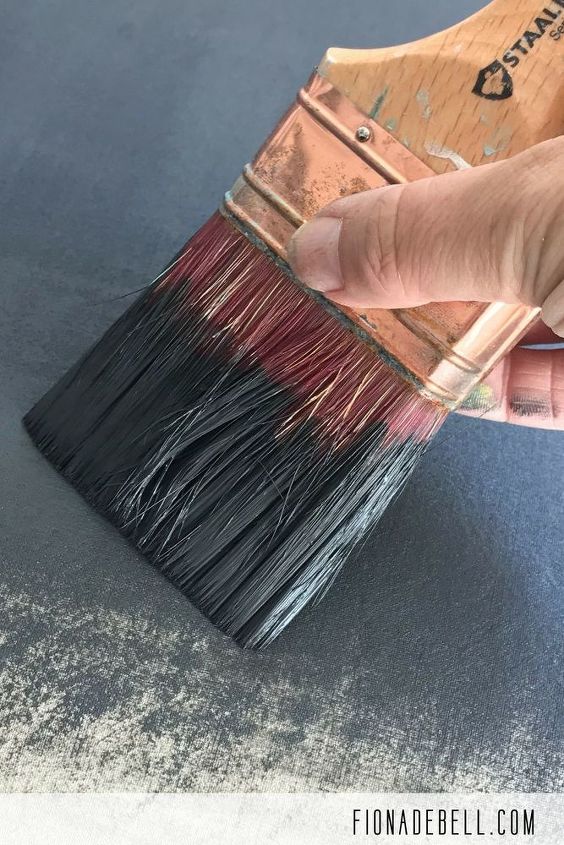
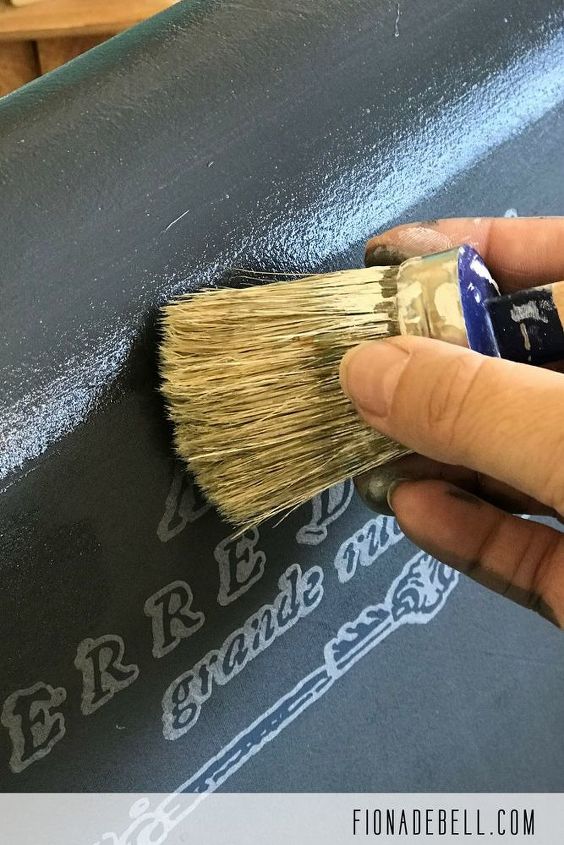
Oh I LOVE this bit! You need an old creditcard, or gift card and you can create some magic! You need a brown and a black paint - I used testers of Coal Black and Chocolate from Fusion Mineral Paint. To apply you need just a tiny amount of paint on your card and you sweep to the side. I think best explained in this short video clip.
{
"id": "4392898",
"alt": "Gentle sweeps create the 'bark'",
"title": "Gentle sweeps create the 'bark'",
"video_link": "https://www.youtube.com/embed/vlcQctCDTN8",
"youtube_video_id": "vlcQctCDTN8"
}
{
"width": 634,
"height": 357,
"showRelated": true
}
Step 5. It should look something like this when done. If you want to, practice on a piece of paper!
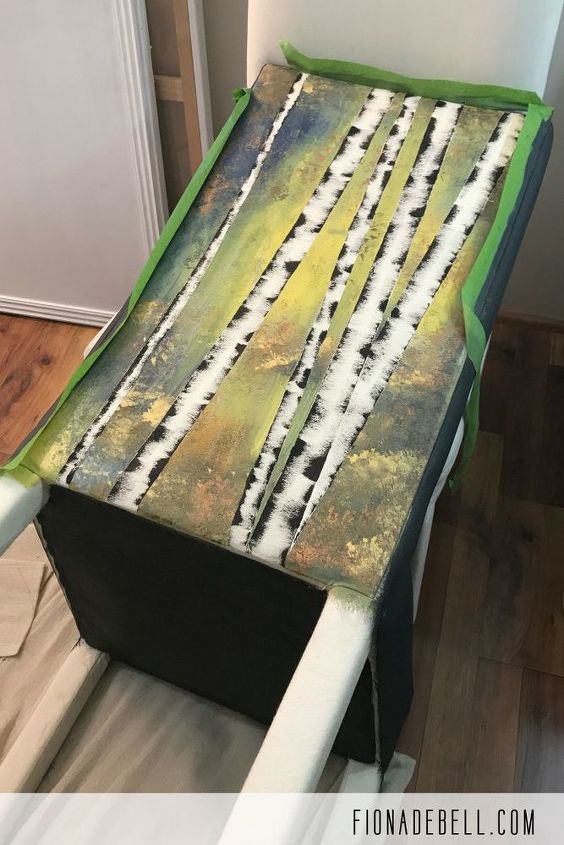
Perfect Birch Trees!
Step 6. Flip the chair over and you are ready to paint.
I taped the edges of my Birch Tree area. Using a water sprayer I wet the fabric and began to paint. I used Ash from Fusion Mineral Paint. Once the paint is dry (I left mine overnight), lightly sand with 180 grit paper. Remove the dust. Apply a second coat if needed.
Wet, then paint the fabric
Step 7. Next, I tackled the legs.
I chose an 'Ombre' finish. I used my Ash from Fusion at the top and a white, in this case, Casement, at the bottom. Gently merge to 2 together. I think perhaps this technique can be the subject of a future blog post!
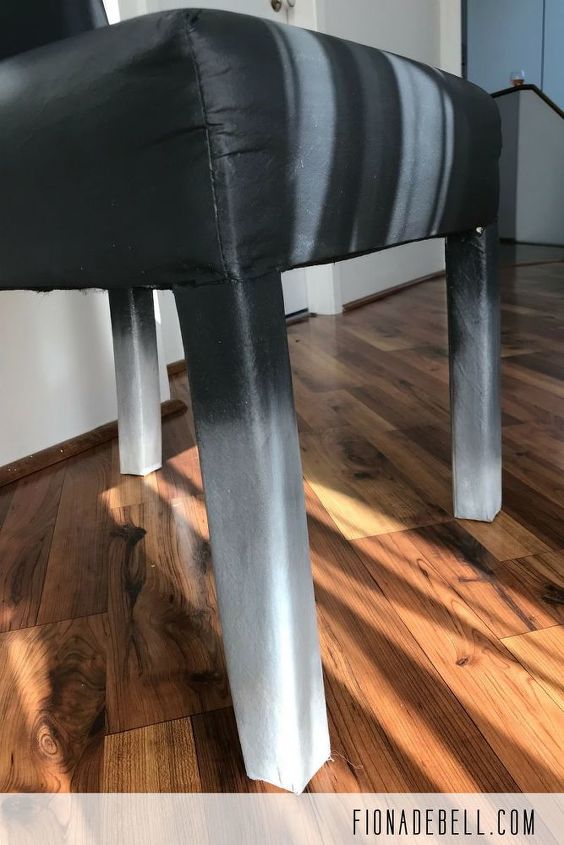
Ombre fabric legs
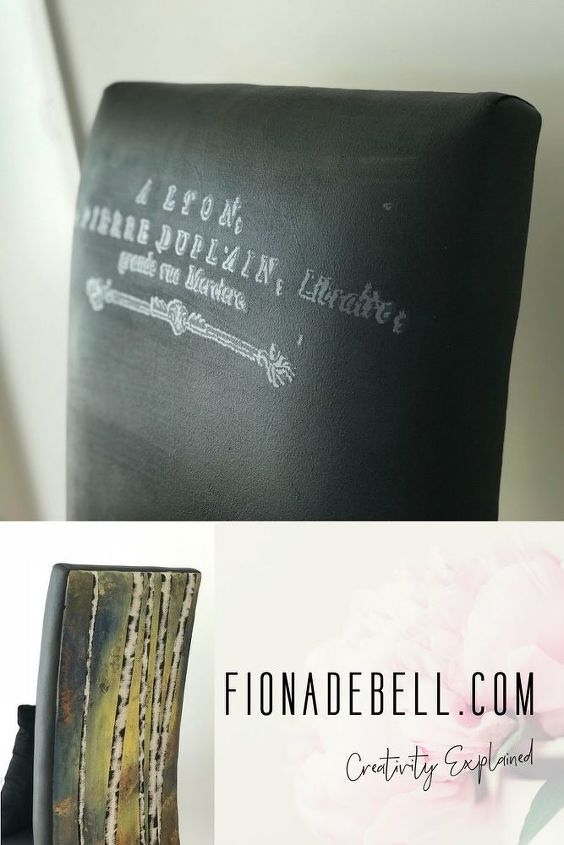
Step 8. I could have easily skipped this next step - but I wanted to add some interest and I happened to have an IOD transfer to hand. I simply trimmed my IOD Transfer and applied it following the instructions. It takes only a few seconds.
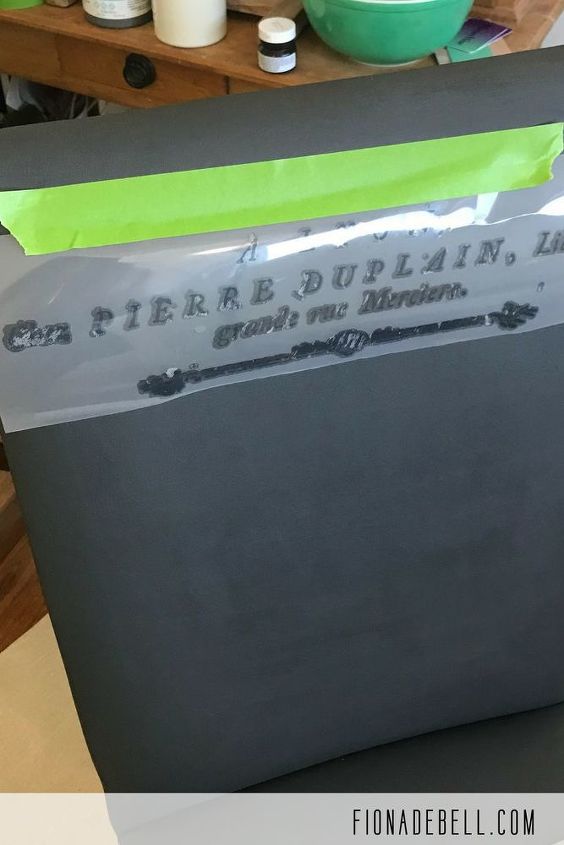
Apply the IOD transfer
Step 9. Finish with a Clear Coat, (or wax).
I chose Tough Coat from Fusion Mineral Paint because it is wonderful on fabric - it is flexible and wipeable. Perfect for me and my kiddos! It feels kind of like leather when dry.
Finish with Clear Coat
Wait for the Tough Coat to dry and you are done! I LOVE it! I have 2 more to do! Oh my!
The finished item!
I just love how it turned out - and so practical because spills can be wiped away
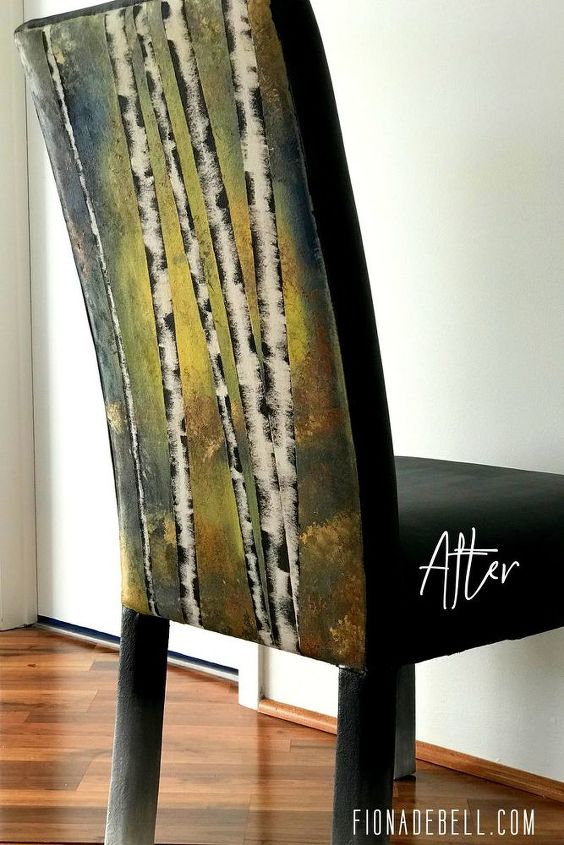
LOVE! Art on furniture - why not?
Let me know if you give this a try!
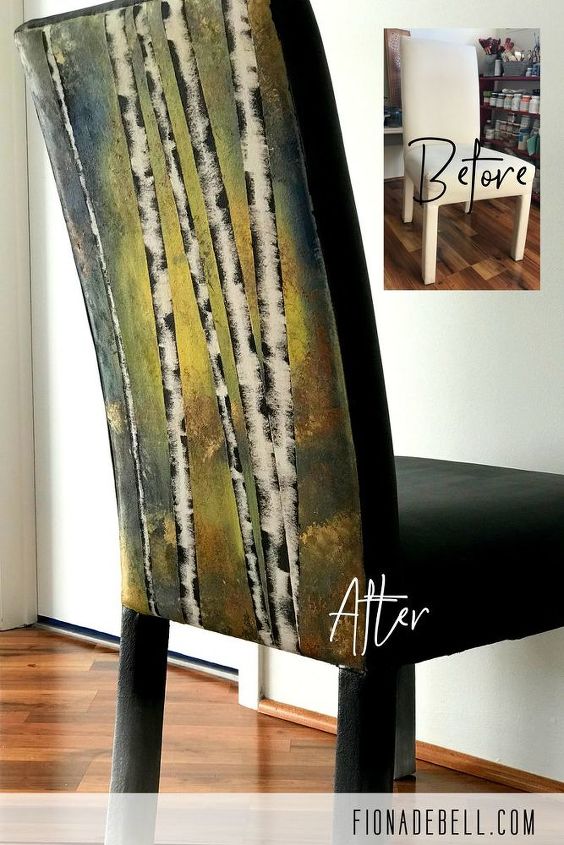
Before and After of this Painted Fabric Chair
Resources for this project:
See all materials


Any price and availability information displayed on [relevant Amazon Site(s), as applicable] at the time of purchase will apply to the purchase of this product.
Hometalk may collect a small share of sales from the links on this page.More info
Want more details about this and other DIY projects? Check out my blog post!
Comments
Join the conversation
2 of 134 comments
-
You are a true artist. It is better than a painting. There is more than just one side of interest. It’s a sculpture!
-
More than inspired this is truly a work of art


Frequently asked questions
Have a question about this project?
I painted my chair with acrylic
. but now fabric is stiff.i used stiff brush on it but only helped little.also should i add a sealer?
Amazing. Best thing seen here long time. I have faux leather chairs. can I use paint idea these?
I have 4 crTe and barrel leather chairs that have marked up, ugly seats (due to rivets and jewels on jeans). WHat would you recommend? Thanks.