


Side Table Update

Here I go again with the self adhesive paper!!
I can't help it, its so cost effective and easy to use.
I needed some side tables to stage a clients house and I needed them quick!
Another reason for using the paper is this is a short term thing, until I can take the time to sand and stain the tops of these tables and really make that wood grain pop!
Anyway.
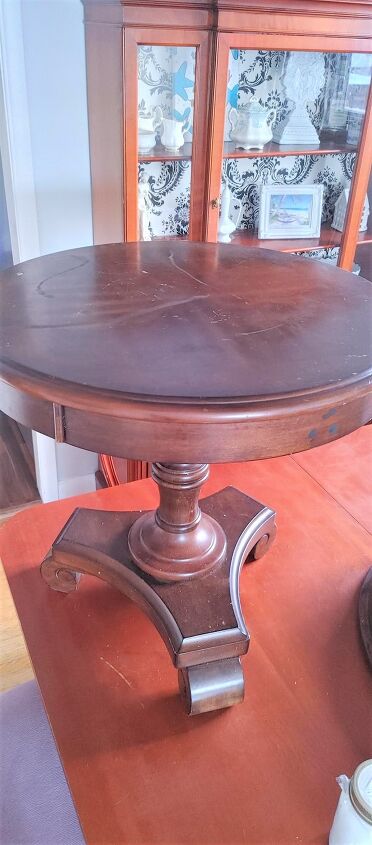
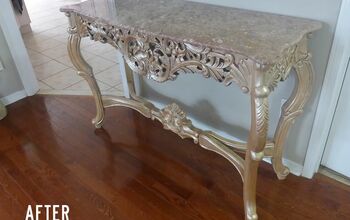
Before pic of the tables. Very nice, just not the color I need. I'm not a wood color fan, I usually paint all furniture. Look away if this offends you.
Hometalk Recommends!
As usual, first things first, gave these a good wipe down.
Once dry, I sanded them down with 120 grit paper. Just enough to take the shine off a bit.
I wiped them down again to get all the dust.
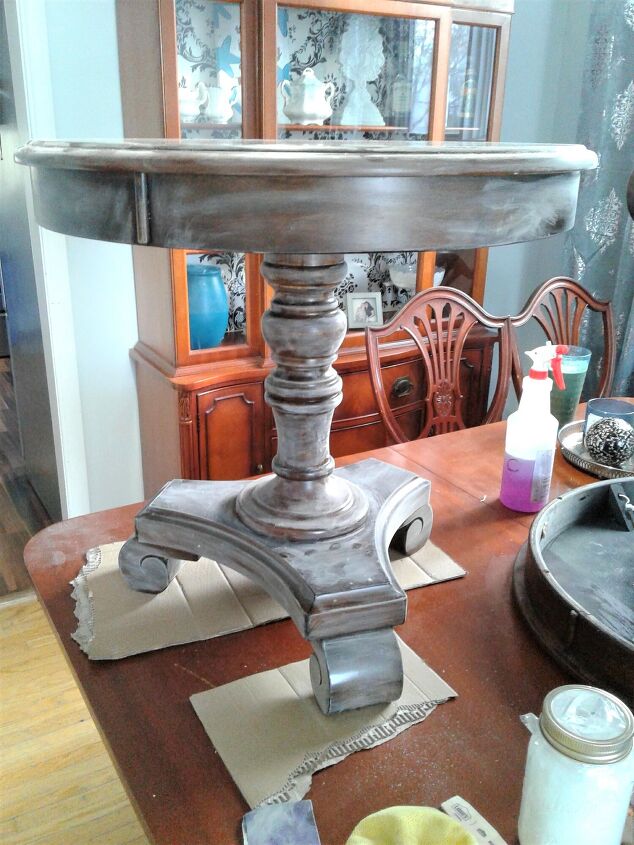
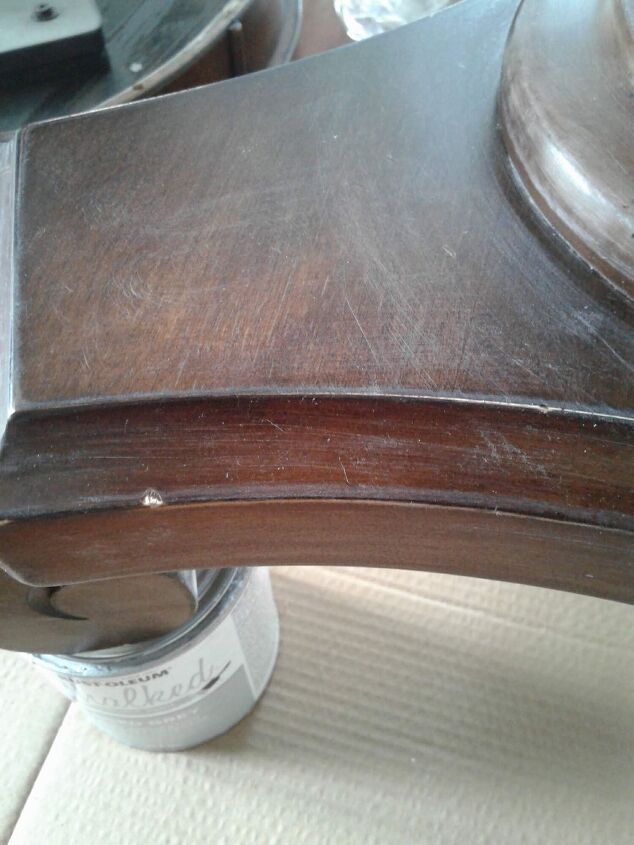
Once wiped, you can see the sand marks and the shine is not as bright.
I then did a coat of primer, followed by a light sand.
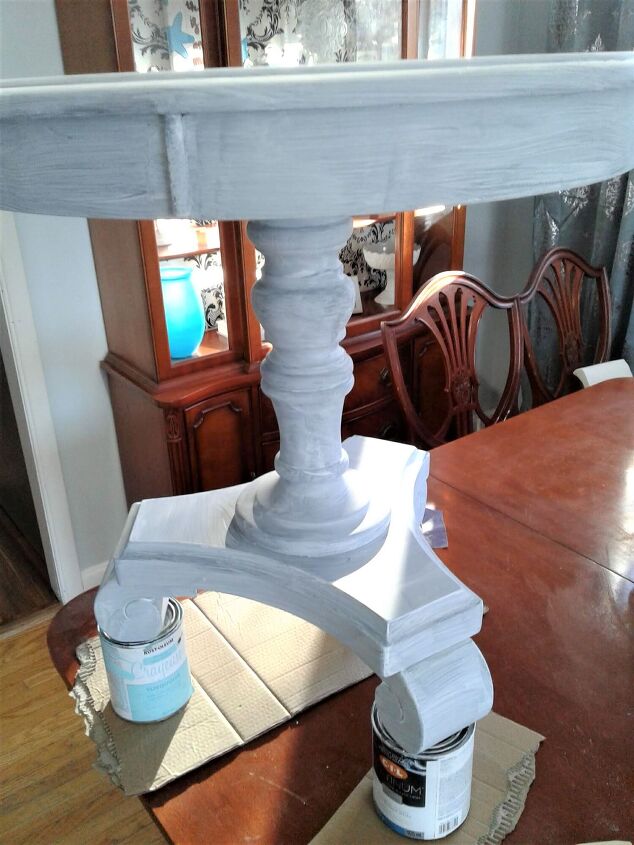
I used two coats of white paint. I had leftover wall paint, I use that on furniture a lot, along with chalk paint when I'm too lazy to sand and prime.

I left the top of the tables, as I planned to use the adhesive paper so no need to paint. As well, I plan to sand them down and stain the tops a nice grey once I have them back.
For now, I lightly sanded the tops, just to have them nice and flat for the paper.

Very interesting pattern on the top would you say? Can't wait to see it stained.
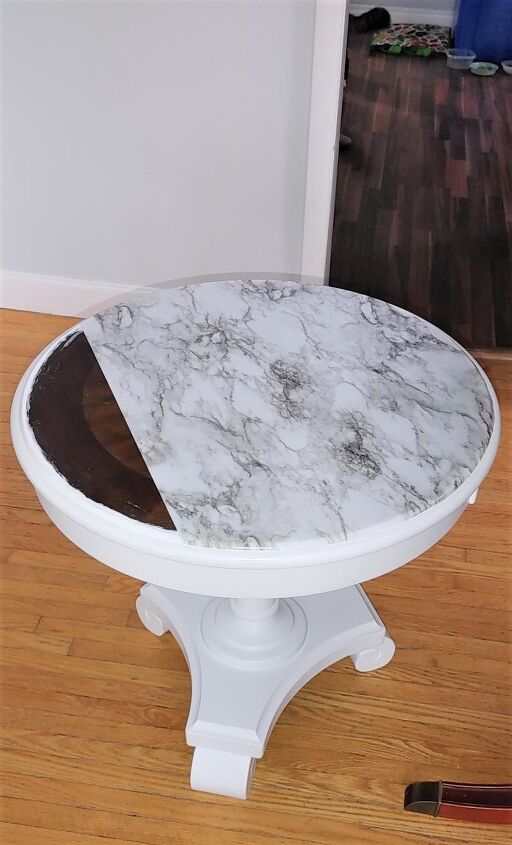
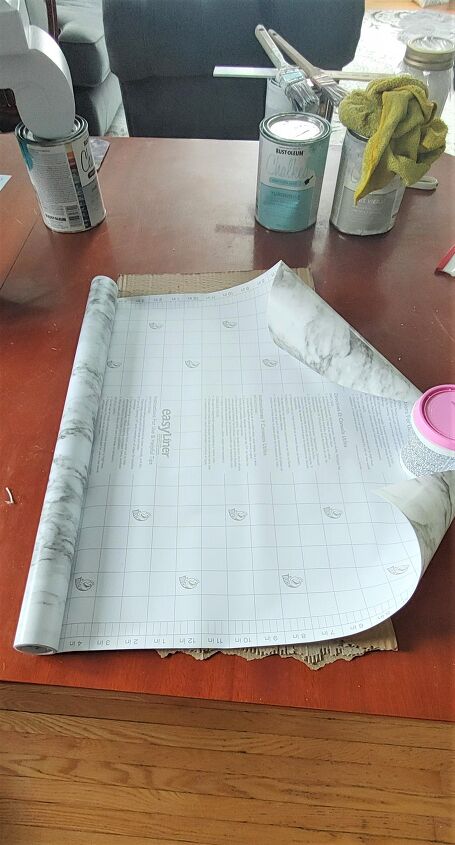
I then laid the paper on top and made a crease where I needed to cut. Unfortunately it didn't cover the whole table so I had to do it in two pieces.
I took half the backing paper off and laid it in position. I then smoothed out the paper to get rid of all the bubbles.
*Side note, at first, I laid it down wrong and didn't realize till after I smoothed it down. I then tried to rip the piece off and reuse it but no dice. It picked up some pieces of the finish on the table and made the paper bumpy. Don't do this. Take your time and make sure it's in the right place!
So I redid the step above.
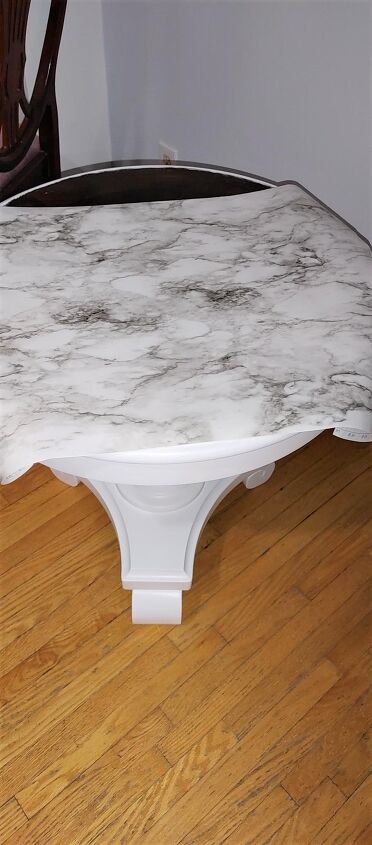
Once finished, I used an exacto knife and trimmed the edges.
I cut the last piece needed and applied that.
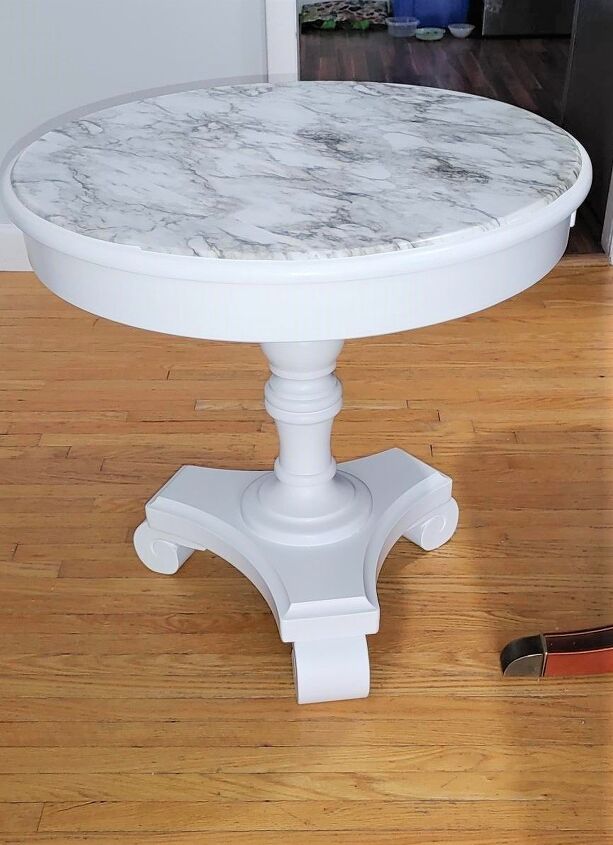
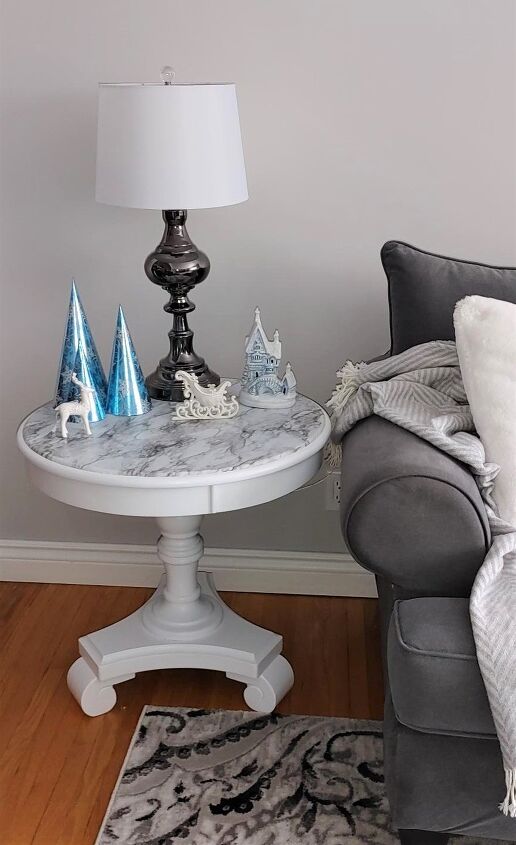
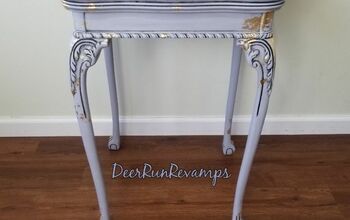
So here it is! I'm happy with them, it will work nicely for the space I'm working with.
Even with two pieces, you can't really see the seam unless you look closely.
Here it is with some Christmas decorations to see how it will look.
Not bad for a quick transformation!
Resources for this project:
See all materials


Comments
Join the conversation
-
This was posted 4 years ago. I still have them, I did remove the top paper, they were fine. These days, I'm now into the wood lol. Ppl change, styles change. I've been putting vinyl wrap that looks like wood on wood pieces that are damaged and its been looking great! And yes, to each their own. How boring would it be if we all liked the same things 😆
-
Issue I had with contact paper surfaces is they get easily damaged if not sealed. You can't actually use them for anything. I tried to seal a kitchen island in epoxy resin after applying contact paper but epoxy heats while curing and shrinks the paper. You have to stick to weaker surface coatings but it will still hold up far longer than plain contact paper. For low quality wood, mdf, pressed board, etc.... it's a great hack over hunting down those quality wood pieces when you want something to use now or make look like a material you can't afford or find. "Fake" wood items are numerous, cheap new, and often curbside free for turning into unique wood grain or stone with textured aka 3D contact paper. Everyone comments on the cinnamon wood contact paper kitchen island. Leveling the damaged surface underneath was basically like scraping cardboard because it's such cheap pressed board. It requires holding the field microscope over it to see it's dots instead of wood grain through the gloss layer over top.
For quality wood it's easier, often not even more time consuming, not really more expensive, and far longer lasting to redo the surface. Many pieces just require some scuffing with sand paper to make it possible for a new varnish layer to adhere and it will be good for another few decades. Provided you use actual varnish and not polyurethane or acrylics. You can use tinted varnish and easily make tinted varnish or shellac with inexpensive tinting powders. Color fixed, wood sealed, and honestly it's no more difficult than lining up and getting contact paper flat. It won't scratch through, peel up at the edges, get creases, wear spots, etc.... like contact paper will.
It has it's place. Just not on already good quality wood that can easily be restored and tweaked for something far more useful and increasingly more appealing to people than the fake aged look or fake stone and wood. The farmhouse white fad was dumb and luckily mostly disappearing. People on farms used lime whitewash because it was cheap and applied to cheap wood instead of scrubbing it clean. White painted stuff was utilitarian and sometimes a sign of not having money for better materials. Why people thought looking poor with cheap materials instead of finished hardwood is a good thing I will never understand.


Frequently asked questions
Have a question about this project?
You should be ….. well it is a sun what you did to that beautiful piece of natural would.
Love it!! What a change. Could you tell me if this is also what you used on the back of your china cabinet. Love that print also!!
Some tired and scarred wood pieces do get a nice refresh with paint. This table turned out really nice. You mention you don't like natural wood color so do you plan to paint your china cabinet? To me, painted would look better with your beautiful overhead fixture. Just my two cents. 😊