


Skinny Nightstands Made From Desk

Take a look at this desk makeover! We turned an old desk into two tall, slim nightstands—one of my favorite projects so far. If you’ve got an old desk you don’t need, here’s how you can repurpose it into something totally new and useful. Let’s get started!
Get all the makeover details and full list of supplies used here.

Hometalk Recommends!
We found this free desk on the side of the road! It was too short to use as a desk, but I knew it would make the perfect nightstands after some repurposing!

First things first, locate the screws and/or nails that attach the top to the desk.

Remove the top of the desk and set it aside for later.

With a hammer and possibly a saw, remove the middle drawer supports.


Repair the damage left behind with Bondo. Once dry, sand it smooth.

You can also apply one more coat to get any small places that you missed or places that had some air pockets from the first round.

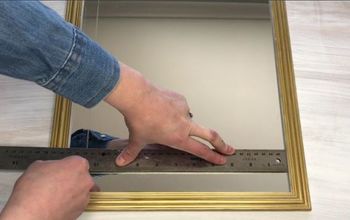
Measure how big your new tops need to be then cut them out of the old top with a table saw or circular saw.

Router out the 3 sides of the new tops to put simple detailing on the edges and sand them to bare wood.

Attach the new tops onto the nightstands by simply lining up the tops and using the old screw holes and screws.

Sand the nightstand legs to remove the old finish. Use the edge of folded sandpaper to get into the details of the legs.

Prime waterbased polyurethane over the Bondo before applying any paint. Then apply 2 coats of milk paint all over the nightstands

Once dry, distress the paint a bit to help it chip.
Lastly, seal everything with 3 coats of waterbased polyurethane.

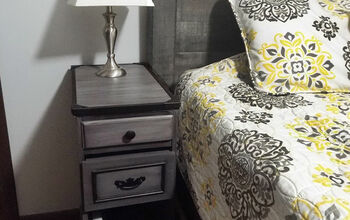
And there you have it! From one old desk to two stylish, space-saving nightstands. Hope this project sparks some ideas for your own DIYs! If you like how these nightstands turned out, let us know!!
Get all the makeover details and full list of supplies used here.
Comments
Join the conversation
-
The feet being untreated makes them look too large I think.
-
I personally would have left it as a desk and refinished it to its natural color. Your project turned out nice but I agree with other comments that the feet should be dark.


Frequently asked questions
Have a question about this project?
These nightstands, are the cutest I’ve seen! Did you? use a router for your table tops? I am so trying this, thanks for for sharing!!
Very nice..can I ask why you left the front legs natural? It’s the 1st thing I saw and it takes away from the detail of this old ornate piece.JMO