


Tiling With a Finishing Touch

7 Materials
2 Days
Medium
We finally finished the tile floor! I absolutely love how it looks and how much bigger the downstairs looks with a continuous floor from the kitchen into the mud room. It is definitely not level (we knew that would happen) but I like to think the natural irregularities in the rough slate makes it less noticeable :). What do you think?

We spread the mortar with notched trowels and back-buttered the underside of each tile as we laid them, being mindful of the color patterns.

After most of the tiling was done we waited 16 hours then grouted with espresso colored sanded grout. The rough surface of the tiles made it easy for grout to get trapped in the crevices so we had to clean them thoroughly within 5 minutes of applying the grout.
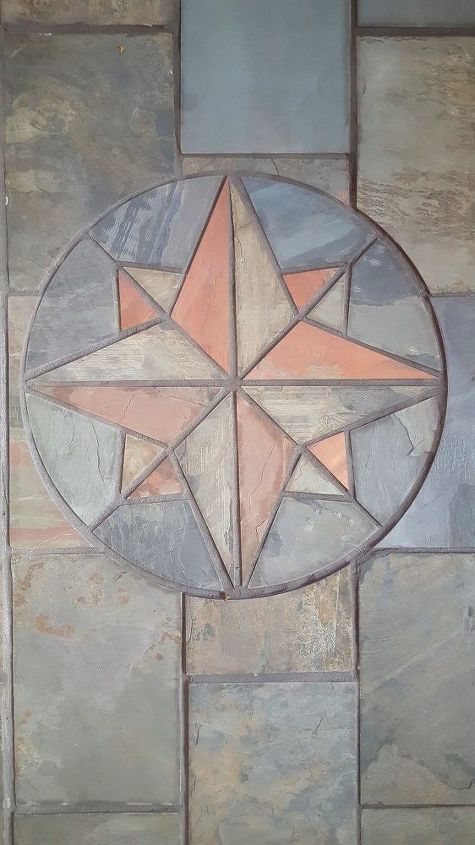
We decided to add a special design which we cut with a waterjet Will has access to through his work: a compass rose. I have a bit of a map obsession so I thought it was fitting. I think it would be fine to do this with a square outline using an regular tile saw.
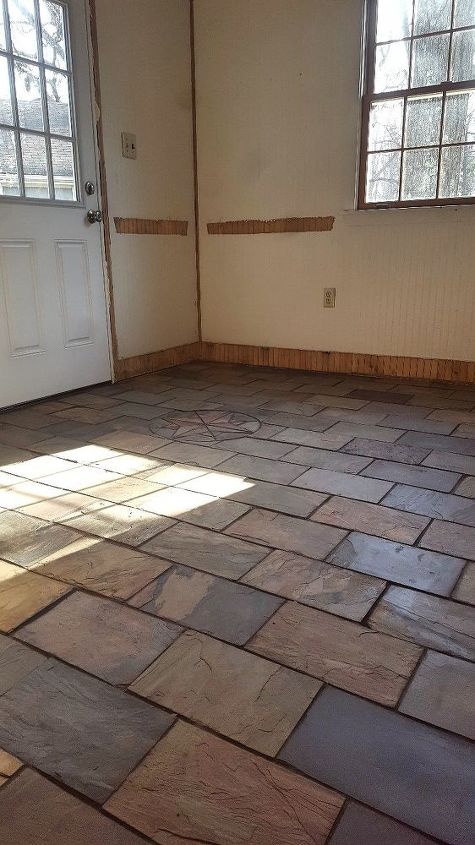
Here is the final result! We still have a lot of work to do on the mud room but I love this tile and how it flows straight in from the kitchen. Will even tested it by jumping on the floor and there are no cracks yet! It doesn't feel any different from walking on the floor with concrete underneath.
Comments
Join the conversation
3 of 35 comments
-
VERY BEAUTIFUL!!
Make sure you put some kind of sealant over the tile when you're finished. It will help it stay beautiful for years to come!!
-
Can I do that on my porch?


Frequently asked questions
Have a question about this project?