


Yes, You Can Assemble That Bed You Saw Online!

by
A
1 Material
$145
3 Hours
Easy
Five years ago, on an impulse, I purchased a king sized upholstered bed from overstock.com. I’m not usually quite that impulsive, but my husband had just passed away and frankly I’m amazed that I didn’t do more credit card damage during that summer. During very stressful or depressing circumstances, some people drink, others use drugs, and I shop. Anyway, at the time, I spent the extra money to have the delivery guys put the bed together for me. It seemed so daunting and I didn’t want to ruin it. Fast forward four years…I sold the house and had to pack up my things. The bed, which I had come to realize was one of the best purchases I had ever made, needed to be broken down and eventually put back together. By this time, I had tightened the purse strings and was not about to pay someone to do something I knew I could figure out. As I disassembled the bed, I took photos and labeled everything so that I could put it back as it should be. It was very simple and I did it by myself – I am not young, and I am not in great physical shape either!
As in my previous posts, I mentioned that I am doing a guest room makeover. I was in need of a bed and I didn’t want to spend a lot. I found exactly what I was looking for and it was very similar to my own bed. Amazon.com is truly an amazing world of treasures! It came in today and once again, by myself, I assembled it in less than 3 hours – and so can you! So if you’ve been on the fence about getting one of those upholstered beds, go ahead and order it…but skip the assembly charge because you got this!
I am not going to give you step by step instructions here because your bed may be a little different than mine. I just want to break it down for you so you can see just how simple it is. I did it alone, but if you have a cooperative partner, by all means, take advantage.
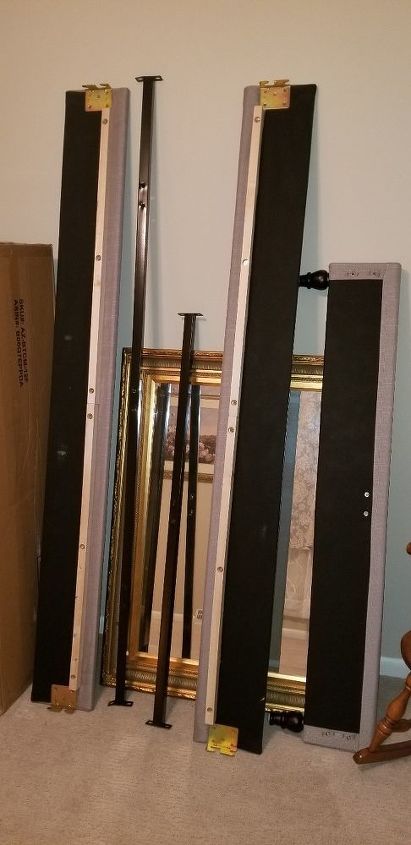
First, unpack you bed carefully. If using a blade to cut open your boxes, do it very slowly and pay attention. Take each piece and lay it out. Find your directions and hardware and get to know the pieces. I like to lay mine out in the area of the room that they will go. You will most likely get two tools with your hardware kit…an Allen wrench and a flat wrench. That is all you will need, unless your directions call for more. I did wind up using a screw gun as well.
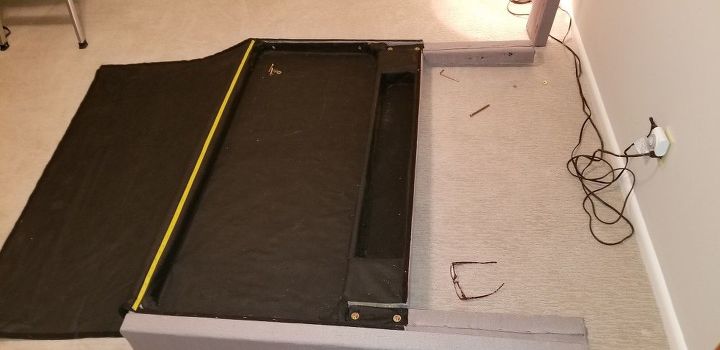
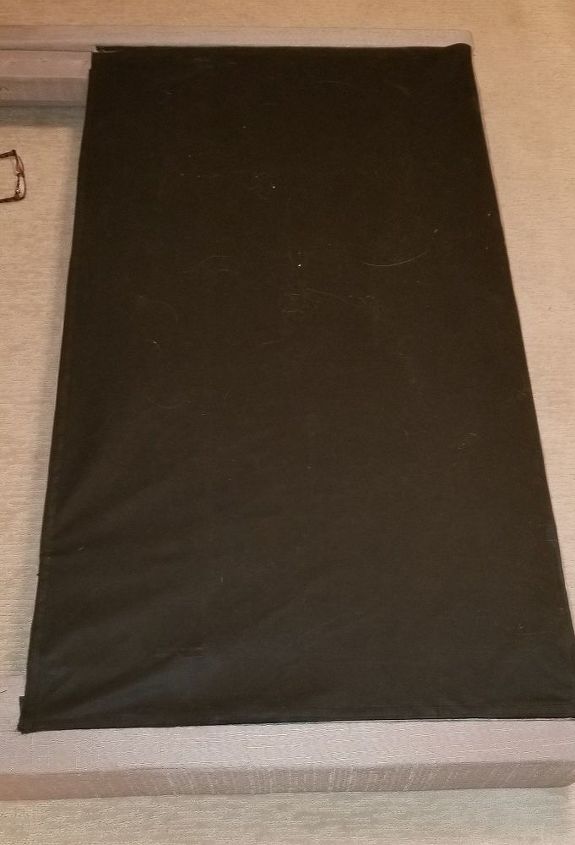
My headboard came with a lot of parts hiding behind a tear-away back. Once all of the parts were out and screwed to the headboard, the backing fabric went back into place with the attached Velcro fastener tape.

When attaching the legs to the headboard, be sure you pay attention to where the holes belong. The instructions are probably going to be graphic so try to match up what you see in the photo. This will ensure that they are attached on the correct sides.
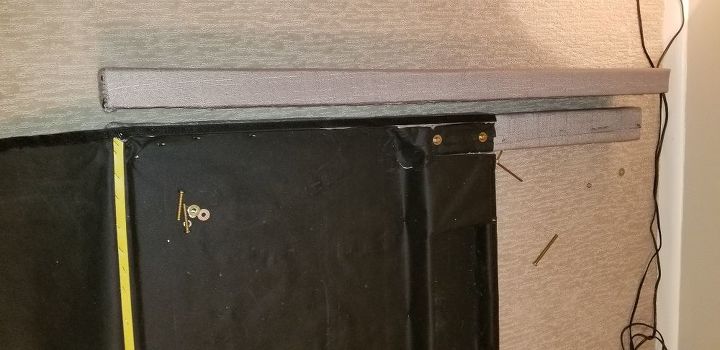

My bed had “wings” along the sides of the headboard. These were attached from inside the headboard. Make sure you tighten up everything so that your bed will be very stable.
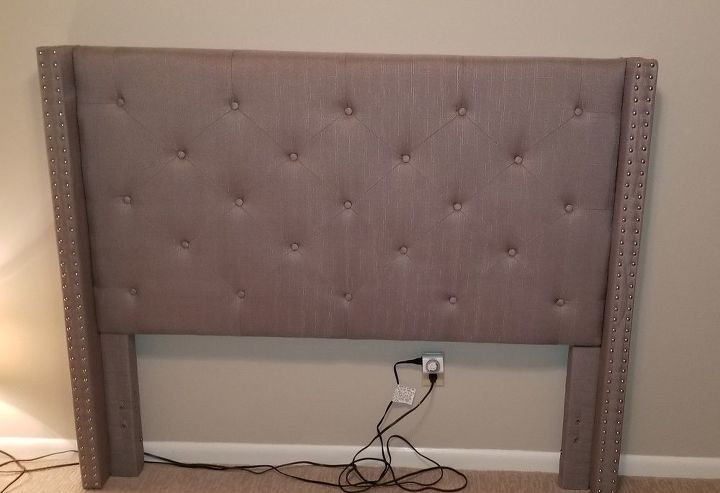
Once done, you can replace the backer and stand the headboard up in the place it is going to be.
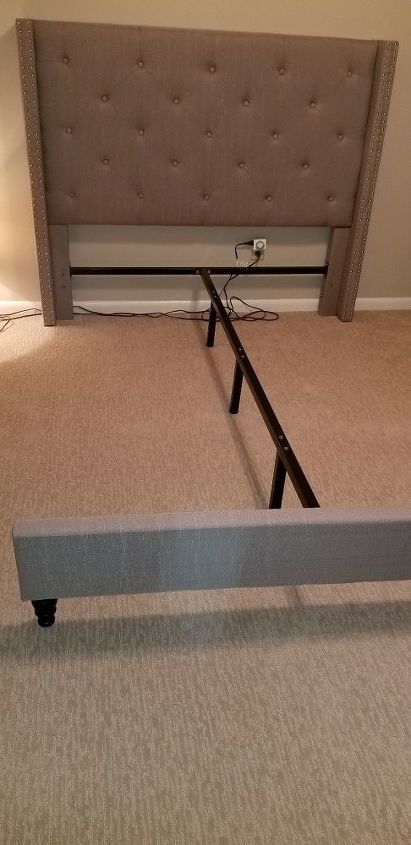
Next, the metal frame pieces went into place. Follow the directions for the direction of the bolts and which washer combinations are used. This bed attaches the foot board to the center frame before adding the side rails.
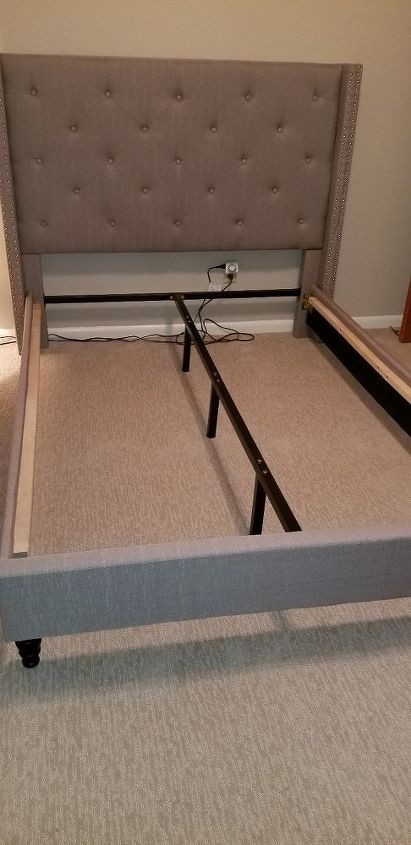
Following the directions, install the side rails and tighten up the bolts on each end. Be sure the bed is where you want it in the room.


Last of all, you will install the slats. This bed had all of the slats attached together with ribbon tape so the spacing was already done for me. I just had to lay it on the rails and screw down each slat in place.
That’s it. No heavy lifting, nothing tricky. It is time consuming and you do need an ounce of patience, but other than that, it is certainly something most people can accomplish.


Frequently asked questions
Have a question about this project?