


Olive Wood Jewelry and Sunglasses Rack

by
Zac Builds
6 Materials
$40
4 Hours
Easy
Do you have this problem: no proper place to put your sunglasses and jewelry in your bedroom? It's basically the epitome of a first world problem. None the less I was tired of looking at my bedroom dresser with sunglasses, watches and various other pieces of jewelry strewn across the top of it.
I decided to build this jewelry stand as a way to reduce the clutter and organize my room.
I suspect if I was single and lonely this is a problem I wouldn't have. Here I am though, with a romantic partner and all the paraphernalia that comes along with that (mostly jewelry and elastic hairbands).
I got the inspiration for this project while I was at the lumber mill recently. I was picking up the walnut I used in my bedframe project when I spied some smaller pieces of live edge olive wood. I didn't know what I was going to use it for when I bought one, but I figured it out pretty quick. I was going to organize that pile of jewellery and sunglasses on top of my dresser damn it! Best of all, it only cost me 20 bucks!
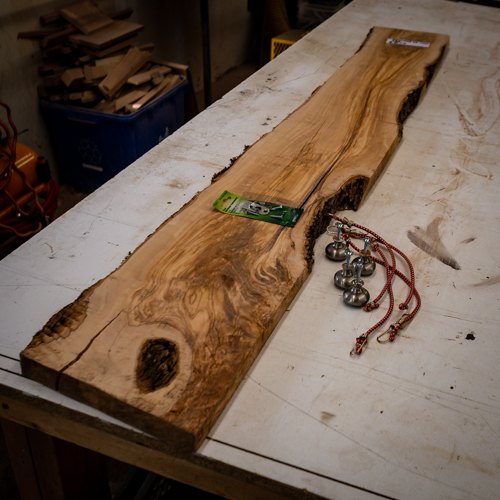
So this is what I started with: A 1" thick live edge slab of olive wood, some cheap bungee cords, and a couple of old knobs that I had left around in the shop.
I actually replaced these silver knobs with the golden "t" shaped drawer pulls. I didn't care much for the knobs from the get-go and I needed some pulls around the house for other projects so I bulk ordered like 20 of the golden T pulls from Amazon for a little over $1 each.
I think the total cost of this project came in at about $40. Plus of course, my time, which depending on who you ask is either priceless or worthless :)

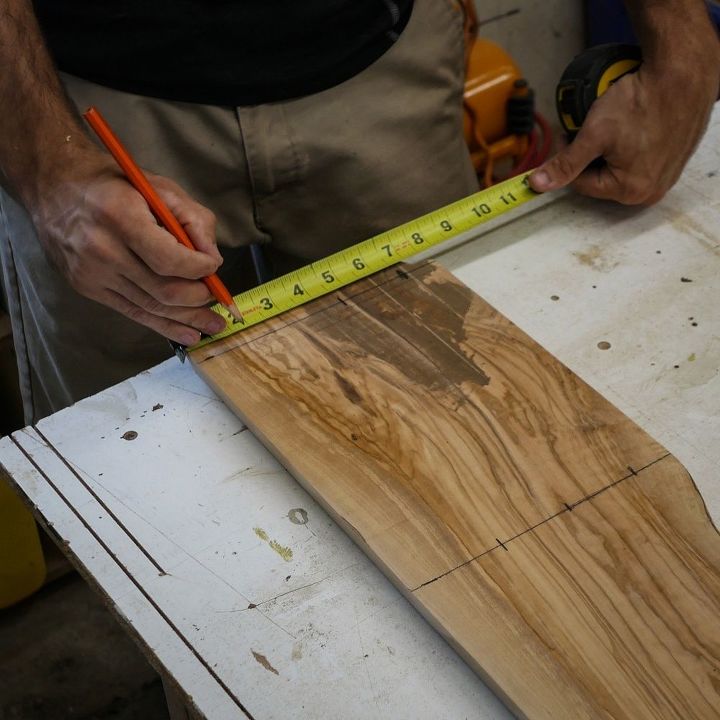
To start I had to decide how big I wanted the sunglass stand to be. I thought 24" would be plenty of space, but after loading up the finished project with all of our jewelry and sunglasses I wish I made it bigger. Perhaps the smaller stand will force my girlfriend and I to pare down on needless materialistic trinkets (haha, ya right).
Using a straight edge I pencilled on two parallel lines that were 24" apart. Because I was working with a live edge piece of lumber I had no square edges to work off. My first line I placed more or less arbitrarily and then I measured my second line off of that first line.
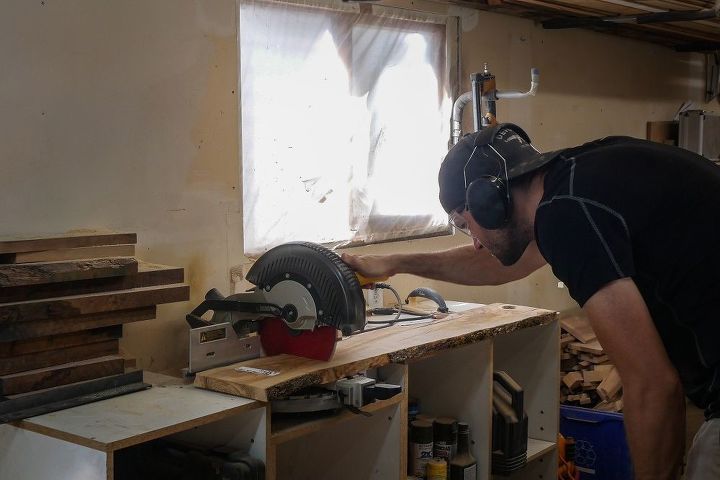
Using my chop saw (I know the correct name is mitre saw, but I like antagonizing woodworking purists) I cut along those lines I just pencilled on. Because I was working with a live edge piece of lumber and had no straight edges (yet) I put it against the back fence of the mitre saw and adjusted the angle of the base until the angle of the blade matched the angle of the lines I had sketched onto the surface of the wood.
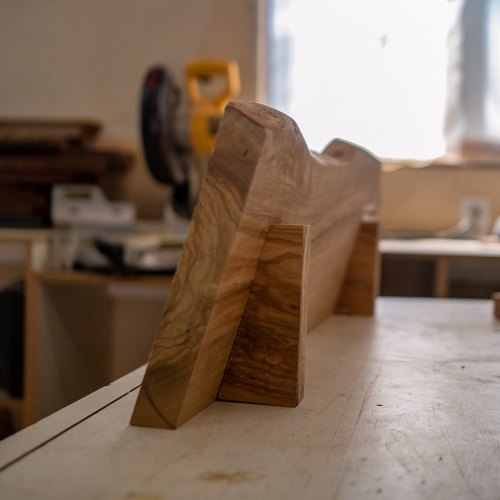
Unfortunately for me, my sunglass stand won't defy the laws of physics and stand upright on its own. I was left with no other choice but to cut some feet that I would attach to its backside to keep it upright.
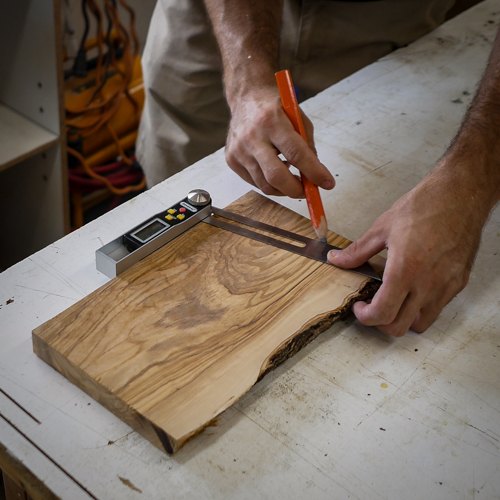
Using my digital angle gauge I traced out some feet onto an offcut of the olive wood. The angle of the feet are the same angle as the base of the sunglass stand, 15-degrees.
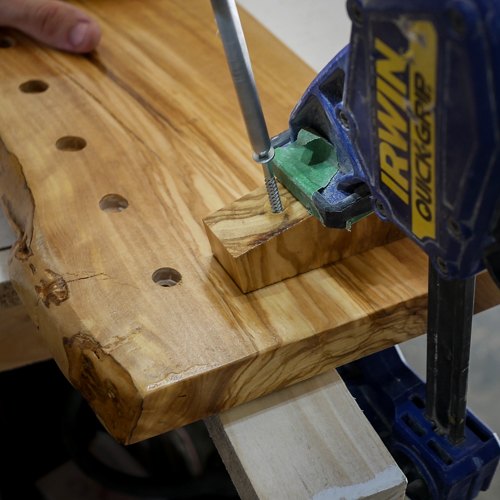
I used a soft clamp to clamp the feet to the backside of the stand and then screwed them in place. Fun fact, I used a 1 1/2" screw at the top of the block and a 2 1/2" screw at the bottom because of difference in their thickness depending on where I was screwing through.
Is that a fun fact? Not really. But it may be helpful for anyone hoping to recreate this project.
With the feet installed I was ready to move onto mounting everything to the surface of the stand.
So remember those bungee cords and knobs? Well, I needed a way to mount them to the olive wood. I figured the best way would be to drill some holes, pull them through and then tie knots at either end.
The first step in that process, before I even drilled the hole, was to layout my hole locations. I traced out two parallel lines and then measured the hole locations up from the bottom of the stand.
I then basically did the whole thing over again for the knob locations. Except I didn't need to draw a parallel line. What a time saver!
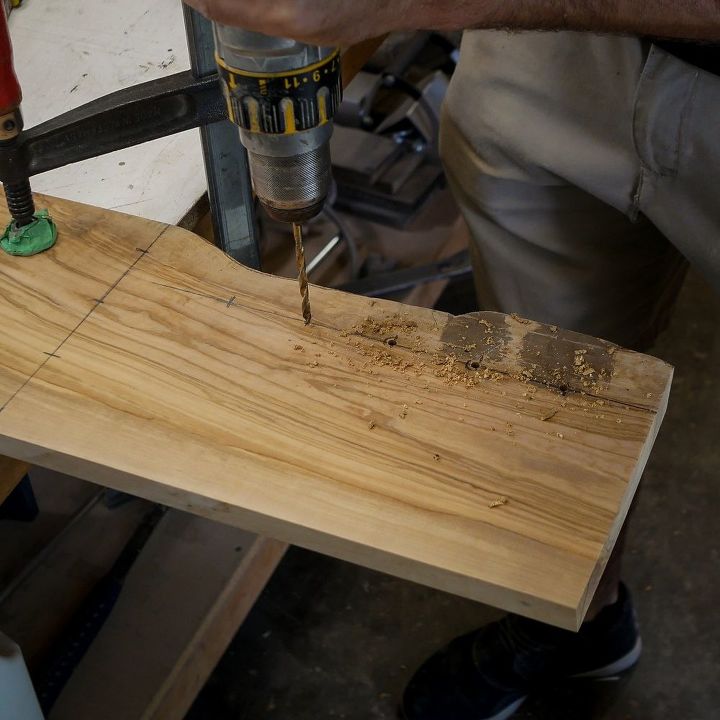
Enough planning, time for action! I grabbed my cordless drill and got to poking some holes in this olive wood. The trick to drilling holes for drawer pulls and knobs is to pick a drill bit that's slightly larger than the mounting screw.
As you're drilling be careful not to apply too much downward pressure on the drill. If you do, you run the risk of bursting the drill bit through the backside of the wood and leaving a nasty crater.
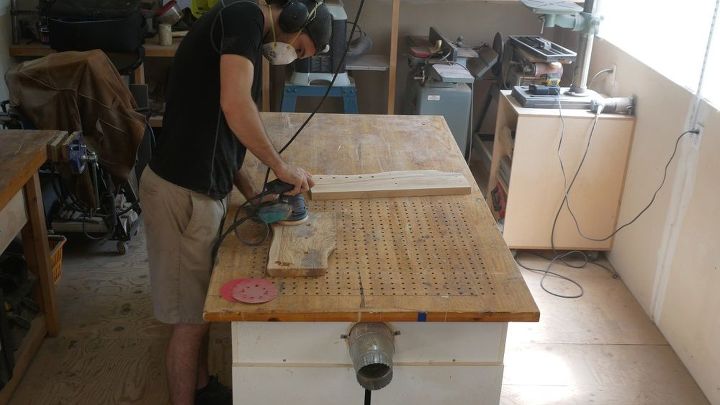
To remove any blemishes and to smooth the surface of my stand I brought the random orbital sander out of retirement. I started with 80 grit sandpaper and worked my way up to 180 grit sandpaper. I worked the whole surface until it was nice and smooth to the touch.
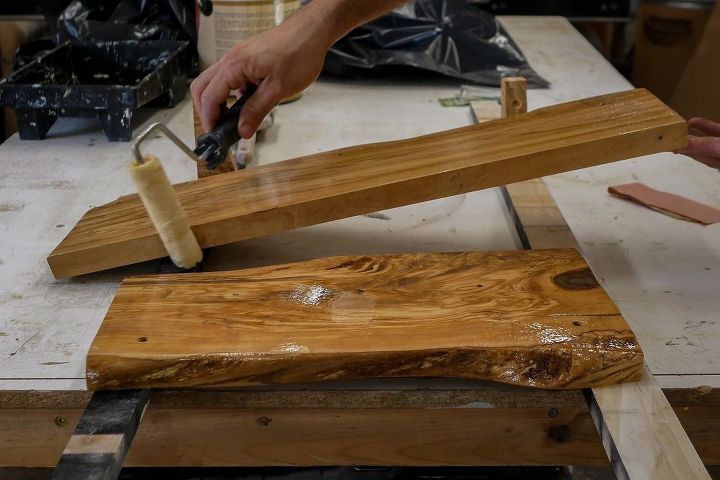
Next I rolled on a hybrid oil and water floor varnish as a clear coat. This step is really just for looks. It makes the wood look glossier, and helps increase the contrast of the wood.
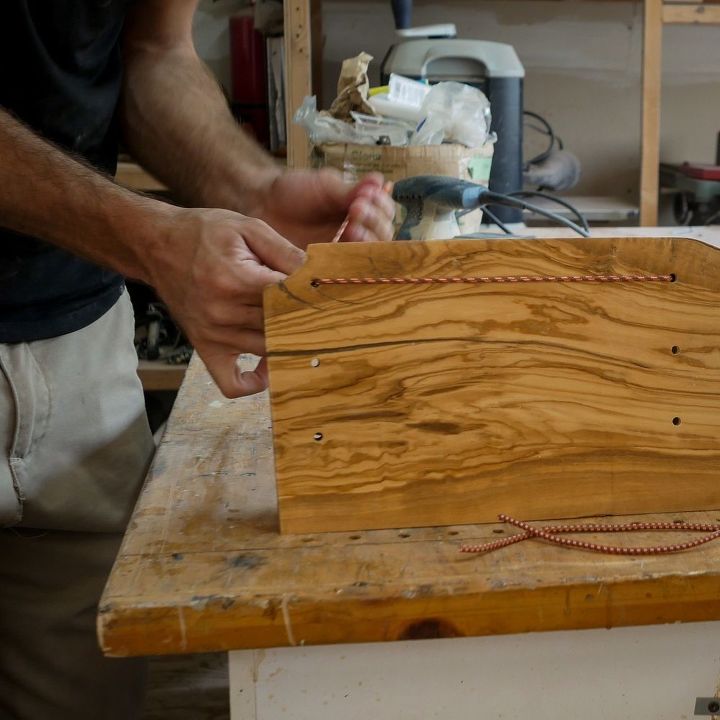
Ok sorry for the quality of this photo, but it was hard to get a photo of me tying a knot. I just did a simple double knot on one end of the bungee, threaded it through the holes and then tied a second double knot on the other side and cut off the excess.
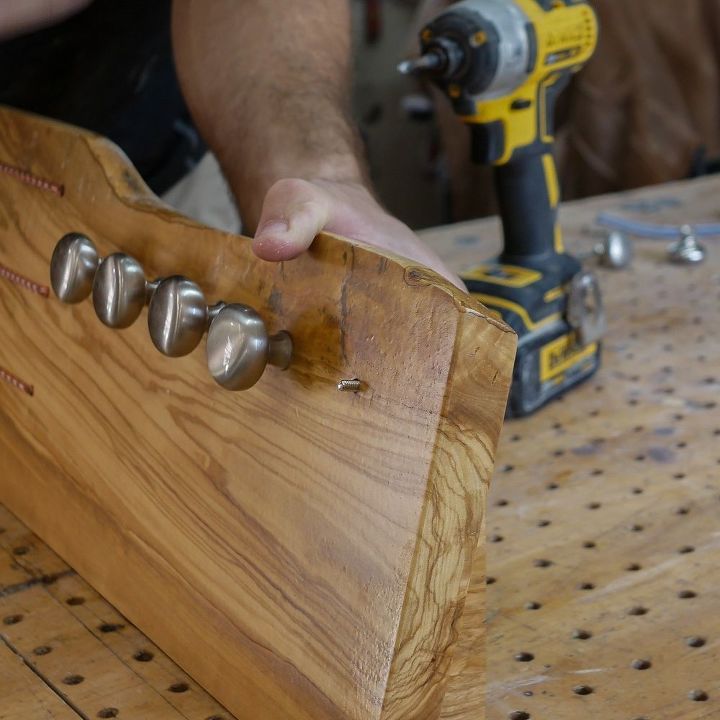
The next step was to add the knobs. I threaded the mounting screws through the stand from the back side and then screwed the knobs onto them. Again these knobs aren't the ones I ended up using in the end, but the process for attaching them is the same.
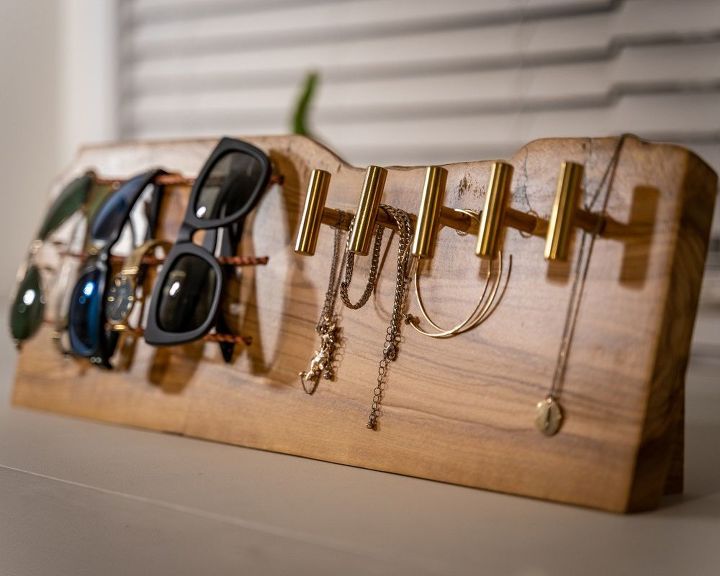
This is what it looked like when it was all done!

The right side I used these t-shaped drawer pulls to provide a place to hang jewellery, everything from chains to earings.
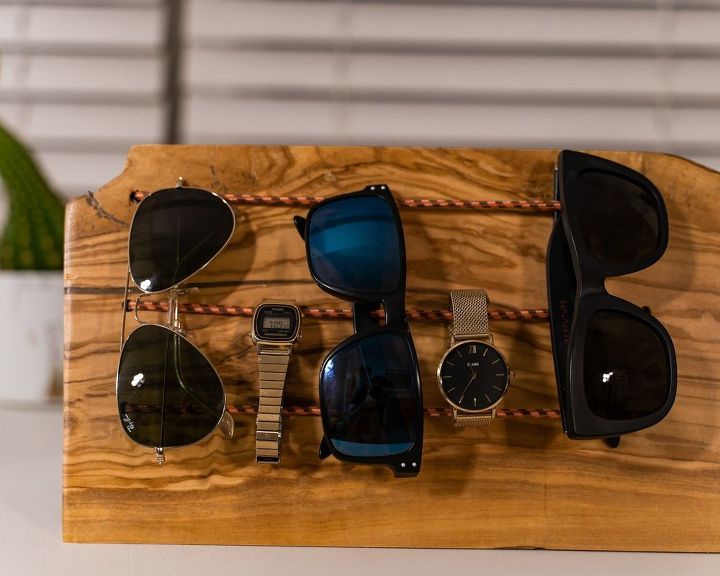
The left side is for sunglasses and as it turns out watches also fit nicely on the middle row of bungee cords. I haven't yet found a good use for the bottom row, but I had to add it for symmetries sake. If you have a good use for it maybe you can let me know in the comments!
That's it for this build. Hope you enjoyed it. If you did I'd love for you to check out my site and my Instagram profile. I post on both regularly.
If you have any questions or comments let me know below and I'll do my best to answer them all!
Want more details about this and other DIY projects? Check out my blog post!


Frequently asked questions
Have a question about this project?