


DIY Bath Caddy/riser

This project started out as a bath caddy made from various plastic bits but as time went on it was used in a new way that I wouldn’t of thought of. It makes a lot of sense for a renter-friendly bathroom that is low on storage space.

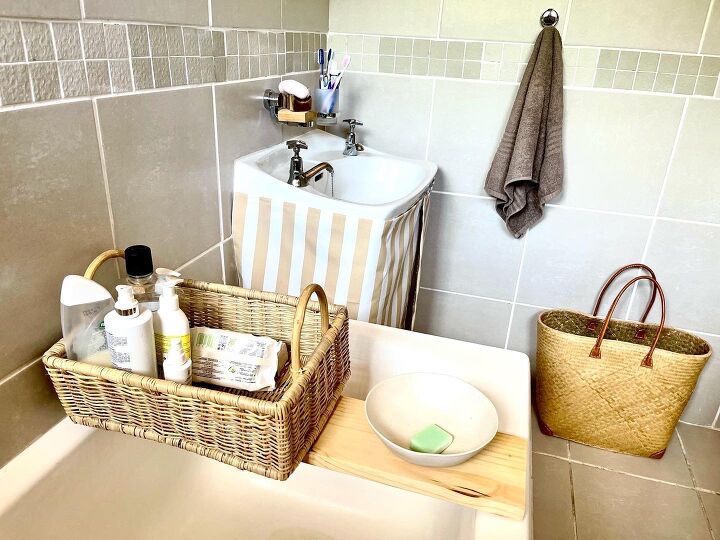
A bathroom shared by three teenage girls is a nervous breakdown waiting to happen for anyone who fancies a bit of order. The scene in the pic above is typical. To make things worse, it so happens the adults in our household have also started using this bathroom recently (we are having major power issues countrywide and the girls’ bathroom has a gas geyser).
So I can unfortunately no longer just close the door on the mess but have to navigate my way past two scrubbies, bracketless hand-spray, one chain without plug, one facecloth and umpteen bottles of hair products, not forgetting my own, lugged all the way from the main en-suite. Plus my general irritation of not being able to do a complete overhaul, which is what the bathroom actually needs.
Perhaps you saw the rustic bath caddy I made for a seaside apartment last year? For various reasons this design was not going to work for the brown bathroom back home, a new design was needed.
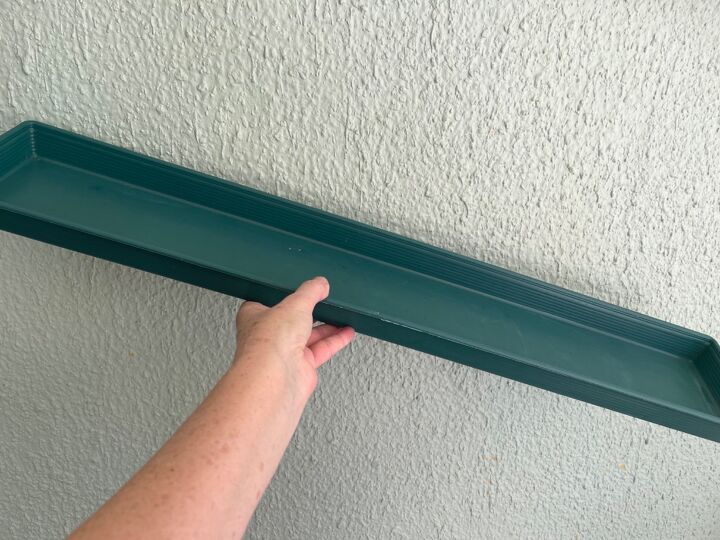
Out comes this long, plastic pot-plant drip-tray and the new design started forming.
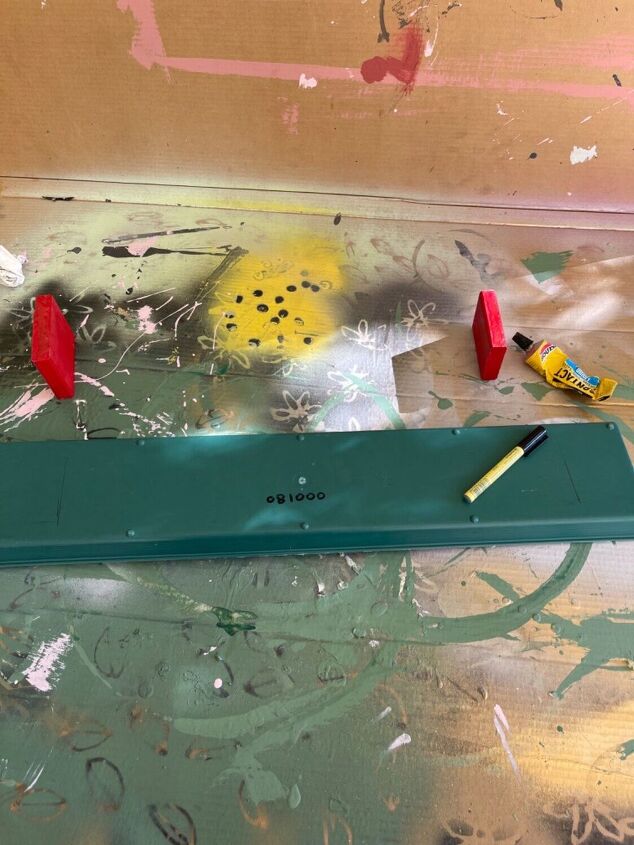
Since the tray was initially going to be slung over the bath, I measured the position of two wooden play blocks that would be under the tray and serve as stoppers inside the bath cavity. You can see that they are two large, flat, rectangular blocks.
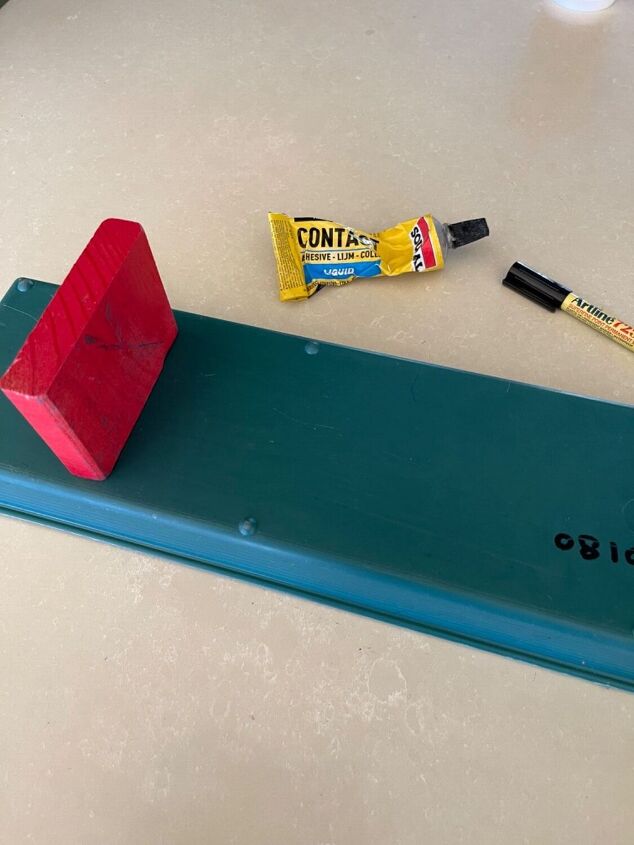
They were stuck down with contact adhesive and left to dry.
Narrow
The one problem with my drip tray is that it is very narrow as well as rimmed. This works well in this particular crowded bath setting but not necessarily if you want to add containers to it. With the seaside apartment caddy I did previously, this was not a problem because I used a flat plank and I could add any size item on top. Not this time though.
See-through
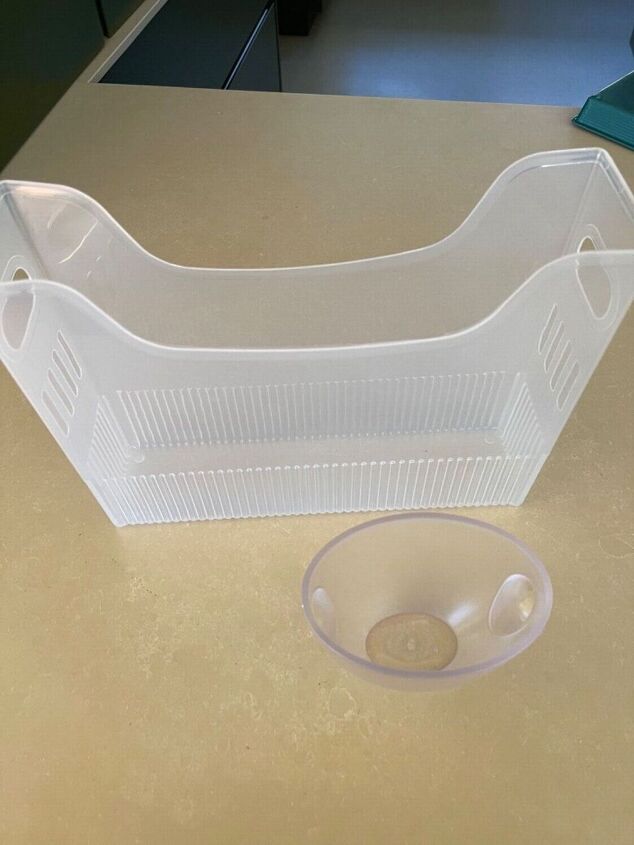
Off I went to my local plastic store and found a file holder that was narrow but also high enough to contain shampoo bottles. I also bought a small bowl for the razors. With a concern over whether the spray paint would scratch off in such a high-use area, I bought transparent plastic that could just be sprayed on the outside but would have the colour showing through on the inside.
Back home I scrounged around for a large round plastic lid to use as a soap dish. Incidentally, I also recently made a soap dish from a calculator cover that could also work, the tutorial is on my TikTok profile, theamakesstuff. (I post completely different projects there).
Not breakable
Whatever you use, make sure that it stands up to moisture and won’t break, should there be an accident. Glass or pottery, for instance, can be heavy and dangerous whilst bamboo, wicker or plastic is better.
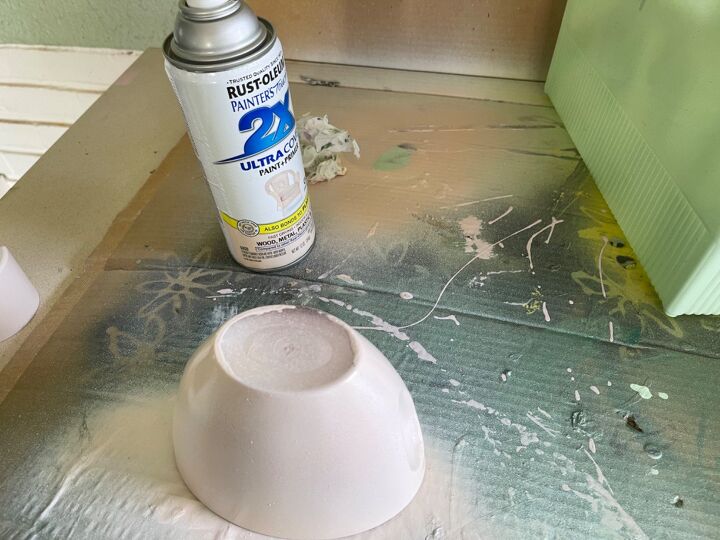
Everything, including the drip-tray, was sprayed with plastic-friendly spray paint. The bathroom is chocolate brown (long story, trust me it’s an improvement over the original), so I used a combination of pinks and greens to liven it up. Let the paint cure as per instructions.
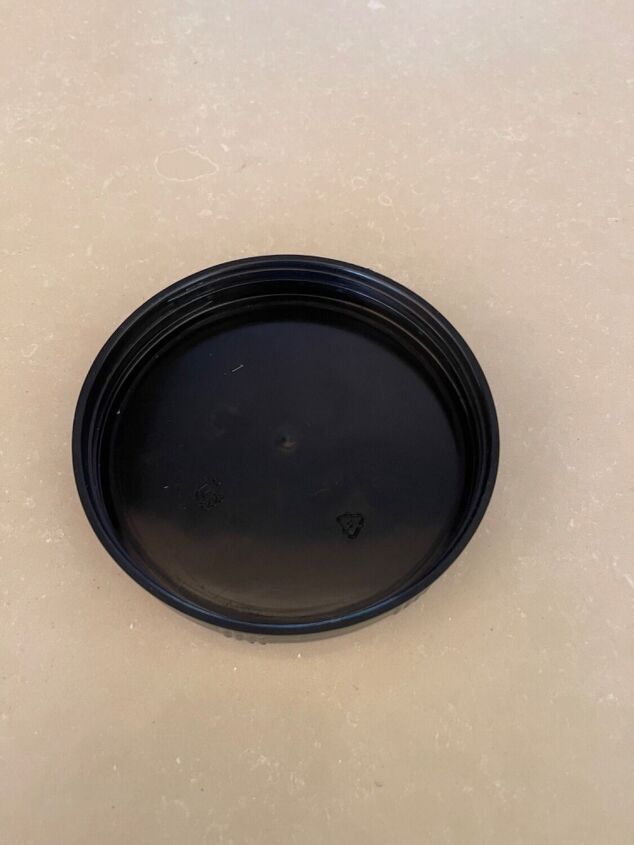
To make the soap dish, I sprayed the lid as well.
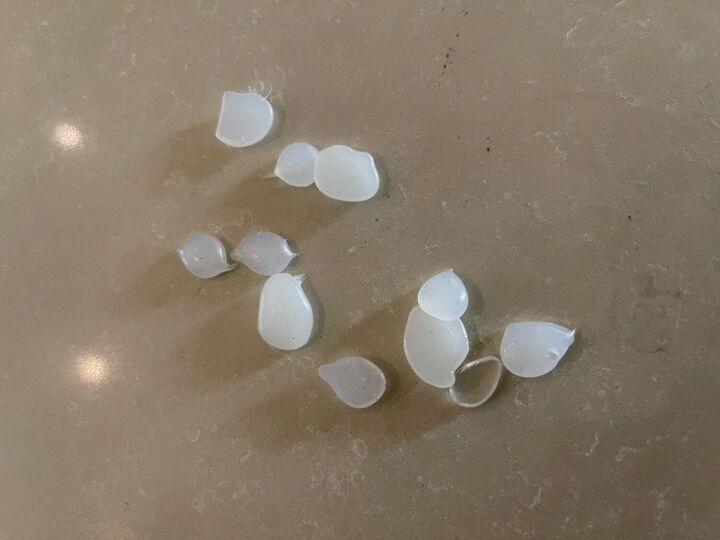
I made blobs of hot glue on a silicone baking sheet.
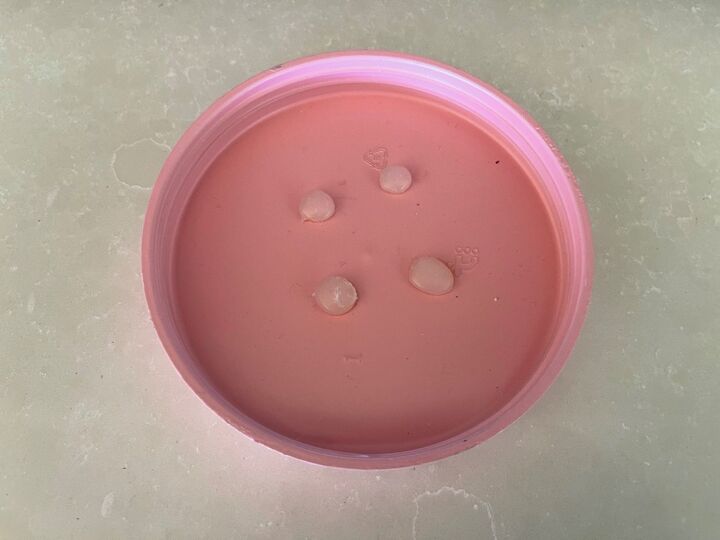
And stuck them down with contact adhesive. I find that hot glue doesn’t hold very well to plastic and read somewhere that contact adhesive is the way to go. This time round I didn’t spray over the blobs but you could.
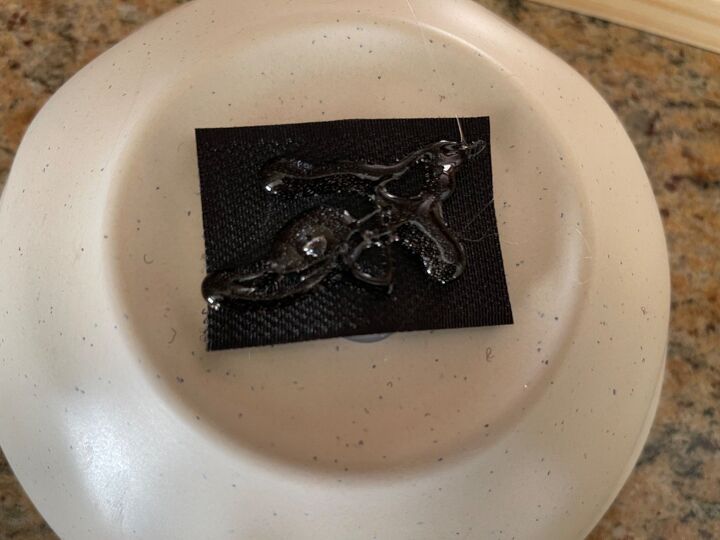
Finally, in order for everything not to topple over, I stuck strips of Velcro to the bottoms of the dish and file holder with contact adhesive.(This pic is from the other project). Sticking just one long horizontal strip to the file holder makes it unbalanced and wobbly, so you need two parallel ones or two or three short ones, vertically.
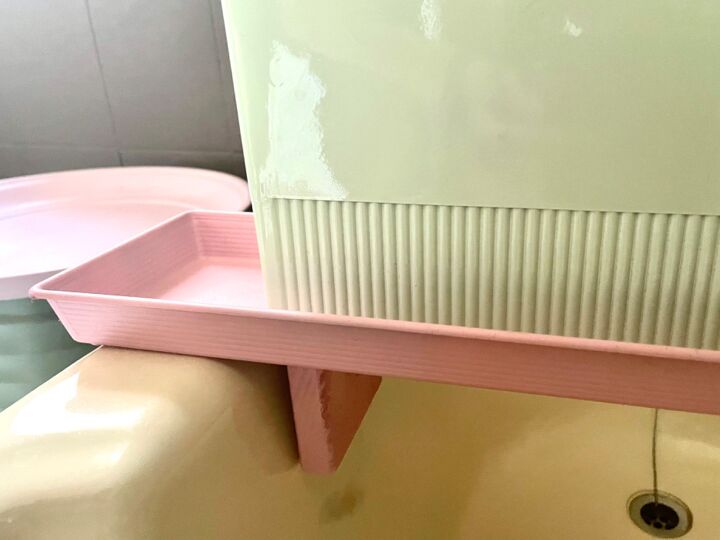
All done and the caddy fits nicely over the bath…
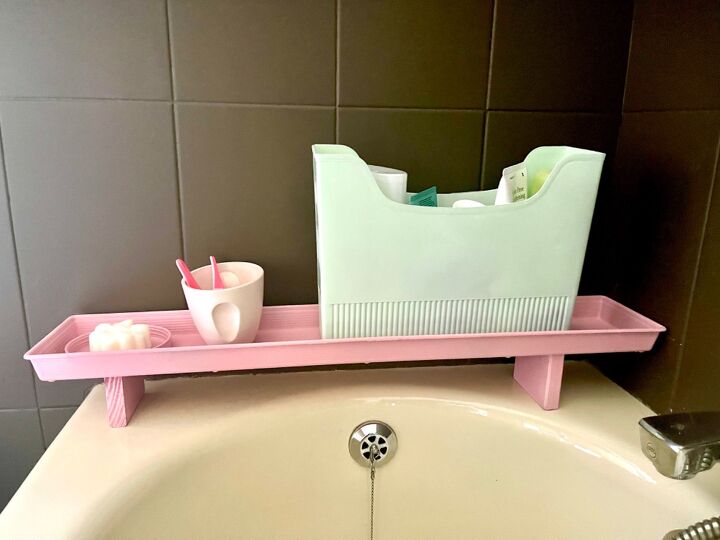
But then it so happened that everyone left it at the end of the bath, effectively making it a riser, instead of a caddy. It works even better as such because there is still space to put your feet up. Perhaps I just didn’t know any better but it never occurred to me that the bath end is the perfect place for a narrow riser.
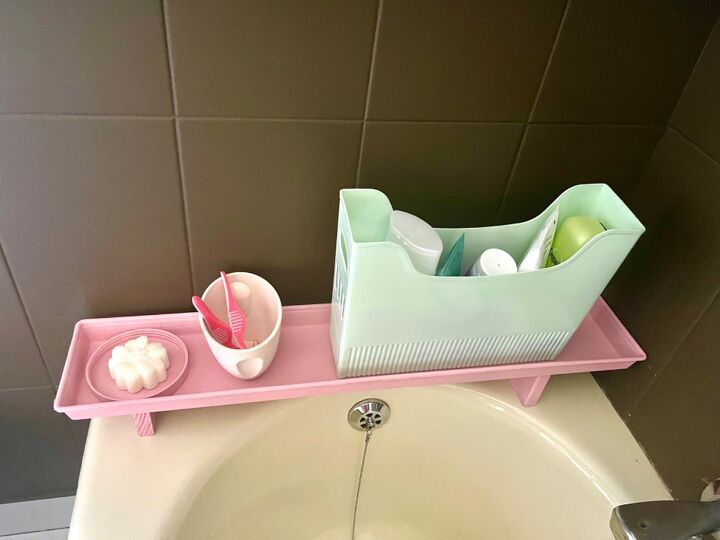
The file holder hides a surprising amount of the garish plastic.
Resources for this project:
See all materials


Comments
Join the conversation
-
Wow! Terrific job! You remind me of the proverb. Necessity is the Mother of Invention! And for sure you have that quality!!
-
I love the way it turned out and the colors are just perfect! I have a coffee bar in the kitchen I keep fussing with, my boys are pretty messy, my goal is to create a system for the coffee bar they will remember to use.


Frequently asked questions
Have a question about this project?
Hi there. I know you're not from the US, because no one in the States would use the word "whilst". LOL. It's fun to see tips from all over the world. My question is...what is a "gas geyser" in your bathroom? Since nobody else asked or commented, I must be the only one who doesn't know!