


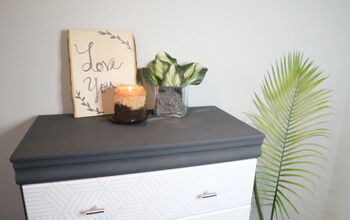
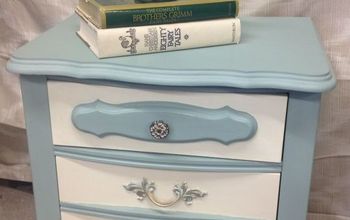
80's Dresser Makeover

I inherited a bedroom set from my mom that she bought back in the 80's when she was very into an Asian-motif style of decorating. Although the pieces are very high-quality, solid wood, and in amazing condition after 30+ years, they didn't match anything in my home. I was very hesitant about refinishing it, first because of the sentimental value, and also there is a varnish finish and I was nervous about destroying it with a sander. But then I was introduced to a product called Beyond Paint, and the transformation that came from this little can of magic was nothing short of amazing!
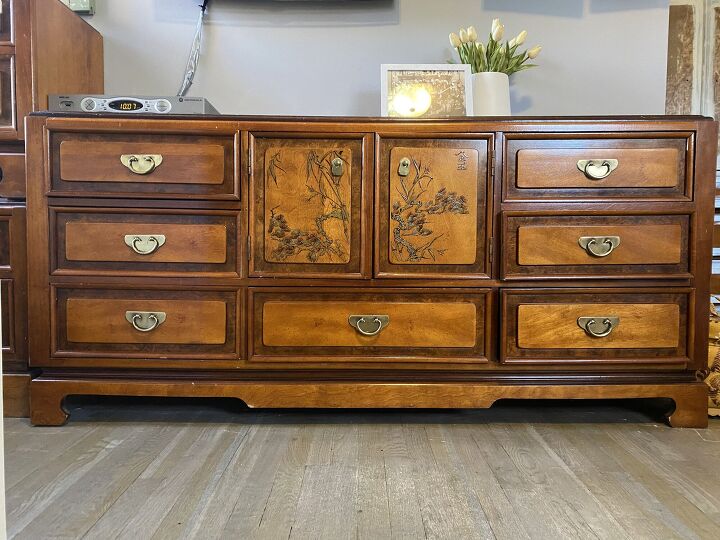
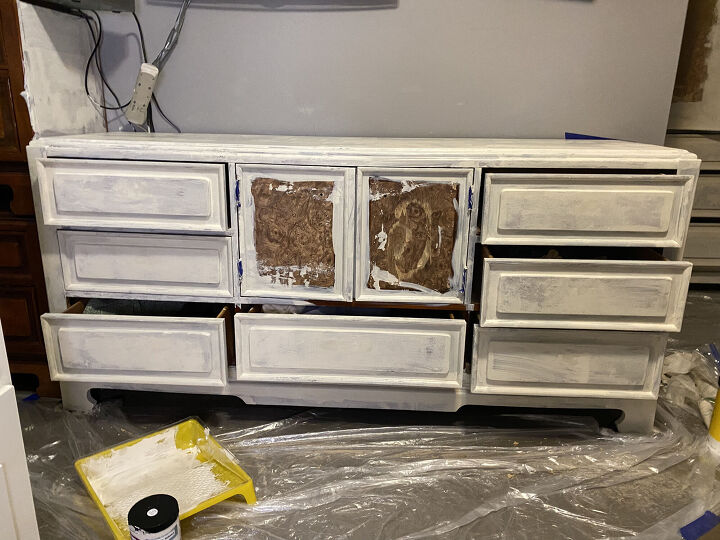
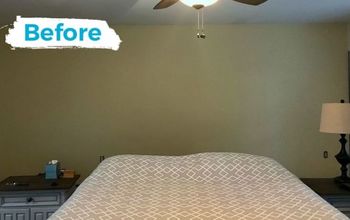
Here's what it looked like before.
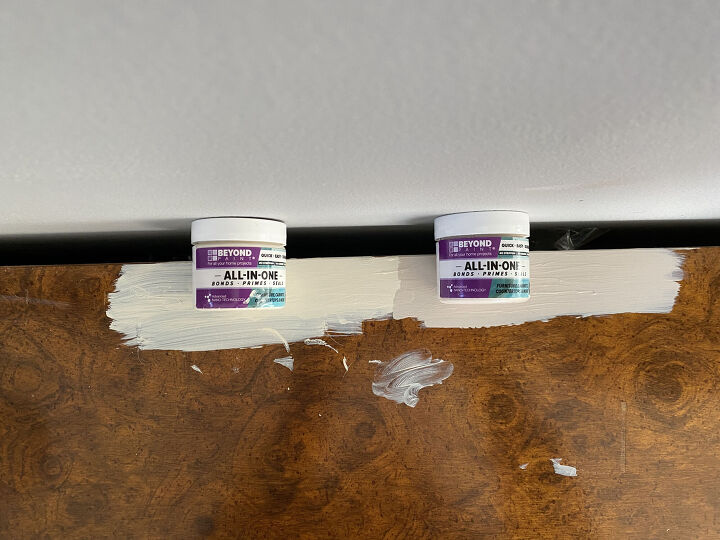
What sold me on using Beyond Paint was that there is literally no prep work! Knowing that I could paint the furniture without having to sand, strip or prime made this overhaul so much less intimidating. They even has these little sample size containers so you can test the color before purchasing the full size. I went with Off-White so there would be a greater contrast with the grey walls in the room.
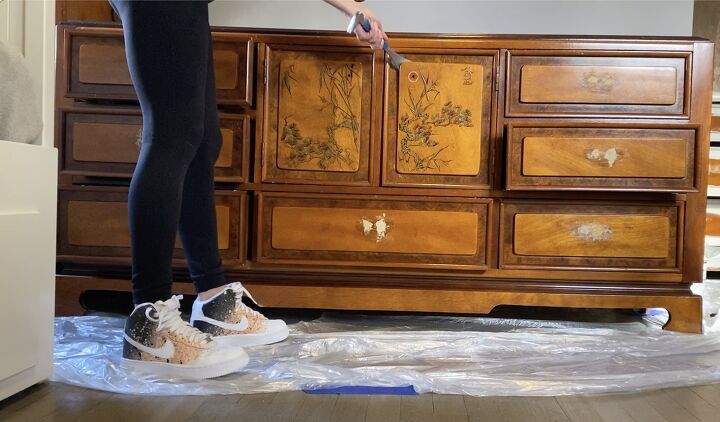
I removed the drawer pulls and filled with Dap wood putty because the replacement ones I bought were a different size. The center of the dresser panels are etched with a design that no amount of sanding was going to remove, so I decided to remove them all together using a crowbar and a hammer.
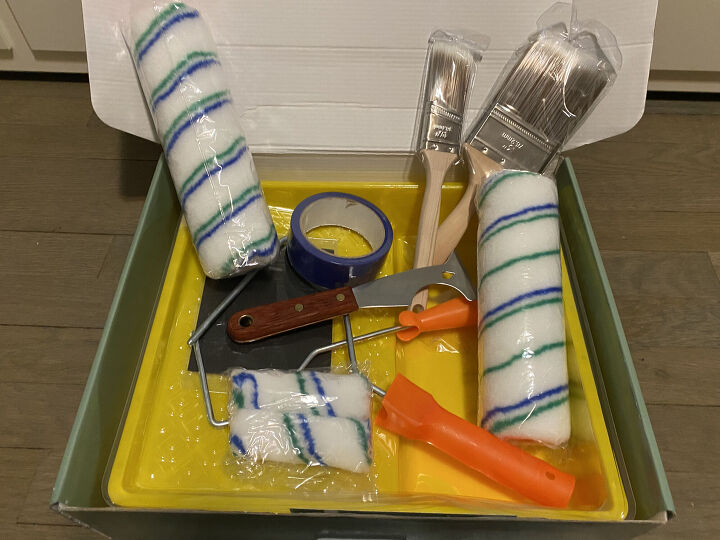
Let the painting begin! I found a cute little all-in-one kit on Amazon that had everything you would need for a painting project: rollers, brushes, painter's tape, scraper, drop cloth and sandpaper.
Here's the dresser after one coat of paint. I used a roller instead of a brush to eliminate any brush stroke marks. The paint is super thick and adhered surprisingly well.
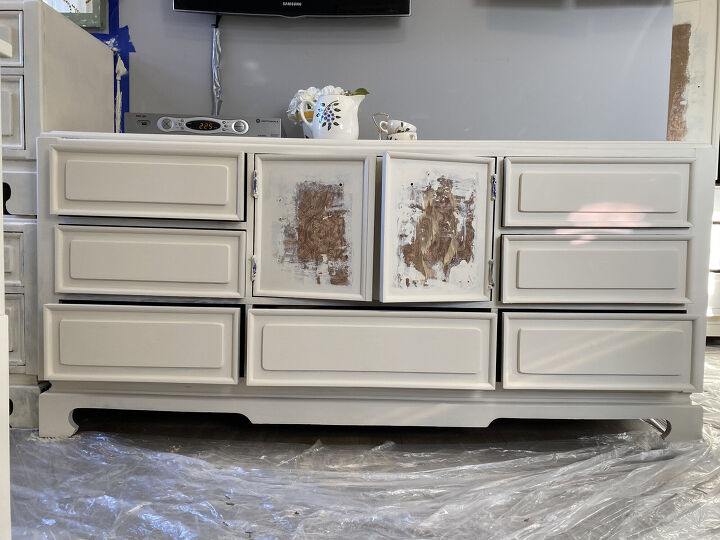
After a second coat, you could really see what a difference it made. A few spots required a third coat, but the coverage was great.
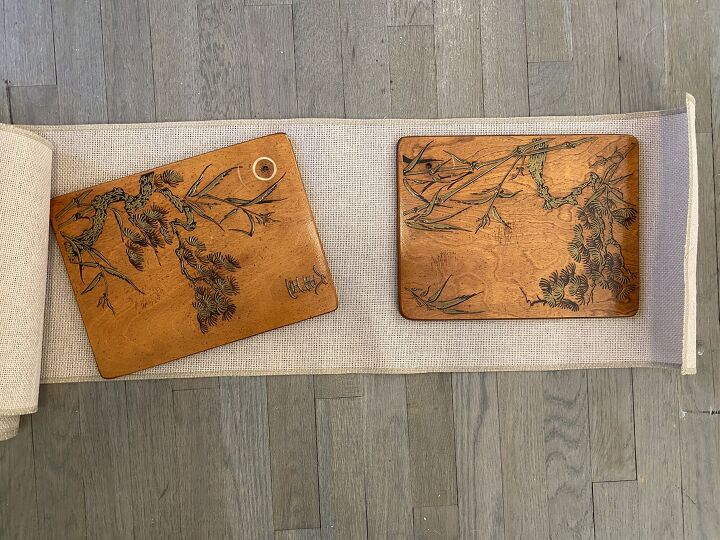
Because the panels have etching on them, I didn't even try to sand them down. Instead I decided to cover with fabric for some texture and contrast. I knew I wanted grasscloth, and found a grasscloth table runner from Amazon that worked because I only needed a small amount of fabric.
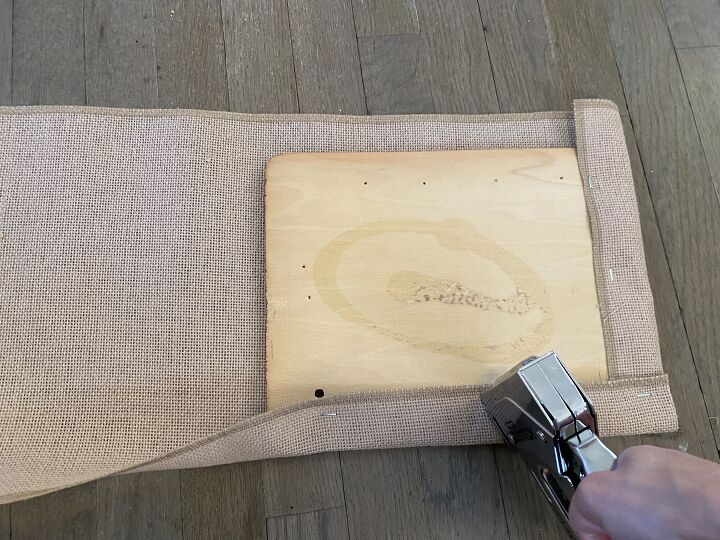
I turned the panels face-down and used a staple gun to attach the fabric to the wood.
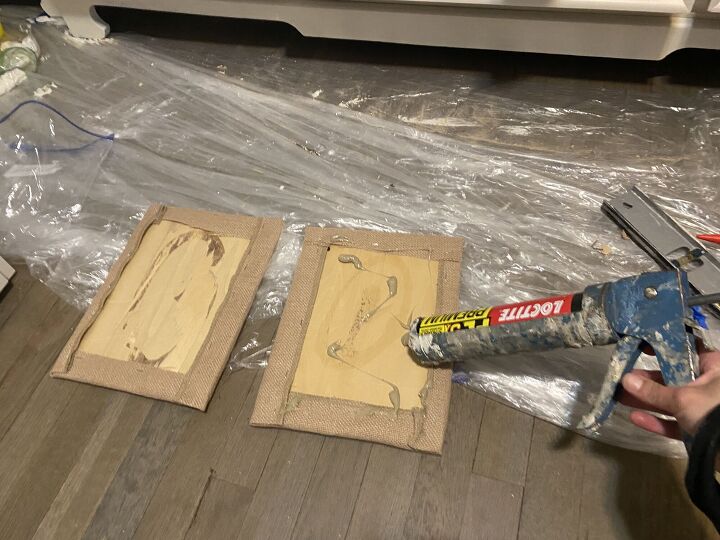
Next, I applied Loctite adhesive to the backs of the panels to secure them back on the dresser.
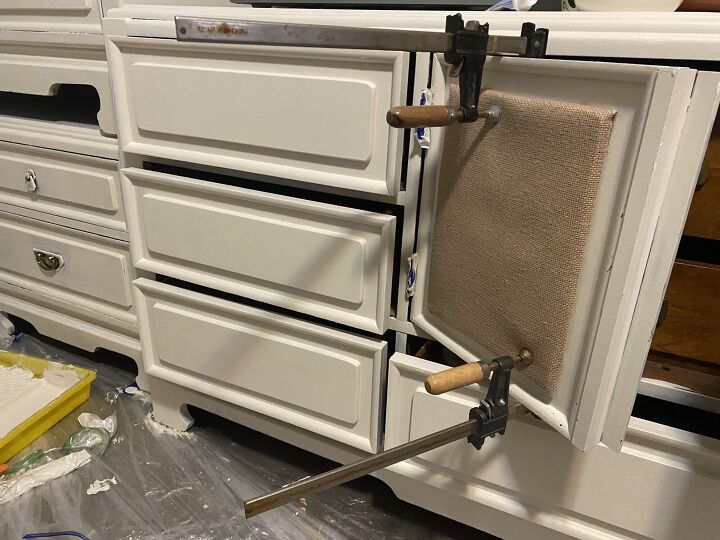
I used clamps to hold them in place while the adhesive dried.
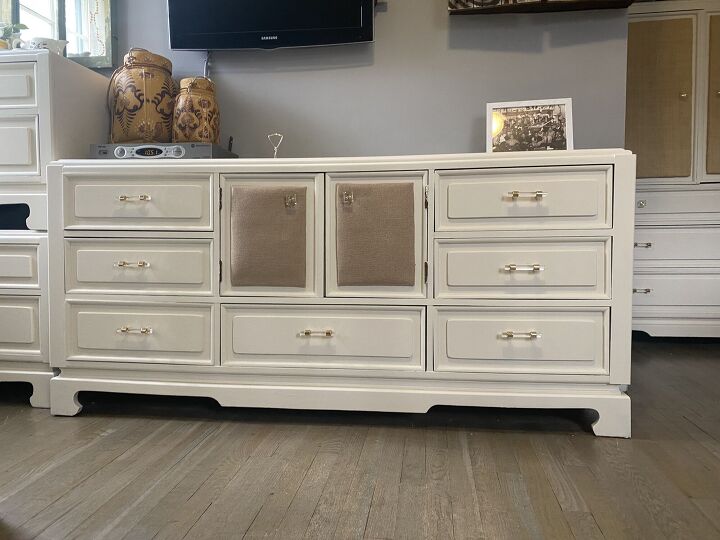
The last step was to install the new drawer pulls and knobs, also found on Amazon, and the transformation was complete. I absolutely love the finished product!
Resources for this project:
See all materials


Comments
Join the conversation
-
I too love the painted piece. It's stunning! Had you thought of wallpapering the front of the doors with grass cloth paper? Beadboard? I'm so glad you saved the furniture pieces and keeping them in the family. Thanks for sharing.
-
Looks good, BUT it probably had more value as it was. You have painted over Bur Walnut!


Frequently asked questions
Have a question about this project?
What did you do a bout the hinges? they look unfinished.
Why didn't you just reverse the panels, in side out ?
Great makeover. Have a desk I will use this paint on. So just a question: Did you need to use a sealer afterwards? Wondering if I should since it is a kid’s desk and will be used for homework.