


Silicone Caulking to the Back of a Sink, Shower Almost Anywhere...

5 Materials
$10
1 Hour
Easy
Admit it! We all have a few of those 'Honey Do's' that we know we should be doing but for one reason or another we keep putting it off. Sometimes the reason is we don't have the confidence to get the finish a 'Pro' can get even using the same tools and supplies. So to even things up I'll give you the tips even some pro's don't know.
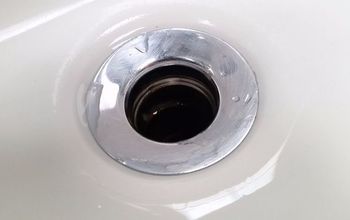
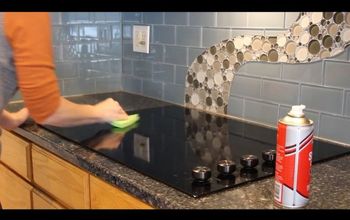
I had to caulk a leak to the back of the kitchen sink. So using a caulking gun and a tube of silicone I achieved a smooth finish with no excess and no stringy bits or lumps and it was EASY!
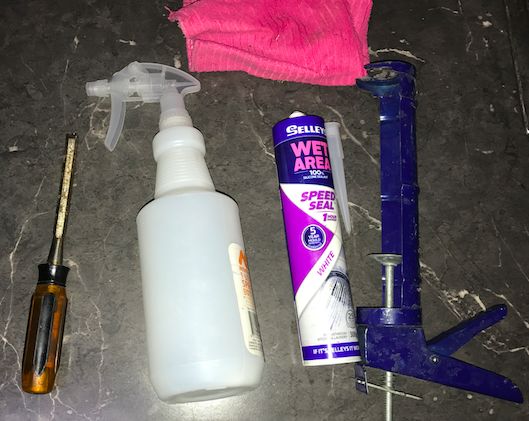
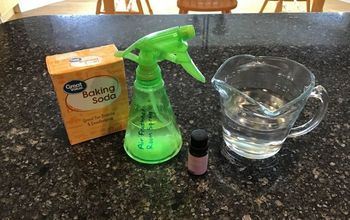
All you'll need to get a professional finish, a sharp scraper (I used a small sharp chisel), a squirt bottle with soapy water (dishwashing liquid and water about 10% to 15% soap or a bit soapier than you use to wash up with), a silicone sealant suitable for the job you want to complete. Various cleaning cloths and paper towels.
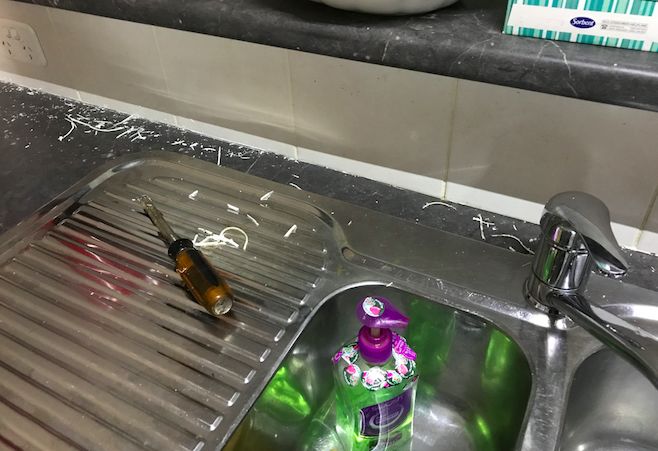
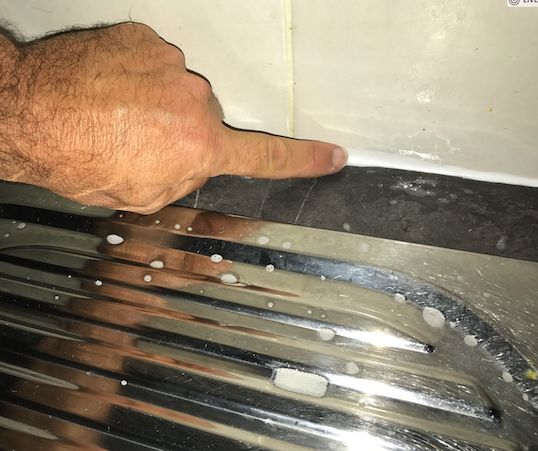
Scrape away all the old sealant and clean the area thoroughly when finished, don't leave any of the old sealer behind as it will spoil your finished job.
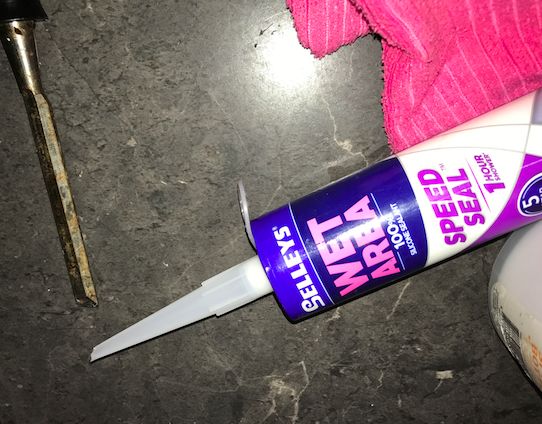
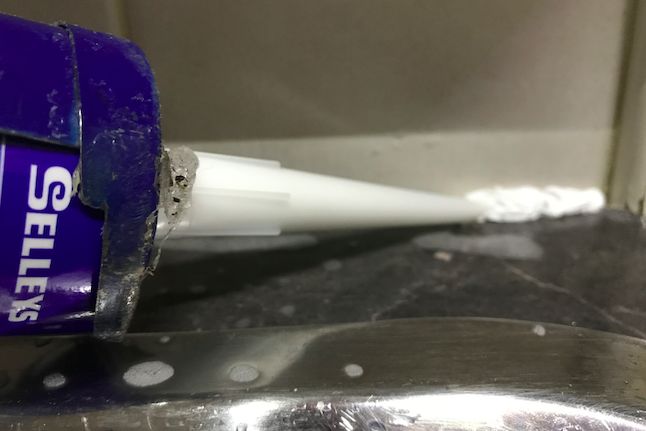
Cut the tip off the caulking tube at a 45 degree angle, this gives you a small bead and a clean sharp edge, be careful when cutting this as it's easy to mark the surface you're cutting into or worse yourself.
After thoroughly cleaning the surfaces make sure you have plenty of the soapy water on the bench and splashback so you can get a clean smooth finish - better than the Pro's, it must be free of the old silicone and bits of left overs, so wipe it down and make the joint as dry as possible.
Clean the area with paper towel then using steady pressure in the gun apply a bead of caulking (silicone) don't worry if it looks a little lumpy at this stage as all you really want to do is get the sealant into the joint at this stage and make it even. Let it 'sit' for a few minutes to 'stick' to the bench and splashback before the next step - 2 to 5 minutes is a minimum but no more than 10 minutes.
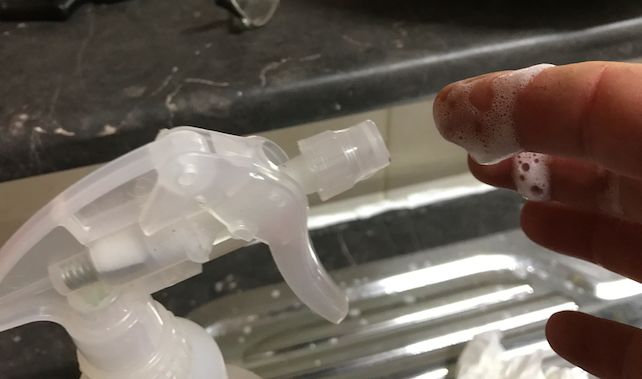
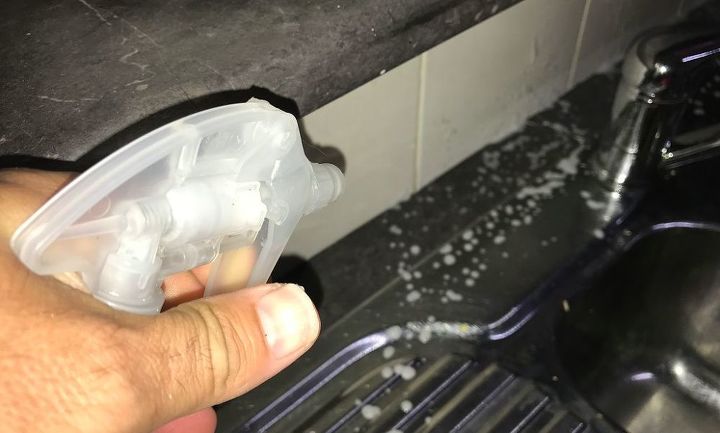
Now the 'trick' that gets you the browny points, use plenty (Lots and Lots and then some more) of the dish soap mix from the squirt bottle on your index finger and use it to 'smooth' over the sealant.
This is the real trick, don't let your finger dry out, using long strokes to smooth the surface, don't worry about getting too much soap on the sealant or your finger, more is better, you don't want the sealant to 'drag' you want it to be smooth round the surface. If you make a mistake (you didn't use enough soap) the surface may 'drag' any you'll take the sealant out of the gap or it will have lumps on the surface - don't worry, just squirt the soap on the surface and your finger and try it again.
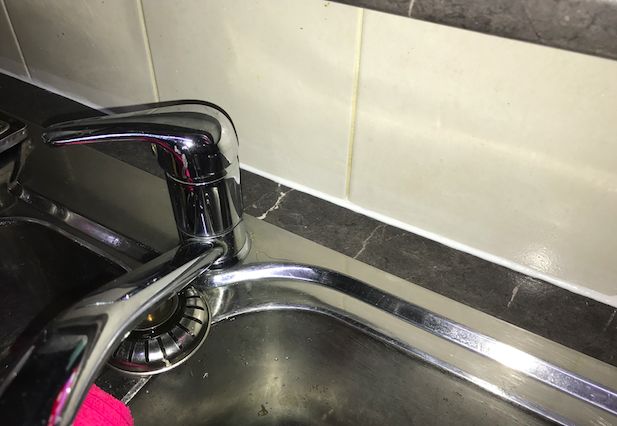
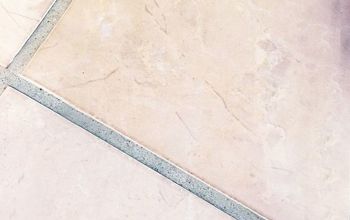
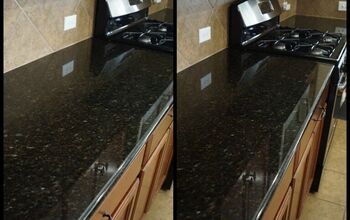
Finished! Looking smooth and no drag marks or lumps plus the important thing is there's no more drips into the cupboard from the lip of the sink and it only took an hour!
Comments
Join the conversation
4 of 23 comments
-
The pros use glass cleaner
-
Thanks for inspiring my procrastinating husband. Great job!


Frequently asked questions
Have a question about this project?
I set a hot Corning wear bowl on my countertop which caused a burn. I would like to cut that piece out and put another just into that spot, but I am unsure how to do it. I have an extra piece that I can cut & put in, but afraid to start cuttin. Should I just replace all my countertops or try?
Would this same idea work for caulking around an exterior door? Robert finally got to the chore but wasn't in the "right mood" and it looks awful!!! I wish I'd seen this before my "lumpy mashed potato" caulk job was done!!!
Is there a tool to remove caulk? Maybe I can try it again.
☹️
Reading your directions it sounds like the soapy water mix is also sprayed on before the caulking is applied and would prevent adherence to the surfaces. I'm sure I misread and appreciate your very helpful article.. Is this correct?
How did you get your line so straight after smothung it with your fingers? Anita