


How to Grow Flavorful Garlic in Your Backyard Garden

Delicious garlic has added a divine aroma and decadent taste to kitchens and dishes around the world for centuries. An ancient bulbous vegetable, garlic grows from individual cloves in the ground that breaks off from a whole bulb. As each clove multiplies in the ground, new bulbs of between 5-10 cloves are formed.
The pungent plant is great for beginners and green thumb enthusiasts alike. It requires little space in the garden and results in promising food by adding flavor to sauces, stews, meats, and more.
Garlic also contains chemical compounds known for a surplus of health benefits, including working as an anti-inflammatory, improving cardiovascular health, and reducing the risk of cancer.
Read on to get your garlic growing in no time and reap the delicious and healthy benefits of the flavorful plant.
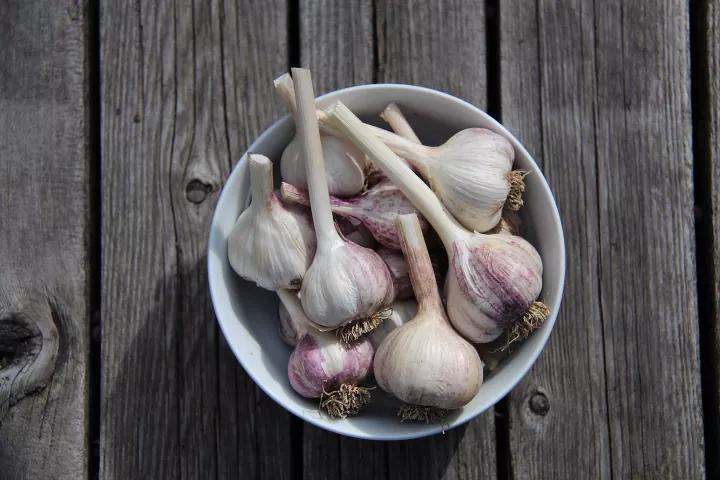
Photo via Home for the Harvest | Mary Jane Duford
Varieties of Garlic
Garlic is among the 700 species in the Allium family. There are two main types of garlic: softneck (Allium sativum) and hardneck (Allium ophioscorodon), and although they’re grown the same way, each type has its own characteristics.
Softneck Varieties
The most common type of garlic found in grocery stores, softnecks have the longer shelf life of the two varieties, producing more cloves per bulb than hardnecks. They have a mild flavor, are adaptable to most climates, and feature a coarse outer bulb wrapper.
Hardneck Varieties
Hardneck garlic has fewer cloves per bulb, but each clove is much larger than the softneck types. Hardnecks produce less of an outer bulb wrapper than the softneck varieties, reducing their shelf life.
As they grow, hardneck garlic plants produce a stalk that coils from the top called a “scape” or garlic flower, according to seed producer Harris Seeds. Scapes can be harvested and used for cooking before the garlic itself is actually harvested.
Hardneck garlic is most closely related to wild garlic, a commonly foraged perennial found in wet areas of the eastern half of the U.S. and in the Pacific Northwest.
Where to Plant Garlic
Plant garlic in an area not previously used for growing members of the allium family (chives, shallots, leeks, and onion varieties are a few common household allium crops). Ensure a proper water drainage site, where water will not collect around the roots and cause the garlic to rot.
Climate
Plant garlic in the fall between September and November before the ground freezes. Garlic requires a cold period of at least 40 degrees Fahrenheit for about four to eight weeks to properly establish its roots.
According to The Old Farmer’s Almanac, you can also plant garlic in early spring, after the last frost, if you live in a climate that has a long growing season. The cloves won’t grow to be as large, but you can still enjoy the garlic scapes if you grow a hardneck variety.
Sun Exposure
Although garlic enjoys cool weather, it still thrives in full sun. Choose a gardening site that receives six to eight hours of sunlight daily.
Soil Type
Garlic grows best in fertile, well-drained soil. If your yard soil leans clay, you can always try growing garlic in a raised bed filled with sandy loam soil.
In any case, be sure that the top six inches of the soil where you plan to plant garlic is free of stones so young and tender garlic roots can sprout freely.
Mix several inches of compost or well-rotted manure into the bed, as well as a 10-10-10 fertilizer (this means that the fertilizer has 10 percent nitrogen, 10 percent phosphate, and 10 percent potassium).
Companion Plants
Thanks to its familiar pungent aroma that fills our kitchens, garlic is great at driving away pests in the garden, including fungus gnats, codling moths, spider mites, cabbage loopers, Japanese beetles, aphids, ants, snails, and onion flies. It’s also known to deter rabbits and deer.
Even if you aren’t growing garlic in the ground, you can sprinkle cloves around the garden to keep critters from gnawing on your other crops. Asparagus, peas, beans, sage, and parsley shouldn’t be planted near garlic, as garlic can stunt these foods’ growth.
As for companion plants that benefit garlic, rue is known to drive away maggots, chamomile improves garlic’s flavor, and yarrow and summer savory improve its overall health and growing power.
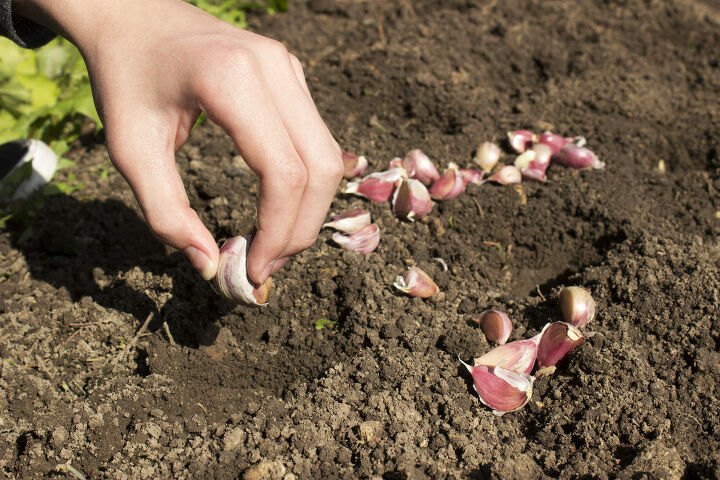
Photo via Courtney |The Kitchen Garten
How to Plant Garlic
Garlic is best planted from individual cloves broken off from a full bulb. Although it’s possible to grow garlic from seed, the process isn’t exactly reliable, because garlic doesn’t usually set true seed. On the rare occasion it does, the flowers of garlic plants usually die before any seed can be produced.
The few plants that may produce from garlic seed propagation will take years to produce quality garlic. Instead, aromatic bulbs of garlic are set aside from harvest to be used for planting year after year.
When acquiring garlic cloves, choose a trusted source, such as a mail-order seed company or a local nursery. Avoid purchasing cloves from the grocery store and planting those in the ground—most are treated to promote a longer shelf life, which makes them harder to regrow.
Tool and Materials Needed
- Garlic cloves
- Garden trowel
- Mulch
1. Separate Cloves
Use your hands to pull apart the cloves within the bulb.
2. Space and Plant the Cloves
Plant each clove four to six inches apart in rows one foot apart. Plant the cloves with the pointed end up and the blunt end down. Make sure each clove is pushed one to two inches into the ground.
3. Firm and Water the Soil
Gently pat the soil until firm around each clove. Water the soil until moist.
4. Apply Mulch
Apply mulch (like straw, chopped leaves, or grass clippings) after planting in the fall. Mulch will help keep weeds at bay, keep the plant lightly moist, and prevent the garlic roots from being pulled out of the ground by shifts in temperature (alternating freezing and thawing). Remove mulch in the spring once the threat of frost has passed.
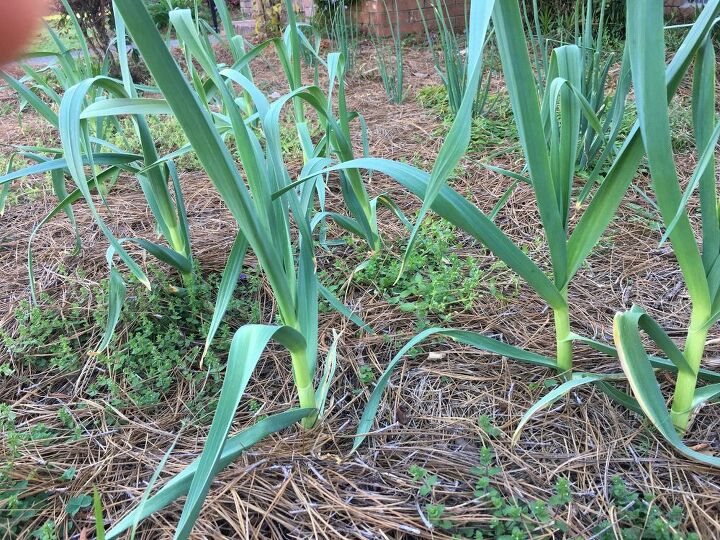
Photo via Courtney |The Kitchen Garten
How to Grow and Care for Garlic
Whether a novice or gardening expert, growing and caring for garlic is fairly straightforward. Just follow a few simple steps and keep weather conditions in mind, and you’ll have healthy bulbs in no time!
Watering
During the fall and winter, there’s really no need to water garlic—regular rain and snowfall, mixed with a layer of mulch, should keep the plants moist enough to keep developing.
Start a regular watering schedule during the bulbing season, which occurs starting in mid-May, and water plants every three to five days. As mid-June approaches, taper off watering.
You may also notice that some varieties of garlic have produced flower stalks by June—you should remove them. At this time, also remove any remaining mulch in the beds, as the garlic will store better if you allow the soil to dry out.
Fertilizing
As the leaves begin to grow on your garlic plants, you’ll want to promote proper growth by adding 1-2 teaspoons of high-nitrogen fertilizer. Blood meal or Osmocote both work well, as they decompose slowly. If you notice yellowing leaves, add more fertilizer around the plants.
Pests and Diseases
Luckily, garlic is a low-maintenance plant that sees little threat from intruders. One thing to note is the potential of white rot: This fungus can attack garlic in cool weather. Keep the issue at bay by rotating crops and cleaning up the gardening site after harvesting every year. Also, too much water is a detriment to garlic and causes rot, so be sure to follow the watering instructions above.
How to Grow Garlic Indoors
Growing garlic indoors is as simple as planting cloves in a pot with soil, setting the pot on a sunny window ledge, and watering lightly. And within just seven to 10 days, you expect to see some sprouts.
Tools and Materials Needed
- Clay pot
- Paper towel or coffee filter
- General-purpose potting mix
- Bulb of garlic
- Garden trowel
1. Prep the Pot
Choose a simple clay pot with a drainage hole. Cover the drainage hole with a paper towel or coffee filter to keep the soil in the container while allowing water to drain out freely.
2. Fill the Pot
Fill the pot with a standard potting mix about two inches below the rim.
3. Prepare the Garlic Cloves
Pry open a garlic bulb with your hands. Keep as much of the skin on the cloves as possible. Throw out any cloves showing signs of decay (especially soft cloves).
4. Plant the Cloves
Plant the cloves in the container, with the pointy side of each clove facing up. The cloves should be about halfway embedded into the potting mix. Allow enough space between each clove so they do not touch.
5. Add More Potting Mix
Add more potting mix to the container until it covers the cloves by ½ inch. Pat the soil down gently. Slowly add water until it spills out the bottom of the container.
6. Tend to the Garlic
Keep the soil consistently moist but not wet. Expect to see green garlic shoots sprouting through the soil within a week or two. Once the shoots reach a couple of inches tall, snip them with scissors (you can use the trimmings for cooking). Keep an inch of shoot on each clove as the garlic continues to grow.
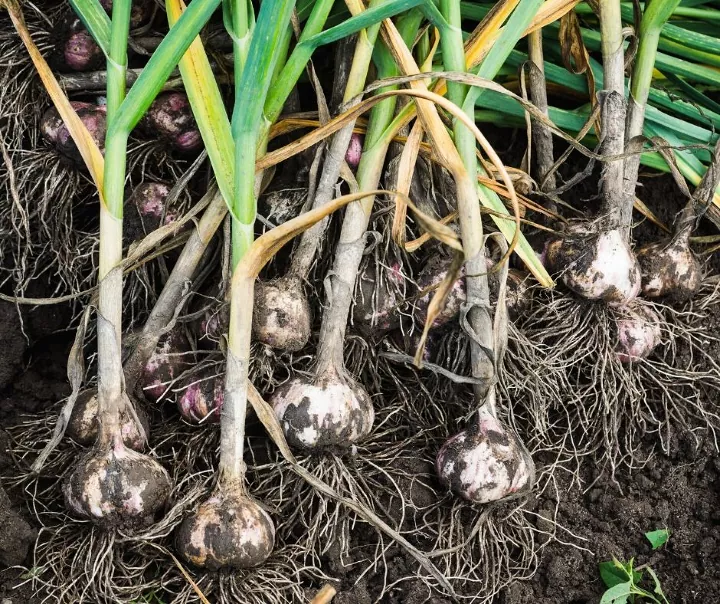
Photo via Courtney |The Kitchen Garten
How to Harvest and Store Garlic
Harvesting garlic at the right time is essential. If you harvest too soon, it will result in smaller cloves that don’t store well. If you wait too long to harvest, the cloves will burst out of their skin, making them vulnerable to disease and shortening their storage time.
Knowing when and how to harvest garlic and the best way to store it will help your bulbs last longer.
Tools and Materials Needed
- Garden fork
- String
- Scissors
- Mesh bags
1. Inspect the Plant
Investigate the plant to see if it’s time to harvest. When three or four leaves have died back, but five to six green leaves remain, you have the green light to harvest.
2. Dig Up the Bulbs
Once the garlic bulbs are ready for harvest, they should easily pull up out of the ground. Using a garden fork, loosen the soil, then gently dig up the bulbs without slicing through them. Use your hand to shake off any remaining dirt on the bulbs.
3. Dry the Garlic
Thoroughly dry your garlic in a cool, dry place. You can store the garlic by bundling eight to 10 garlic stems together. Tie the top of the stalks with string and hang upside down. Alternatively, you can spread the harvest out on a rack. Either way, good ventilation is essential in keeping the garlic healthy. Allow the garlic to dry for a few weeks.
4. Trim and Cut
Once dried, trim off the roots of the garlic and cut the stalks off about 1½ inches from the bulb. Clean the garlic by removing the outer skin, ensuring the cloves are not completely exposed. If you have softneck varieties, you can leave the stalks and braid the garlic instead, which adds a decorative touch for when the garlic is in storage.
5. Store the Bulbs
Store garlic in a cool, dark place, either in a mesh bag or braided and hanging. Softneck varieties of garlic can be stored for six to eight months, while hardneck varieties typically last three to four months. Check for softness or sprouting, which are signs that the garlic is deteriorating.
6. Save and Regrow
If you plan on planting garlic again next season, save a few of the largest, best-looking bulbs. No more than one to two days before replanting, pull apart the garlic bulbs and plant individual cloves.
Whether you're a seasoned gardener or just starting out, growing garlic is a fun and easy way to add a flavorful and healthy ingredient to your cooking repertoire. With the right preparation, planting, and care, you can enjoy a bountiful harvest of delicious and flavorful garlic.
Have you grown garlic in your home garden? Share your tips and tricks below!
Comments
Join the conversation
-
I grow green onions in a pot all year round. They seem to love our Texas heat for some reason. I will try garlic in the fall, too late to try now, but great instructions. In my house a dinner always has both garlic and onions.
-
A few of my cloves have sprouted (store bought) so I stuck them in dirt and they are doing well. Thanks for the informative presentation, well written.


Frequently asked questions
Have a question about this project?