How to Install a Stock Tank Pool With a Waterfall

I've been wanting a stock tank pool, or as we call them, a redneck swimming pool for at least 3 years now. I'm not going to lie, the stock tanks are expensive! We happened across a bargain and got both of the tanks and all the flag stone for $75 total! Bargain of a lifetime right there!
There are lots of tutorials on how to install these pools and I've linked what I thought was the best one on our blog. I'm basically going to show you how to add the waterfall tank since I haven't seen that feature much at all.
Step 1: Choose your tank size and location to set it
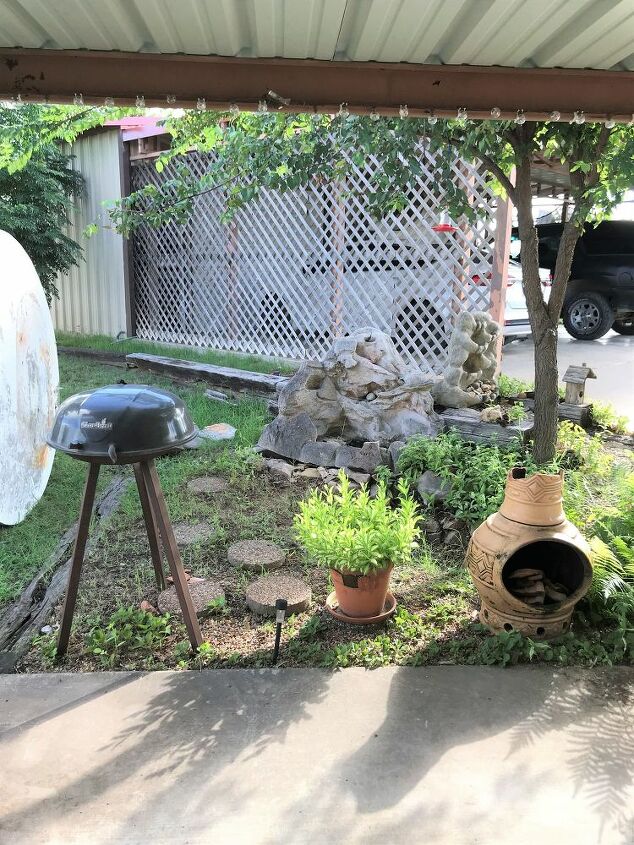
This spot is right off our patio and it used to be a fish pond waterfall feature. The plastic in ground tub went by the wayside a couple of years ago so we pulled that out of the ground, tossed it in the dumpster and filled in the hole. Now we have a perfect spot for our pool. Lots of cleaning and prepping to do though.
We have two tanks that are 6' x 2', one round and one oblong with a spout. I couldn't find one with a spout to link for you online, but if you click over to our blog you will see a really cool alternative that I've found. CLICK HERE.
Both of our tanks are used, so we had a bit of restoration to do before we could attempt to fill them with water. Our patch job won't last forever and we will probably have to fork over lots of money to replace one or both tanks some day. But today, we have a spot to cool off in the Texas heat! My advice is, buy new if you can.
Of course, my honey does all the manual labor, I'm just his assistant. First we placed the round tank where we wanted it and he used the shovel to mark its spot. He pushed the shovel into the ground all the way around the pool. When we took the pool away, we knew where to clean and level the ground.
Next he watered it all down to get it to settle real well.
We used contractors sand from Lowe's to act as a leveling agent. This is 3 bags worth.
He used a piece of 2 x 4 and his level to make sure it was all level so that when the pool was filled it wouldn't be leaning more on one side than another. This is a very important step.
And again, watering it down to get it all to settle in level.
Next we laid down some landscaping cloth, covered it with more sand to ready it for all the rocks.
He strategically placed each flag stone the way he wanted it. We then spread river rock over the entire area to settle into the sandy spaces. It took about 4 bags of river rock. We also got that from Lowe's as well.
NOTE: In hindsight, we would have skipped the sand step here. We didn't think about all the sand that would possibly get into the pool. On another day, he actual took all the rock and as much sand up as he could and then put all the rock back. It was a long tedious process so JUST SKIP THE SAND if its not UNDER the pool!
Step 2: Installing the Filter Pump
Please visit our blog right HERE to see the video and tutorial we thought was the most helpful and also for a direct link for all the items listed below for the supplies.
Supplies We Used:
- Intex Filter Pump - This includes an outlet, but no inlet strainer or valve.
- Pump Inlet Strainer + Outlet w/ Two Valves: Note: It includes an outlet jet as well, which is already included with the Intex Filter Pump, we used this for our waterfall tank. You will not need the extra outlet jet if you just have one tank.
- Intex Valves (2 pack) - This is not needed if you purchase the pump strainer above, but it is needed if you are NOT going to have a waterfall.
- 2 3/4” Hole Saw w/ Arbor
- Drill
- 100% Silicone Caulk
- Extra Intex Filters
For our 6' x 2' stock tank (the round one) he carefully drilled two holes. We chose to have our holes on one level instead of one high and one low like a lot of people do. This way served our type of tank. If you keep reading you'll see why, but in the end, we actually don't use one of these fittings and we just turned the valve to off now.
NOTE: Make sure you drill your hole on a flat area. DO NOT drill on an indention or bump. Your parts and pieces will not seal properly if you do.
Next we set up the pump as instructed from the box.
At this point if you have one tank only you can fill it with water and enjoy your pool. We should have waited but we didn't, because were impatient. We were still waiting on Amazon to deliver the final parts we needed for the oblong tank to become one with the round tank.
In the mean while we used a pond pump to circulate the water, which you can totally do, but I hated seeing the ugly black hose and wire draped over the side of the tanks, so my honey figured out a way to remedy that for me.
This is the water jet I ordered for the waterfall tank. See I told you the tanks were used and in sad condition. The waterfall tank is the worse. The round one was in pretty nice condition, thankfully, since its the one we get into.
Please visit our blog for the remaining steps of installation.
This is what it looks like on the outside. Since our tank is old and textured, we used silicone on the inside seal to make sure we had no leaks.
Now, we have the outlet (shooting water in) on the waterfall tank and the inlet (sucking water out) on the round tank and both hoses lead to the pump which we have sitting on a rock on the back side of the entire set up.
No more ugly black hoses in the way and we still have our waterfall feature which by the way, sounds delightful when you're just sitting pool side relaxing.
And lastly, we added pool noodles around the edge of the round pool for comfort. When you're relaxing in the pool it cushions your head or neck and if you want to sit on the side of the pool, it cushions your bottom. I found them on clearance at the Dollar General for 50 cents each! It took 4 full noodles and a piece of another one to go all the way around it. I love it!
I hope this wasn't too confusing, but if you have questions, please ask! :)
More Pool Noodle Ideas
Enjoyed the project?

Comments
Join the conversation
-
 Gail
on Apr 09, 2021
I’m not understanding how he leveled the spot with water. Did he dig out some of the dirt, fill it with sand and then pour water on it? Did he loosen the dirt and then use the hose to push the dirt out and then put in the sand, spray water on it so that the sand would fill uneven spots? I would really like to use this idea to lay some flagstone.
-
-
 Patty
on Apr 11, 2021
Very nice on a hot day. I might try to decorate the outside of the tanks,and add plants.
-
 Maggie Mae
on Jun 07, 2022
Do t need plants next to the pond,bugs and trash you know !!!
-
-











Frequently asked questions
Have a question about this project?
S♥️♥️♥️♥️ Cute! Is your oblong tank elevated? I think next you should find some perennial taller flowers or bushes and plant around the oblong one, especially on either side that is next to the round tank with just the waterfall peeking through. I love the galvanized look but you could get some cute things called Wall Pops, Amazon or Etsy and put a few on the outside of the round tank. Flamingos or big roses or Peonies or whatever your back Oasis theme. You have to have a theme😀. How cute would it be to get a stencil and do sayings or a stencil to paint the outside tank wall ALL in black and white buffalo plaid(farmhouse look). Last comment, you could ALSO bury the stock tanks , maybe just halfway in the ground and Wa-lah you have a inground pool. You don’t want to swim after a few years you can convert back to a pond. I cannot find used stock tanks cheap! They are as much as a new one! I recently purchased a oblong one ( new) for my tomato plants. It was very painful having have to drill holes in the bottom 😭☹️ But I wanted a easy above ground vegetable garden that I can move, won’t decay, etc. I would love a round one just like yours for my grand babies to swim in! thanks for sharing! Love it!
I like the way it looks..and the work manship. However, isnt metal a conductor? Seems dangerous, also rust? And with water in it.... it will instantly start a degeneration process..I would be afraid of just the metal. I know that galvanized steel is zinc dipped, but it is still metal.great idea though, when u upgrade that will nice..I would like this too but with an old porcelain tub outside😁 with running water, so I can make it hot!!!
What am I not understanding? Why is there no pool liner?