How to DIY a Friendly Fall Gnome for Your Front Porch

There’s nothing better than watching the leaves turn a deep orange and fall from a tree! Fall for me is comfort. I love everything about it!
I’ve made porch gnomes before for winter and summer and I thought it was time to make one to bring in my favorite season. If you love fall as much as I do and would like to learn how to DIY the cutest porch gnome to add to your fall decor then this tutorial is for you!
Follow my step-by-step guide and let's make an outdoor fall gnome!
This post was transcribed by a member of the Hometalk editorial team from the original HometalkTV episode.
Hometalk Recommends!
Tools and Materials:
- Tomato cage
- Pipe cleaner
- Garland leaves
- Wire
- Fabric
- Fabric scissors
- Glue gun/ sewing machine
- Tights
- Cotton
For the structure of my gnome, I used a tomato cage. I’ve made the cutest summer and winter porch gnomes before using this cage so I know it works well!
1. Attach the tomato cage ends
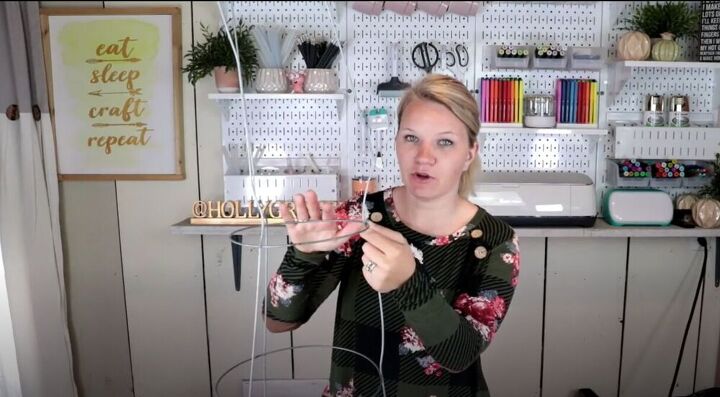
In this first step, I used a pipe cleaner to attach the ends of the tomato cage. I wrapped the pipe cleaner around the ends and really made sure they were held together tightly.
2. Attach garland leaves to the tomato cage
I used garland leaves as the body of my gnome. I suggest using a garland that already has a wire piece inside to make attaching it much easier.
I first twisted the wire at the end of my garland around the wire of the cage. Then I began to intertwine the leaves through the wire of the cage.
I used a small piece of wire and twisted it around the garland and cage to hold the garland in place. You can position the garland however you like on the cage. It’s important to make sure that once the garland is secured, all the leaves are facing outward.
I continued wrapping the garlands over the tomato cage, making sure to leave the top of the cage uncovered.
To get the perfect body for my gnome, I pulled the leaves and moved them to make them look as though they were falling, creating a gorgeous cascade.
3. Fill gaps with leaf picks
Using leaf picks on a plastic stem, I filled any gaps left in the garlands. I really wanted to create a full fall gnome body!
I pulled the leaf picks through from their stems and, using a wire, attached them to the top of the tomato cage.
4. Make the hat
I put the body of the gnome to the side so that I could start on my hat. I used this cute fall green-colored material, but you can also use a material with a fall design on it to make the theme even more obvious! I used fabric scissors and cut a twenty-inch by twenty-inch square.
I folded the fabric corner to corner and then applied hot glue to one side of the fabric. If you prefer sewing, you can sew for this step instead of using the glue. I glued all the way to the folded corner, making sure to add a little extra glue at the fold. Once my glue was on, I pressed down the piece of folded fabric. I couldn't wait to see this turn into a cute gnome hat!
In order to make my gnome hat, I use fabric scissors to cut a semicircle, starting from the folded side of the fabric all the way to the top corner of my recently glued side.
Once the glue had fully dried, I turned the hat right-side out. A great tip is to use the back of a pencil to push out the material at the point of the gnome hat to really get the perfect look.
If you have a fall fabric design you can skip this step. I used a plain fabric so I thought it would be nice to add some fall decor appliques. I turned my hat around and, using hot glue, started sticking the fall felt garland onto the material. Once the back of the hat was finished, I carefully flipped over my hat and applied the garland to the front. I worked my way back to the back of the hat and cut off the extra felt garland.
5. Make the gnome nose
To create the cutest little gnome nose, I started by cutting the leg off of a pair of tights.
I then used cotton to stuff the tights.
Once the nose was stuffed I took the two ends of the tights and tied them together. I cut off the hanging fabric and was left with an adorable, plump gnome nose.
6. Put the gnome together
Adding the hat to the gnome is the easiest step! Gently slide the hat over the top of the tomato cage. I made sure the point of my hate fell directly over the top point of the cage.
To add the gnome nose, I stuck a piece of wire through the nose and attached it to the tomato cage, wrapping the small piece of wire around the cage so that the nose would sit securely.
To add a little something extra to my gnome I attached this really gorgeous fall stem embellishment I had. I love how tiny details can totally change the whole piece for the better!
DIY fall porch gnome
I am obsessed with the colors on this outdoor fall gnome! Fall is definitely my favorite season! What fabric would you use for the hat? Let me know in the comments below!
DIY fall gnomes
Enjoyed the project?
Resources for this project:
See all materials
Comments
Join the conversation
-
 Emmawilliams1
on Aug 06, 2023
Not into Gnomes....But cute idea and instructions...Have fun!!! There's no place like Gnome! teehee 🤩
-
-
 Faye Davis
on Aug 06, 2023
I'm gonna do it. I will use burlap or denim or old flannel shirt with fall colors..
-
 Ton120622093
on Aug 27, 2024
i love the flannel shirt idea
-
-













Frequently asked questions
Have a question about this project?
I love it! I think a burlap would work nicely for knome hat.
Do you have to weight the base down so it doesn't blow over? I love how simple, to recreate, this project is. And your instructions are easy to follow. Thank you. 😀🍁🍂🍃🎃
What size of tomato cage did you use?