


How to Care for Orchids So They'll Bloom Again and Again

By Judy Schumer
Orchids are elegant flowers that may seem intimidating to keep as house plants. The good news is that they aren’t, and if you invest a little time in learning how to care for orchids, they’ll reward you with gorgeous blooms that grace your home with an exotic beauty for years to come.
In the wild, most orchids grow by hanging from the bark of tropical trees. When caring for orchids indoors, it’s best to mimic their native conditions as much as possible, which we’ll show you how to do in this guide. Read on to find out about orchid care must-knows like the temperature, humidity, light, water, and soil that orchids thrive in, and how and when to repot these plants.
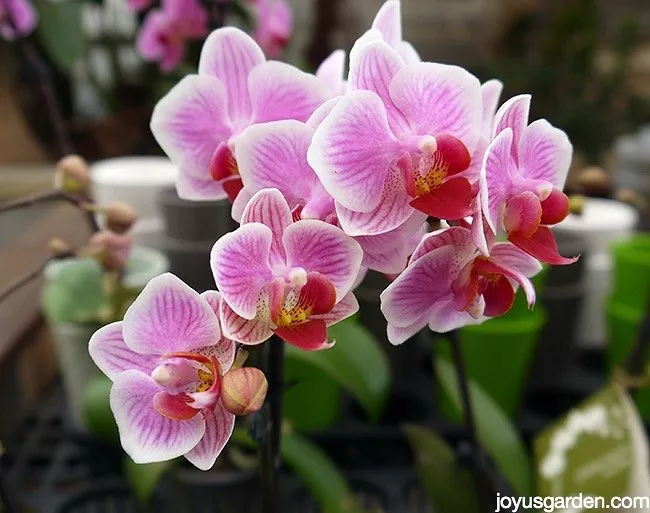
Photo via Joy Us garden
How Orchids Grow
Orchids are magical plants in their natural habitat. They are called epiphytes because they grow by hanging onto tree bark, but they are not parasitic plants, meaning they survive without the need for nutrition from another plant (like pollen). Orchids absorb water from the humid jungle air, which is then stored in their thick stems. However, the way orchids grow in a tropical jungle is different from how orchids grow in a pot as an indoor plant.
Orchids tend to be broken down into two categories, which define how they grow. Underneath these categories, they’re then broken down into type/genus (which we’ll cover in the last section) and then species. Here are the two common categories of orchids:
- Monopodial orchids resemble traditional flowers with upright stems, leaves on either side of the stem, and the flower perched at the top. Commonly grown orchids in this group include phalaenopsis.
- Sympodial orchids grow horizontally and grow new shoots from an older underground stem. The shoots swell and form a bulbous growth that stores water and nutrients. These shoots help the orchid survive long periods with little or no water. Two of the most popular sympodial orchid types are cattleya and dendrobium.
How to Care for Orchids Indoors
Caring for orchids indoors requires attention to a few details, that of which include the environment that they live in and what you, the plant parent, can do to maximize your plant’s longevity.
Humidity
Because orchids get nutrients from water in the air, they need plenty of humidity. You can provide this by lightly misting your orchid daily if your home is below 40 percent humidity (you can track this with a hygrometer).
You can also use a humidity tray, which you can buy from your local garden center or make yourself by filling a large cake pan with pebbles and water. Then rest your potted orchid on top of the pebbles. As the water evaporates, the orchid will absorb it. Be sure to keep your orchid away from vents, which will dry it out.
Temperature
The best overall temperature for orchids to grow indoors is between 60 and 80 degrees Fahrenheit. They do not like cold spots or drafts, so keep them away from windows during cooler weather.
Air Circulation
Orchids need excellent air circulation, especially because they are susceptible to diseases. Avoiding stagnation can help prevent fungus and bacteria from forming after watering an orchid. Air circulation also allows the orchid to get the proper amount of light it needs.
Open a window in the summer or use an indoor air purifier in the winter. If you don’t have a room-sized air purifier, use a small oscillating fan to keep air circulating throughout the room.
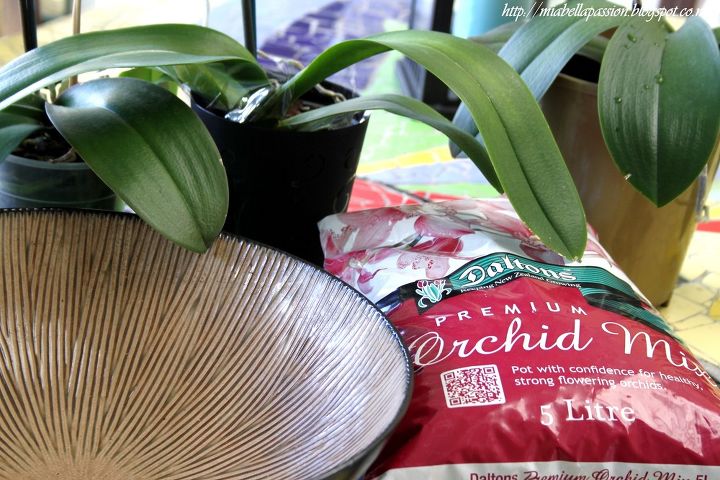
Soil
Orchids don’t use the standard potting soil that you probably already have on hand. These plants need a mixture that includes bark and sphagnum moss. Bark is great for drainage (as are drainage holes) and moss holds moisture, providing the perfect balance for your orchid's water needs.
Water
While orchids are dependent on water to survive, over-watering is the number one cause of death for an orchid plant. It is always safer to give an orchid too little water instead of too much.
Water an orchid just as they’ve finished drying out. If the potting mixture is dry and the pot feels light when you pick it up, it likely needs watering.
Another way to tell if your orchid needs water is to check the root color by carefully lifting the plant out of its pot:
- White roots mean the orchid is healthy.
- Gray roots indicate dryness and that your orchid needs water.
- Mushy or spongy roots with a dark brown or black color are a sign of root rot, which will require repotting (we will teach you how to do this below).
An average schedule for watering orchids is once every ten days during the summer months and twice a month during the winter, but your eyes are the best judge of whether your plant needs water or not.
Light
The amount of light an orchid needs is dependent on the species. Some require a lot of light, while others only need low light. Even so, you don’t want to place an orchid in direct sunlight for hours on end, nor in a dark room for long periods.
A bright sunlit room with eastern or southern exposure is ideal. Place the orchid on a surface away from direct sunlight while allowing it to bathe in indirect sunshine. You can check to see if your orchid is getting enough light by looking at the leaves:
- Light green leaves mean you have a healthy plant.
- Dark green leaves mean your orchid needs more light.
- Yellowish leaves are indicative of too much light.
You may also need a special orchid light to supplement your orchid’s light needs, especially in the winter. You can get an orchid light at any full-service nursery, garden center, or online.
Fertilizer
You’ll need to use a special fertilizer formulated especially for orchids and further dilute it so it’s half strength. Many orchid growers suggest fertilizing weekly with a weak solution (weekly, weakly) during the spring and summer months and once a month during the fall with the diluted solution made according to the fertilizer’s instructions. Do not fertilize at all during the dormant period in the winter.
Growth and Maintenance
While orchids do need their roots pruned when repotting, never repot when an orchid is in bloom.
To prune dead or fading flowers, use sterilized scissors or a sharp, sterilized knife to cut the bloom back to the central part of the branch it is on. Keep in mind that different species have different pruning needs, so for specifics in pruning your orchid, visit your local nursery and ask for their advice.
Pests
Orchids tend to be pest-free, but sometimes little critters find their way to your plant. The following pests are most familiar to orchids:
- Aphids: Telltale signs are clear sticky drops on your plant.
- Mealybugs: These are more challenging pests and may require multiple treatments to eradicate. They look like small white cotton balls.
- Spider mites: This pest leaves a very fine web on the leaves.
- Thrips: Thrips are tiny gnat-like pests. They look like streaks on flowers or freckles on the leaves.
You can use the following treatments to rid your plant of pests if you spot them. Soak each solution with a clean, sterile cloth, cotton swab, or paper towel and gently wipe down the orchid leaves and stems.
- Insecticidal soap and warm water mixture
- Isopropyl alcohol (70 percent)
- Neem oil
Diseases
With proper air circulation, watering habits, and the correct potting mix, your orchid should remain disease-free. If your plant does become diseased, it is usually for one of the following reasons:
- Root rot: Occurs when roots become waterlogged. Follow the tips above for caring for your orchid to avoid this. If the roots are severely soggy and brown or black, your only solution is repotting. Wait until the orchid has stopped blooming to repot and snip away any rotted roots. Avoid watering it unless absolutely necessary to keep the other roots healthy.
- Leaf spot: Looks like what it sounds like—leaves are spotted in brown, tan, or black dots. Leaf spot is caused by fungal and bacterial diseases of the leaves or flowers. You can remove the diseased leaves with sterilized scissors or a knife. Cut about 1/2 inch beyond the spotted areas.
- Crown rot: The center of the orchid (the bulbous part) turns black or starts to rot. Unfortunately, this is usually not treatable and requires the disposal of the entire plant. This is caused by overwatering or stagnant water at the crown.
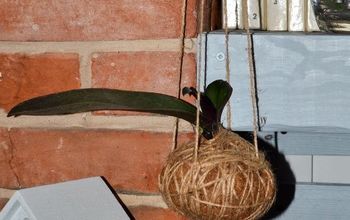
Grab Your Cinnamon
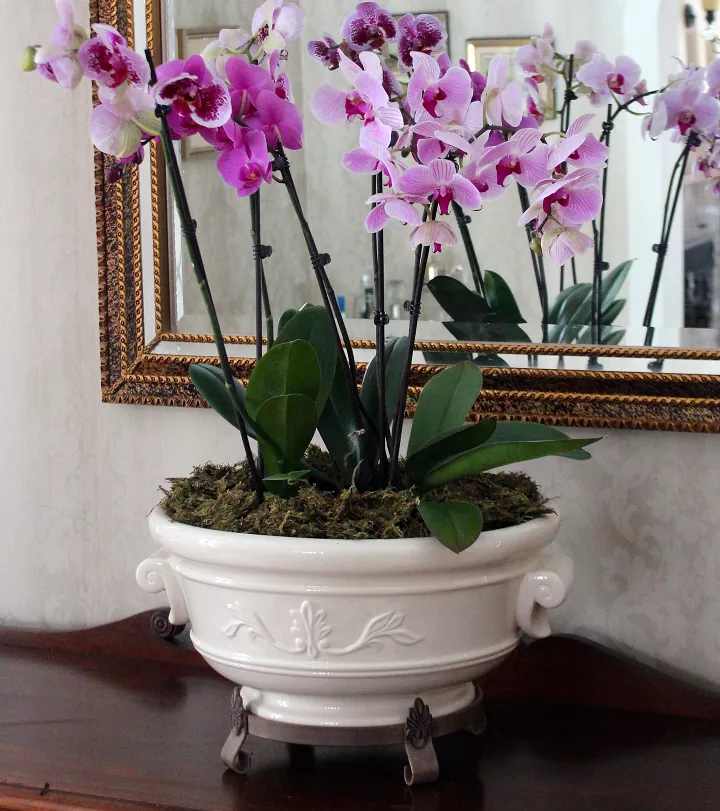
Photo via Heather (New House New Home)
How to Care for Orchids After They Bloom
Orchids expend quite a bit of energy to provide us with their showy blooms. After the flowers are gone, they go into a period of dormancy to rest up for their next blooming period. During this time, you’ll want to give your orchid the best care as it rests and prepares for re-blooming by cutting the orchid spike (the tall stalk that the leaves and flowers are on). If the stem is still green and robust, it is healthy. If it’s brown, yellow, or wrinkly, it needs pruning.
Use a sterilized pair of scissors or a knife and cut on the closest node where the first flower appeared. This allows for the growth of new shoots.
Caring for your orchid after it is finished blooming is nearly the same as caring for a blooming orchid. Provide water, light, airflow, and a weak fertilizer once a month during the winter months and bi-weekly during the spring and summer. Allowing your orchid to rest while still providing tender loving care will reward you with more blooms once the dormant season is over.
When to Repot an Orchid
If you’re lucky enough to have a long-living orchid, there will come a time your orchid will need repotting. There are two main reasons that an orchid will need repotting:
- The orchid outgrows its pot. You’ll see the white roots growing out of the container. At this point, the roots are usually tangled, densely packed, or both.
- The potting material breaks down. Orchids do well with loose potting mediums like bark and moss (their favorites in a jungle environment), allowing air and water to move freely around the roots. When the mixture breaks down, it can get tangled in the roots, stopping the free flow of air and proper water drainage. Left alone, the orchid will develop root rot.
Although your orchid may show signs of needing repotting, do not repot while your orchid is blooming. Doing so can damage new or current blooms, causing flowers to drop or prevent future flowering.
Along with waiting for your orchid to stop blooming, a general guide is to repot your orchid every one to two years. Infrequent repotting reduces unnecessary stress on your plant.
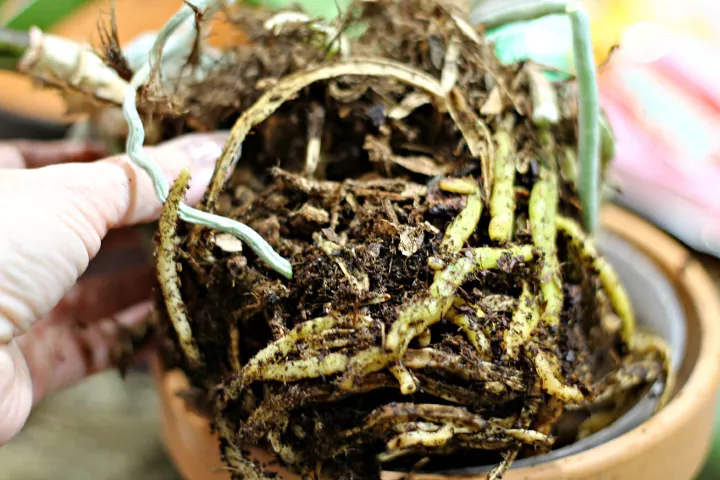
Photo via Patti @Hearth and Vine
How to Repot an Orchid
With just a few materials and a careful touch, you are steps away from your orchid plant gaining a new home. Here’s how to repot an orchid, step by step.
Tools and Materials Needed:
- ½ cup bleach
- 1 gallon water
- 2 buckets
- Larger orchid pot (1-2 inches larger in diameter than the existing pot)
- Orchid potting mix
- Boiling water
- Sharp scissors
- Chopsticks (optional)
- Orchid stakes (optional)
Step 1: Choose a New Pot
When choosing a new pot for your orchid, be sure to get a pot that is one to two inches wider than the current pot the orchid is in.
You can buy a pot made especially for orchids that have holes or slits around the pot to allow for optimal airflow and drainage for the roots. Terra cotta pots are a great second choice because of their porous nature.
Step 2: Sterilize Your Materials
Before you begin the process of repotting your orchid, it’s important to sanitize all the materials you will be using to repot it. Orchids are susceptible to diseases, so pre-sanitizing your tools will help keep your orchid healthy during the repotting process.
Mix ½ cup of bleach and one gallon of water in a bucket. Soak your scissors, chopsticks, and the planter in the solution for five minutes right before you’re ready to use them. Rinse thoroughly and dry with a clean, soft towel, and be sure to wash your hands before handling your orchid.
Step 3: Prepare the Potting Mixture
Measure the amount of potting mixture you’ll need (roughly enough to fill the new pot) and place it into a bucket. Cover the potting mix with boiling water, using a ratio of 2:1 water to potting mix.
Once the water cools, drain it from the bucket. This sterilizes the potting mix and gives the repotted orchid enough moisture to settle in the new pot.
Place just enough of the sterilized potting mix into the new pot so that the base of your orchid plant (directly above the roots) will be level with the rim of the pot.
Step 4: Remove the Orchid from the Current Pot
Now that you’ve got your pot filled with potting mix, it’s time to take your orchid out of its current pot. The best way to ensure zero damage to the roots is to cut away or break the pot it’s in. If this isn’t possible, carefully hold the orchid from the base of the plant and pull it up while wiggling it slightly to loosen the potting mixture and roots away from the pot. You may want to use new, clean chopsticks to loosen individual roots that are tangled.
Step 5: Clean Around the Roots
Once the orchid is removed from the pot, gently remove any old potting mix from around the plant and the roots.
Check all around the roots of the orchid. Using your sharp, sterilized scissors, clip off any roots that are brown, blackened, or mushy. Leave healthy white or green roots.
Step 6: Place Your Orchid in the New Pot
Lower the orchid onto the container and potting mixture and add in more potting mix around the roots. If you have chopsticks, use them to push the mixture around the roots very gently. Keep adding the potting mix until it is level with the top of the new pot.
Once filled with the potting medium, you may want to place stakes around your orchid to give it extra support as the roots settle into their new home.
Photo via Barb Rosen
Types of Orchids
There are close to 900 types of orchids, and within those types are over 30,000 species. The number of species continues to grow as avid horticulturists develop new and exciting orchids that grow easily at home.
With so many types of orchids, it can be a surprise to find that almost all orchid plants sold commercially in garden centers and nurseries are hybrids. Hybrids are created by crossing the various characteristics of different species of orchids, and the goal is to breed plants that are easier to care for in indoor settings and more appealing.
We’ve highlighted the ten most popular types/genuses of orchids for growing indoors and included ways to identify them:
Brassavola Orchids
Brassavola orchids are unique because they have the most potent fragrance at night, earning them the nickname “Lady of the Night”. They usually have white flowers with narrow petals and long, bushy leaves. Some hybrid varieties are spotted.
Catasetum Orchids
There are many species of the Catasetum genus of orchid. The most recognizable feature of this type is that they produce male and female flowers. The characteristics of the males are that they are showier (more color and/or pattern) than females and have an elongated trigger that ejects pollen onto bees that stop by to visit.
Epidendrum Orchids
The Epidendrum orchid genus is among the most beautiful types of orchids to grow indoors in your home. The flowers are elegant and delicate, having long, thin flower petals. While not as large as other types of orchids, they are very fragrant. The small flowers are usually pink, white, or orange. They need very bright light to thrive.
Lycaste Orchids
Lycaste is a type of orchid that grows from something called pseudobulbs. The main growth organ is above-ground, unlike traditional bulbs which are entirely nestled underground.
The flowers of the Lycaste have three large petals that form a triangle shape with their outward points. The flowers average three inches across, but hybrid varieties can grow as large as eight inches. They are fragrant, with a warm spicy scent, and are usually white, red, pink, or lilac-colored.
Cattleya Orchids
Cattleya orchids are the most common orchid used in corsages. They have been hybridized to offer a stunning array of colors and patterns. The most popular colors are pink, white, lavender, and deep purple, and the designs vary from speckles to streaks in varying shades. They also have ruffled petals, adding to their uniqueness. Many of the varieties have a heady fragrance.
Dendrobium Orchids
Dendrobium orchids are one of the largest genus of orchids, with over 1,800 species under its umbrella. They grow almost anywhere, making them a favorite houseplant throughout the many growing zones.
Dendrobium orchids have a lot of blooms on large stems, which make them top-heavy. Because of the weight of their flowers, they’ll require stakes to hold them upright. The most common colors are white, lavender, and purple and they thrive in smaller pots (as long as their roots aren’t soggy) and need abundant light.
Oncidium Orchids
Oncidium orchids are often called Dancing Lady orchids because their flowers form the shape of a lady dancing in a wide gown. This orchid type is easy to grow, needing only filtered light for about six hours a day. Oncidium grows fast and tall (up to 15 feet, so it needs a stake) and produces blooms in many colors, the most common being bright red, bright yellow, vibrant pink, or white. Almost all of this genus is epiphytic, growing by hanging onto the bark or heavy stems of other plants.
Phalaenopsis Orchids
Phalaenopsis orchids, also known as moth orchids, are the perfect choice for beginners. They are easy to care for, grow fast, produce large and long-lasting spectacular blooms, and are very forgiving when repotting. The only downfall is that they are sensitive to cold, so keep them away from drafty windows.
Phalaenopsis types come in various colors and patterns, the most common and natural being white and pink, or they’ve been dyed colors like blue or bright orange. While dying orchids different colors doesn’t hurt them, be aware that the color will only last as long as the dyed blooms last. All new blooms will be white or light pink.
Cymbidium Orchids
Cymbidium orchids produce small sprays of flowers. The sprays grow close together, creating a beautiful flowery display. They are also one of the most fragrant orchids and the most common colors are green, yellow, red, and bright pink.
Paphiopedilum Orchids
Another very easy to care for beginner orchid is the Paphiopedilum orchid. This beautiful species is also called the Lady Slipper because the petals form a shape similar to an elegant dancing slipper.
The blooms of the Lady Slipper orchid have a wide range of colors. From delicate pastels to deep dark shades (even black), they can also have stripes, spots, or “freckles”. The foliage tends to be patterned, making them just as pretty when they aren't in bloom.
Do you have a long-living orchid plant? What care tips can you share with us?
Comments
Join the conversation
-
Avoid over watering as this can lead to root rot. Position your orchid in a bright windowsill facing east or west. Weekly feeding with a fertilizer designed for orchids. Repotting in fresh orchid mix when your orchid stops blooming.


Frequently asked questions
Have a question about this project?
How can I save or email or print the orchid article?